
This post is the second in a series of posts that demonstrate how to create your own Private Blockchain. The previous post shows the step by step to create the private ethereum blockchain, we will connect to that blockchain using the MetaMask.
Below you can see the current structure of the private blockchain built:

You can read the previous post here.
MetaMask
The MetaMask is a crypto wallet to Ethereum. Can be used to start and manage private wallets to users in blockchain network. By default is set to the Ethereum Mainnet, but can be used to any others blockchains based on Ethereum.
Get Start
Follow the next steps to finish this tutorial:
- Install MetaMask and create an account
- Add My Blockchain network
- Import the miner account created using Geth
- Transfer funds between accounts
Install MetaMask and Create the First Account
The MetaMask can be installed like an extension to most popular browsers or a mobile app. In this post, we will use MetaMask like a extension in Brave. This process is similar for other browsers like Chrome or Firefox.
Go to download page and click at "Install Metamask For BROWSER_NAME". Follow the installation steps until finish.
A similar window should be open at the end of installation:

Click at "Get Started" to initialize MetaMask. In next step you can import or create a new wallet. Let's create a new one.

Define the MetaMask password and keep account recovery words in a safe place. Without your private key or that words it's impossible recover your blockchain account.
After that, you should see the inital MetaMask screen with your account created like this:
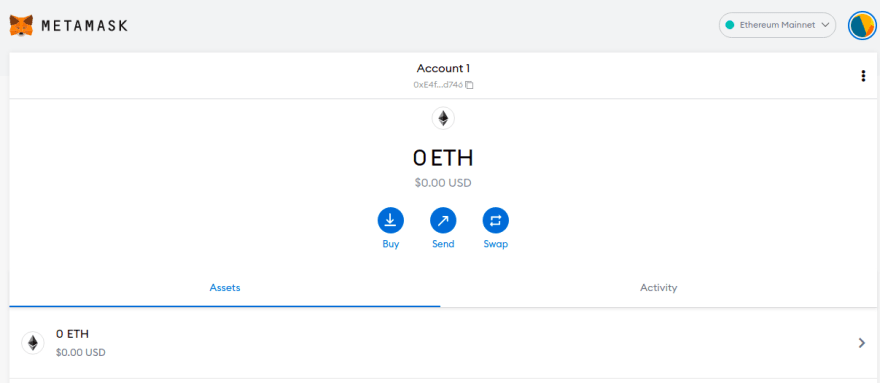
The account was created on the main ethereum network as shown in the upper right corner of the screen: Ethereum Mainnet.
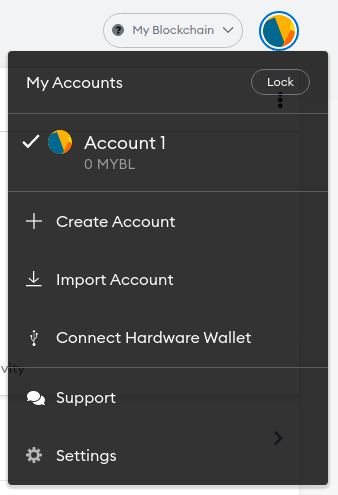
Add My Blockchain Network
Let's add our Blockchain Network to MetaMask. Click on Ethereum Mainnet and select Add New Network option.

Define values to My Blockchain and click o Save button.
- Network Name: My Blockchain
- New RPC URL: http://127.0.0.1:8545
- Chain ID: 1234
- Currency Symbol: MYBL

Explanation:
- Network Name: Any string to reference your blockchain name.
- New RPC URL: The HTTP Server URL. In our the HTTP Server is running on Node1 in default port 8545.
- Chain ID: The chainId defined in genesis block.
- Currency Symbol: A symbol to reference the coin in your blockchain. If you not define it, the default value is ETH.
All Done!! Your blockchain network has been added and you should be see your account created in this network without balance.

Import Account
In previous post we create an account using Geth and we did the mining of some blocks with that account. Let's import that account to MetaMask to see balance and transfer funds to account created in this post.
Select "Import Account" option in MetaMask, choose "Select Type" as JSON File, choose account json file in your blockchain, type the password and click on "Import" button.
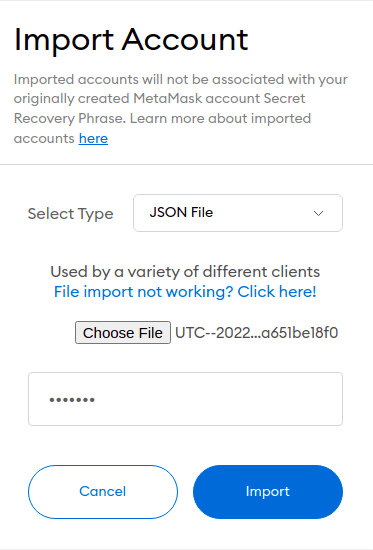
The account json file can be found in database of the Node1 in your blockchain, the path to this file contains the account address, something like this:
node1/keystore/UTC--2022-03-17T20-40-36.929865867Z--bd3156b239e2bb8d073406e67eba59a651be18f0
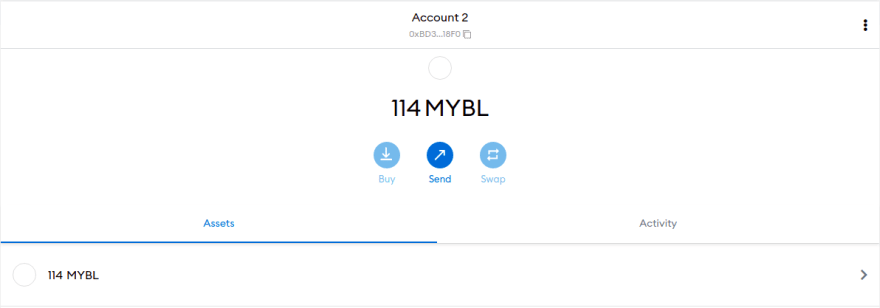
All Done! The account has been imported to MetaMask. You can see that account in inital page selecting the Account 2.
Transfer Funds
Let's transfer some value from Account 2 to Account 1 to validate the structure and finish this post.
First, go to Account 1 in MetaMask and copy the Account Public Address and back to Account 2. In my case the public address of the Account 1 is:
0xE4f4206F11C249aeCfE5AD8a4DDcfae60343d746.
In Account 2 click on "Send" button, paste the public address of the Account 1 and type the value to transfer. Click on "Next" button and then click on "Confirm" button.
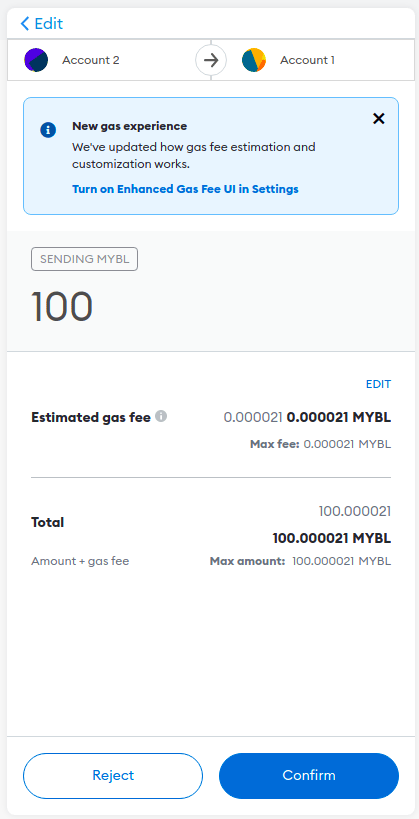
The transaction will be with status "Pending", waiting for a block to be mined for validation.

Now, it's necessary start the mining to validate that transaction. Let's do this in our blockchain using Geth in Javascript Console from Node1. Type the command:
miner.start()
Waiting some seconds and verify your account in MetaMask again.
Obs: If you want, you can stop the mining in Node1 after the transaction validation. Type command to stop the mining:
miner.stop()
All Done!. The transaction was validated and the Account 1 received the 100 MYBL.

Blockchain Structure

Next Steps
You can create new accounts to your blockchain using MetaMask or Geth to increment your tests. Do more transactions, using other accounts to execute mining in Node1 or Node2. That's it.

Oldest comments (0)