In this post we will see one of the ways we can implement social login to an application built with Spring Boot and Nextjs.
We’re just briefly going to touch on what is actually happening when you click the “login with google” button, without bombarding you with all those oauth2 terms. If you’ve never before heard about terms like authorization server, resource owner, resource server, grant types, openid then I would suggest you to find some other good resource on that topic.
Simply said, when you click “login with google” you (resource owner) are allowing the application that you’re using (client) to access your resources.
In the case of login, application will mostly ask you to get some basic access to your profile information, and they will most often store this data in their own database and log you in internally.
The application (client) can be a server or a public client which is for example an spa or anything that cannot securely hold secrets.
So, you have 2 options here, you can either do the login from your public client, and when you get the data back then invoke your backend endpoint to store this data internally, or you could just initiate the flow from the frontend and let the backend act as a client.
Spring security has a package called spring-security-oauth2-client which does exactly this, there is also a spring boot starter which we’re going to use spring-boot-starter-oauth2-client .
For reference, I’m using spring boot 3.2 which is using spring security 6.2.0.
Great thing about this starter is that it lets us setup a working example with just a few lines in configuration file.
spring:
  security:
    oauth2:
      client:
        registration:
          google:
            client-id: <use your google client id>
            client-secret: <use your google client secret>
For common providers which google is, we can only provide the client id and client secret, the rest will be populated by spring security.
Autoconfiguration will do some other things other than registering this client in memory. If you start the app you should see a log like this:
2023-12-16T21:27:20.616+01:00  INFO 14840 --- [           main] o.s.s.web.DefaultSecurityFilterChain
     : Will secure any request with [org.springframework.security.web.session.DisableEncodeUrlFilter@4a44cfc0,
org.springframework.security.web.context.request.async.WebAsyncManagerIntegrationFilter@60e3c26e,
org.springframework.security.web.context.SecurityContextHolderFilter@17b37e9a,
org.springframework.security.web.header.HeaderWriterFilter@67536ae0,
org.springframework.web.filter.CorsFilter@80b122b,
org.springframework.security.web.csrf.CsrfFilter@5b88b8e,
org.springframework.security.web.authentication.logout.LogoutFilter@6088451e,
org.springframework.security.oauth2.client.web.OAuth2AuthorizationRequestRedirectFilter@39f5b723,
org.springframework.security.oauth2.client.web.OAuth2LoginAuthenticationFilter@1d06f16f,
org.springframework.security.web.savedrequest.RequestCacheAwareFilter@111d5c97,
org.springframework.security.web.servletapi.SecurityContextHolderAwareRequestFilter@29c17c3d,
org.springframework.security.web.authentication.AnonymousAuthenticationFilter@999b951,
org.springframework.security.web.access.ExceptionTranslationFilter@45658133,
org.springframework.security.web.access.intercept.AuthorizationFilter@6a1ef65c]
Somewhere in the middle you can see OAuth2AuthorizationRequestRedirectFilter and OAuth2LoginAuthenticationFilter were added to the filter chain.
OAuth2AuthorizationRequestRedirectFilter is what starts the authorization flow. Simply put, if you send a request with a pattern that matches this: /oauth2/authorization/{providerId} then this filter will resolve the registered client, load it’s properties, construct a redirect url and redirect you.
On googles login page you’ll give the client consent and it will redirect you back to the redirect url that the OAuth2AuthorizationRequestRedirectFilter sent in the request query parameters. This is by default {baseUrl}/login/oauth2/code/{registrationId} . You have to make sure you’ve allowed this redirect url on the provider when you’re creating your client. So for example on google you would add http://localhost:8080/login/oauth2/code/google to Authorized redirect URIs.
Now when you’re redirected back, here the next filter comes in play: OAuth2LoginAuthenticationFilter . This filter matches request with the same pattern like the previously mentioned redirect url, and it does the following:
It will create a token of type OAuth2LoginAuthenticationToken with the code it received in the request and delegate this token to the authentication manager.
AuthenticationManager will then use the OAuth2LoginAuthenticationProvider to authenticate the request. It uses the code to fetch the user information from the provider and then it creates and returns an authenticated OAuth2LoginAuthenticationToken
If the authentication is successful, the OAuth2LoginAuthenticationToken will be set to the security context holder, but also important for us a AbstractAuthenticationProcessingFilter#successHandler will be invoked.
Now let’s stop for a second and think about it.
We have these 2 filters that basically handle everything for us, one handles redirecting us to the providers consent page and the other one handles the redirect from the consent page back to us.
What else do we need to do?
We need to have a “login with google” button on the frontend.
This login button needs to take us to /oauth2/authorization/{providerId} .
Filter will take us to the consent screen and get us back to the app, then another filter will do the rest, we just now need to return back to our client application. By default upon successful authentication you would be redirected to the root path or the path you were trying to access before you were redirected to login page, but since in development we’re using different ports for the backend and the frontend, we have to modify this.
We also might want to also save this users details in our own database.
This is where the successHandler comes to play.
We can provide our own success handler in the configuration dsl.
Here’s how:
@Configuration
@EnableWebSecurity
public class SecurityConfig {
  @Bean
  public SecurityFilterChain filterChain(HttpSecurity http) throws Exception {
    http
        .authorizeHttpRequests(authorize -> authorize
            .anyRequest().authenticated()
        )
        .exceptionHandling(exceptionHandlingConfigurer -> {
          exceptionHandlingConfigurer.authenticationEntryPoint(
              new Oauth2AuthenticationEntrypoint());
        })
        .oauth2Login(customizer -> {
          customizer
              .successHandler(new Oauth2LoginSuccessHandler());
        });
    return http.build();
  }
}
You could also define the success handler as a lambda, but I prefer a class because debugging becomes easier.
Here is my success handler:
@Slf4j
public class Oauth2LoginSuccessHandler implements AuthenticationSuccessHandler {

  @Override
  public void onAuthenticationSuccess(HttpServletRequest request, HttpServletResponse response,
      Authentication authentication) throws IOException, ServletException {
    log.info("Authentication: {}", authentication);
    DefaultOidcUser oidcUser = (DefaultOidcUser) authentication.getPrincipal();
    AppUser appUser = AppUser.fromGoogleUser(oidcUser);
    AppAuthenticationToken token = new AppAuthenticationToken(appUser);
    SecurityContextHolder.getContext().setAuthentication(token);
    response.sendRedirect("http://localhost:3000/login-success");
  }
}
You can notice that I’ve build a user class that is app specific, in this handler I construct our user and set it to the context. You can do whatever you want here, as I said before you’d most likely save the user to a db if not already exists, but in any case you should re-set your own user representation to the context holder, so that in the next request that this user makes, you don’t get all of that information that the DefaultOidcUser has.
Another thing that you’ve noticed in the configuration class is that we have this:
.exceptionHandling(exceptionHandlingConfigurer -> {
          exceptionHandlingConfigurer.authenticationEntryPoint(
              new Oauth2AuthenticationEntrypoint());
        })
Because we’re going to be requesting stuff over the api from our backend, our authentication entry point should just be a restful response with status 401 / 403, the client then decides what to do with it.
By default the entry point is redirecting you to the login page, so that’s why we have to override it.
This could also be written as a lambda.
Here’s Oauth2AuthenticationEntrypoint:
@Slf4j
public class Oauth2AuthenticationEntrypoint implements AuthenticationEntryPoint {

  @Override
  public void commence(HttpServletRequest request, HttpServletResponse response,
      AuthenticationException authException) throws IOException, ServletException {
    log.debug("Oauth2AuthenticationEntrypoint.commence, authException: {}", authException.toString());
    response.setStatus(HttpStatus.UNAUTHORIZED.value());
    response.setContentType("application/json");
    response.getWriter().println("{ \"error\": \"" + authException.getMessage() + "\" }");
    response.getWriter().flush();
  }
}
And that’s really all we need to do on the backend. There are just 2 classes that I didn’t show so here they are as well:
public class AppAuthenticationToken implements Authentication {

  private final AppUser appUser;
  private final boolean authenticated;
  private Collection<GrantedAuthority> authorities;
  private WebAuthenticationDetails details;

  public AppAuthenticationToken(AppUser appUser) {
    this.appUser = appUser;
    this.authenticated = true;
  }

  @Override
  public Collection<? extends GrantedAuthority> getAuthorities() {
    return authorities;
  }

  @Override
  public Object getCredentials() {
    return null;
  }

  @Override
  public Object getDetails() {
    return details;
  }

  @Override
  public Object getPrincipal() {
    return appUser;
  }

  @Override
  public boolean isAuthenticated() {
    return authenticated;
  }

  @Override
  public void setAuthenticated(boolean isAuthenticated) throws IllegalArgumentException {
    throw new UnsupportedOperationException("Use constructor to set authenticated to true");
  }

  @Override
  public String getName() {
    return appUser.getName();
  }
}
@Getter
public class AppUser {
  private String id;
  private String name;
  private String email;
  private String imageUrl;

  public static AppUser fromGoogleUser(DefaultOidcUser googleUser) {
    AppUser appUser = new AppUser();
    appUser.id = googleUser.getSubject();
    appUser.name = googleUser.getFullName();
    appUser.email = googleUser.getEmail();
    appUser.imageUrl = googleUser.getPicture();
    return appUser;
  }
}
And in the end I’ve made an endpoint that should return currently authenticated users details:
@RestController
@RequestMapping("/api/auth")
public class AuthController {

  @GetMapping("/me")
  public ResponseEntity<AppUser> google() {
    AppUser user = (AppUser) SecurityContextHolder.getContext().getAuthentication().getPrincipal();
    return ResponseEntity.ok(user);
  }

}
Let’s now see some really basic nextjs implementation that’s meant to just prove that this works.
I’ve created a next 14 app, with app router.
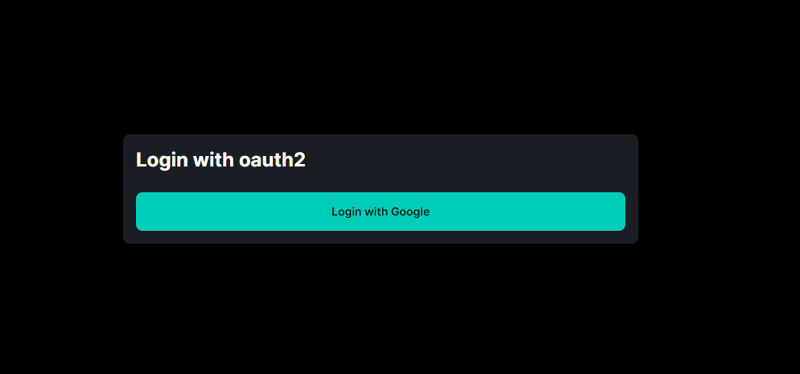
On the home page we show a login button:
import Link from "next/link";

export default function Home() {

  return (
    <div className="h-screen flex w-full items-center justify-center">
        <div className="max-w-screen-sm w-full flex flex-col gap-y-2 rounded-lg p-4 bg-base-200">
          <h2 className="text-2xl font-bold mb-4">Login with oauth2</h2>

          <Link href="http://localhost:8080/oauth2/authorization/google">
            <button className="btn btn-accent w-full">Login with Google</button>
          </Link>
        </div>
    </div>
  )
}
When we click this we’re taken to the google consent screen. After login, we’re taken back to the backend where user is authenticated and successHandler redirects us back to the client/login-success page
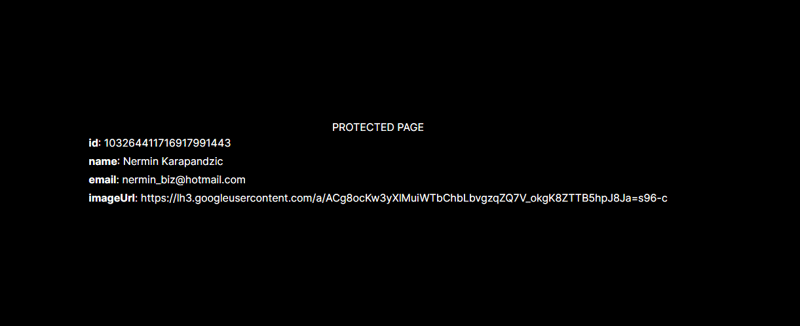
We also have a /protected page on the client and a guard component that checks if we’re logged in before accessing it.
So if I open the devtools and remove the JSESSIONID cookie and try to visit the /protected I’ll get redirected back to the home page (login screen)
Here’s a very naive implementation of that guard and the page itself:
import AuthenticatedGuard, { getUserInfo } from "./AuthenticatedGuard"

export default async function ProtectedPage() {

    const userInfo = await getUserInfo()

    return (
        <AuthenticatedGuard>
            <div className="h-screen flex flex-col w-full items-center justify-center">
                PROTECTED PAGE

                <div className="flex flex-col gap-y-1">
                    {userInfo && Object.keys(userInfo).map((key) => (
                        <div key={key}>
                            <span className="font-bold">{key}</span>: <span>{userInfo[key]}</span>
                        </div>
                    ))}
                </div>
            </div>
        </AuthenticatedGuard>
    )
}
import { cookies } from "next/headers";
import { redirect } from "next/navigation"

export default async function AuthenticatedGuard({ children }: { children: React.ReactNode }) {

    const userInfoResponse = await getUserInfo()

    if (!userInfoResponse) {
        redirect('/')
    }

    return (
        <>
            {children}
        </>
    )
}

export async function getUserInfo() {
    const cookieStore = cookies();
    const JSSESSION = cookieStore.get('JSESSIONID')

    try {
        const userInfoResponse = await fetch('http://localhost:8080/api/auth/me', {
            method: 'GET',
            headers: {
                'Content-Type': 'application/json',
                'Cookie': `JSESSIONID=${JSSESSION?.value}`
            },
            credentials: 'include'
        })

        if (!userInfoResponse.ok) {
            return null;
        }

        return await userInfoResponse?.json()
    } catch (error) {
        console.log(error)
        return null;
    }

}
Now if I login again, and then try to access the /protected I will get in because I’m authenticated.
Note, we only need to attach a cookie manually because these are server components, if you’d be sending these from client components browser would attach the cookies automatically.
Also I’d like to share that enabling debug level for springframework.security packages helped me a lot while learning and debugging how all this works. You can do it by adding this to the application.yaml:
logging:
  level:
    org:
      springframework:
        security: DEBUG
And don’t be afraid to peek into the frameworks code and see what it’s doing, it’s the best way to get better and really learn.
Let me know if you have any questions or suggestions, I’d love to hear them.
I might be creating a more real world scenario around this topic, by building some real application and writing a series about it, let me know if you would find that interesting.


Top comments (1)
Hi Jean,
Great post, however, I am getting stuck right after the "Login Success" page. I don't know how you implemented the protected page functionality. Do you have the project posted on GitHub? If so, could you share a link to the project?
Thanks!
Gary