
Blogging is one among the latest trends today. There are approximately 600 million blogs spanning across various subjects such as Technology, Lifestyle, Spirituality, Governance and much more today. Another fun fact is that around 43% of the websites in the world run on WordPress, which makes it the go-to option for beginners to have an easy-to-use administration of their blog.
WordPress is a PHP framework that was first launched by Automattic in May 2003. It has achieved rapid adoption by people around the world in just under a decade, thanks to its low-code/no-code implementation using themes and plugins that offer maximum customisation options.
Now that we have chosen our choice of our blog software, hosting it on a server is the next priority in order to make it accessible via the Internet. Here’s where Azure comes into play. Azure App Service is a fully managed service with built-in infrastructure maintenance, security patching, and scaling, so that you don’t have to worry about setting up server resources.
Here are some of the features of App Service:
- Get high availability with a service-level agreement (SLA)-backed uptime of 99.95 percent.
- Simplify operations with automatic platform maintenance and security patching.
- Help protect your applications with Azure Web Application Firewall, and connect through virtual network integration.
- Deploy isolated web app instances with a single-tenancy model. Use App Service Environment v3 to enforce network access external to your applications.
- Use Azure Active Directory and other popular identity providers to authenticate and authorize app access.
- Scale globally across all Azure regions.
With that being said, let me guide you through a step by step process in creating a blog using Azure App Service.
Disclaimer : The resource utilisation and bills for this demo session are completely covered by Microsoft under the Microsoft Learn Student Ambassadors program. Be wise in choosing your resources as per projected demand when going for a production ready deployment.
Step 1 : Create an account with Microsoft Azure

Create an account with Azure - it’s free and you get $200 Azure credits to get started!
Step 2 : Select App Services in the Azure Portal

Step 3 : Click on the Create App Service button

Step 4 : To begin with, create a resource group

A Resource Group is kind of a container that holds related resources for an Azure solution (App Service in our case), which makes it easy to track, especially in the areas of cost and billing.
Step 5 : Now configure your WordPress settings

Choose your hosting plan and customise your login credentials as per convenience
As mentioned earlier, be wise in choosing your hosting plan according to your needs. Azure has multiple configuration options for hosting your blog. It is also capable of auto-scaling your server resources when demand increases dynamically. So, choose the best fit for your case.
Now that you’ve chosen your hosting plan, now setup your WordPress admin login credentials such as username and password. These will be required to access the dashboard of your blog later.
Step 6 : Now, review your WordPress configuration

Review your WordPress configuration here.
Make note of your database credentials. (Will be helpful during troubleshooting)
Step 7: Hit on the Create button and relax for a while…
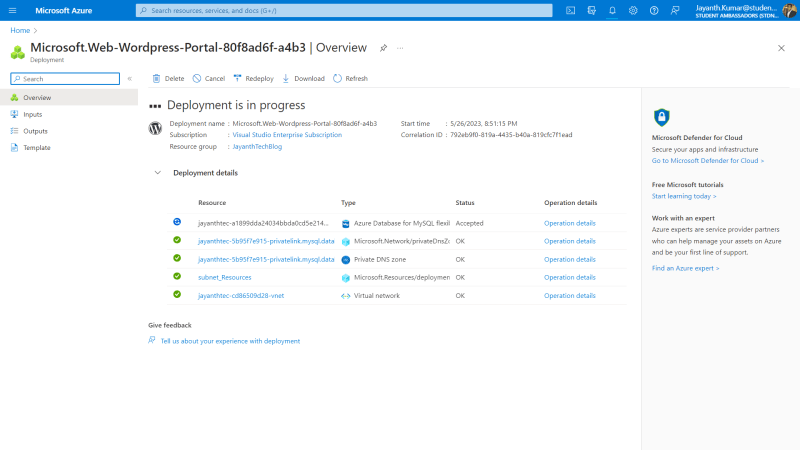
Azure begins with the process of deploying your blog. Sit back and relax for a couple of minutes.

Upon successful deployment, you get this screen. Click on the Go to resource button.

Now, visit your blog by clicking the link specified by the name Default domain. You can also assign your own domain name to your blog.

This may take a while as WordPress is getting configured for initial use.
And viola! you get your WordPress blog up and running!

Login to your dashboard by following the link : https://[your-wesbite-name].azurewebsites.net/wp-admin
(Replace the placeholder text with your website’s name)

Your newly created blog’s dashboard
I hope this tutorial has helped you in creating a WordPress blog in just 7 easy steps. Feel free to ask your queries through my mail address (Jayanth.Kumar@studentambassadors.com)
You can also suggest other services if you wish and I’ll assist you through tutorials.
Thank you for reading and have a great day!

Top comments (0)