
I was recently part of a team project where we wanted to send emails confirming registration to our application without using a backend server. Thanks to my best buddy, Google, we were able to find a way.
Email JS is a free service that allows you to send emails from your applications using only client-side technologies. No server is needed. And best of all? It's free.
1.) Go to https://www.emailjs.com/ and sign up for your free account.
2.) After signing up for your free account, you will find the dashboard.
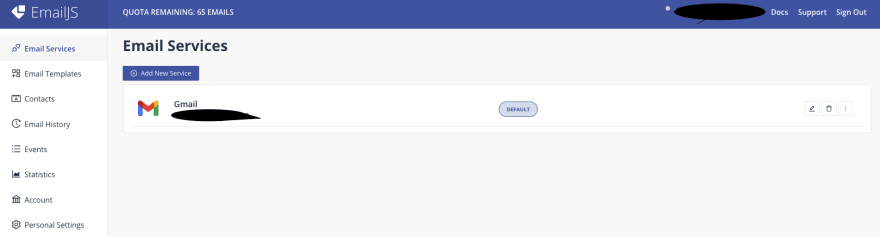
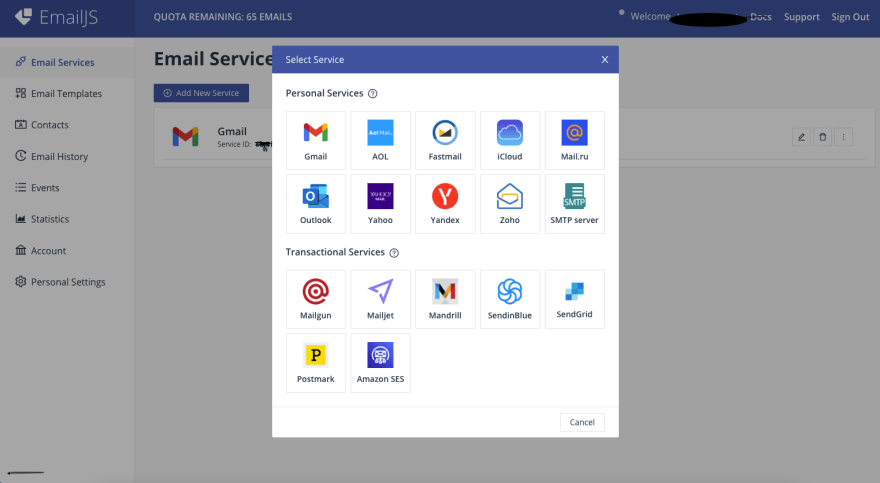
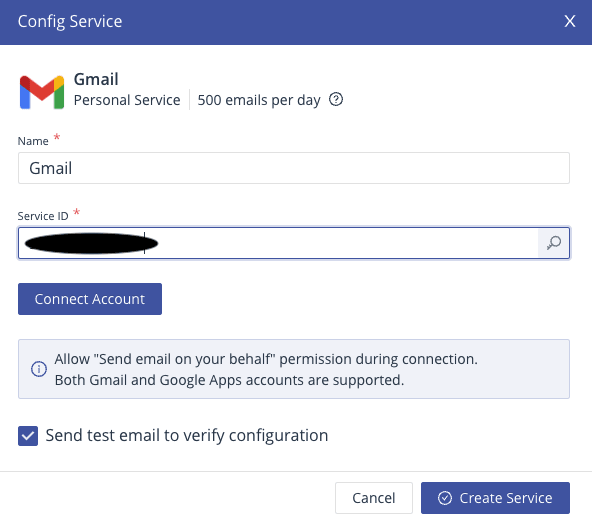
3.) If you already have a gmail, yahoo, or even an old-school aol email account, you can use it in conjunction with this tool. Simply click on the Add New Service button and then choose the email provider you use.
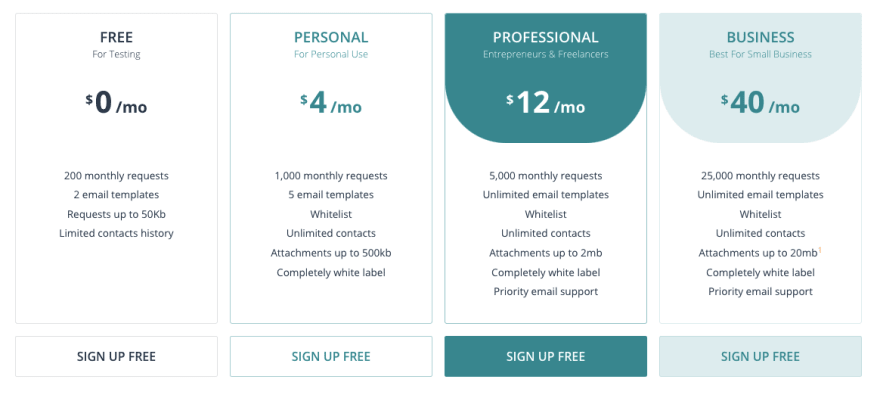
NOTE: EmailJS allows you to send 200 emails a month for free. If you need to send more, there is a fee. See the pricing guideline below.
4) To begin, choose your email provider by clicking the "Connect Account" button. Then, push the "Create Service" button in the lower right hand corner.
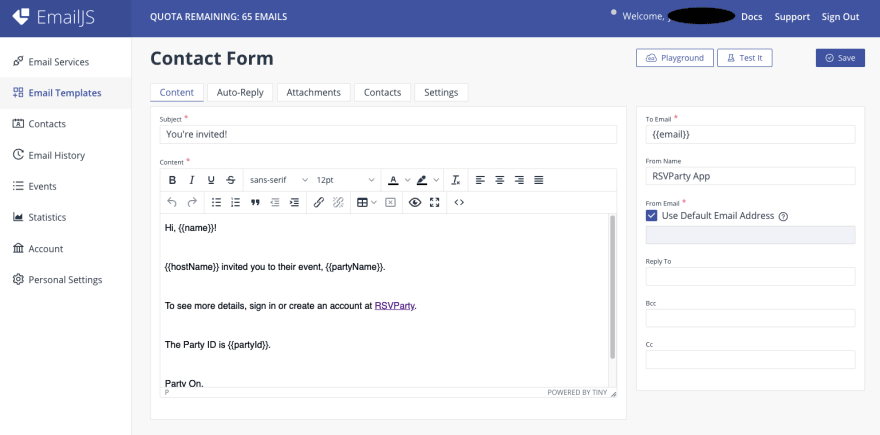
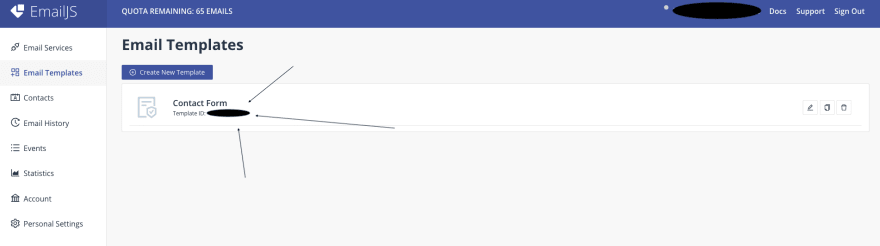
5) Now click on the Email Templates on the left. Then click the "Create New Template" to set up your email message. Notice that EmailJS allows you to interpolate individualized information with two curly braces.
6) Now that your form email is set up and ready to go, you need to jump into your terminal and type the following where your react project lives.

7) Inside your component you will type the following code.
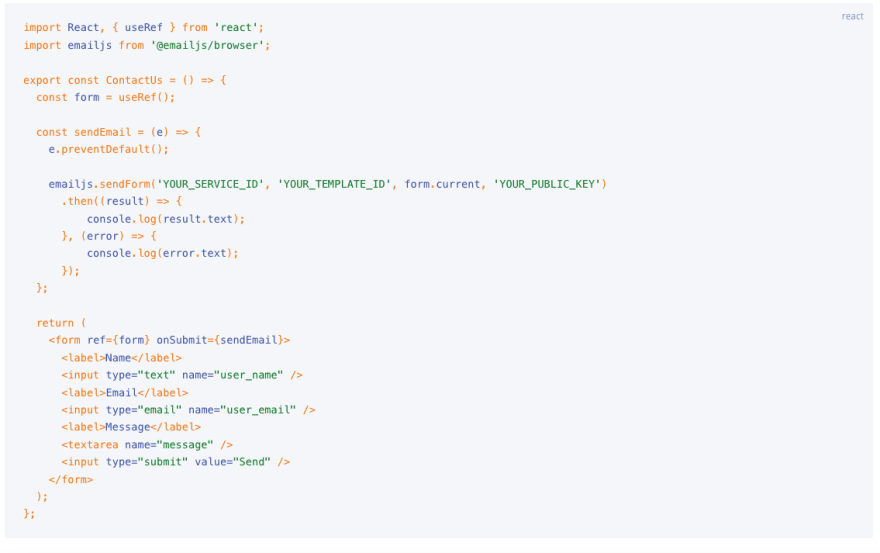
8) Pay special attention to the 'YOUR_SERVICE_ID', 'YOUR_TEMPLATE_ID', and 'YOUR_PUBLIC_KEY' portion of the code.....
![]()
10) These three placeholders need to be replaced with your individualized information.
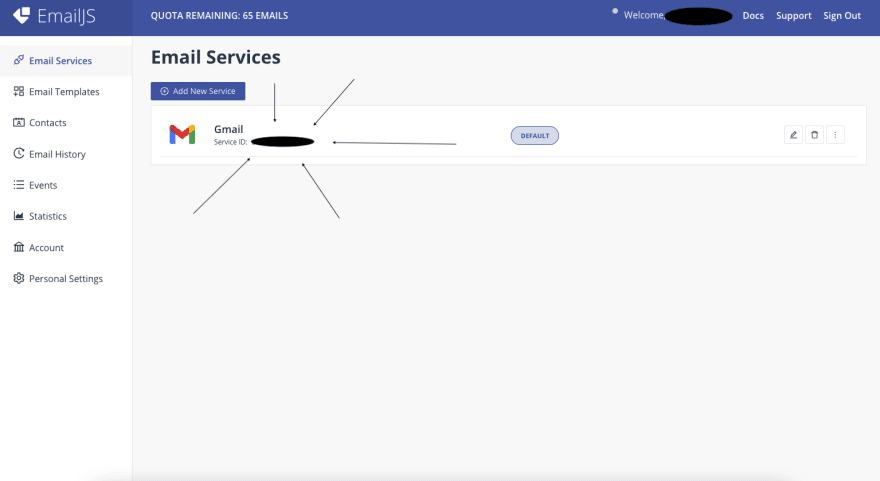
The 'YOUR_SERVICE_ID' needs to be replaced with the Service ID which you can find in the Email Services portion of the dashboard.
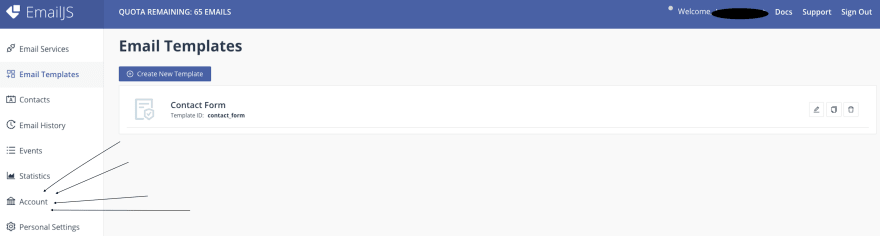
11) The 'YOUR_TEMPLATE_ID' can be found back on the "Email Templates" portion of the dashboard.
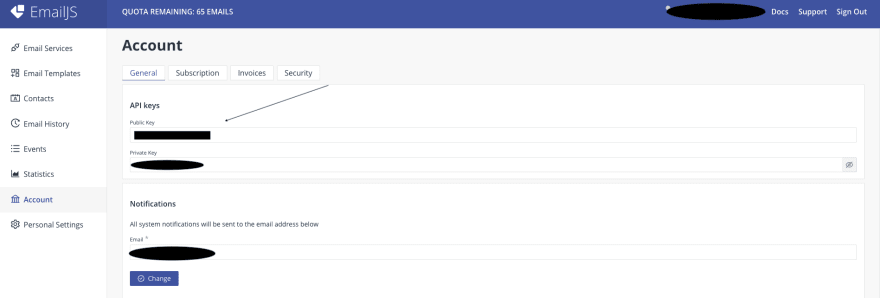
12) The 'YOUR_PUBLIC_KEY' portion needs to be replaced with your public key. This can be found in the Account section located on the dashboard.
13) Once you click the Account link, you will find 'YOUR_PUBLIC_KEY' where it says "Public Key."
14) Now all you need to do is capture a form where you can capture the information to send an email. It's that easy!
In conclusion:
That is just the "bare bones" of what EmailJS can provide for you. In addition to basic email services, it can also send emails with attachments, add CAPTCHA verification, and even allow auto-replies. Plus, EmailJS not only works with React, but also vanilla JS, Wix, Vue.js, and Angular.
I hope you found this article helpful in adding some functionality to your application. Happy coding!

Top comments (2)
Thank you for your very nice and detailed article!
You are welcome, thank you for taking the time to read it!