This post was originally published at janasundar.dev
Introduction
In this article, I'll guide you through all the tools and packages that I used in this blog. I'll also provide all the blog post links that I used as reference while creating this blog.
The Tech Stack used in this blog are NextJs, Chakra UI, MDX, Graph CMS
Next Js
Next Js is a react framework that offers SSG(static site generation) and SSR(server-side rendering).
SSG is used to create a static page. These pages are prefetched during the build time and use the static page until the next build. Pages like about us, contact us, and blog posts.
SSR is a technique where we process web pages on a server by prefetching after which the rendered HTML is passed to the browser. SSR allows our webpage to load quickly and increases user experience. SSR helps to increase the SEO scores as well.
Reference
Next.js by Vercel - The React Framework
Chakra UI
I used Chakra UI to style everything. It is a customisable, and reusable component-based library for reactjs. It follows the WAI-ARIA guidelines. Let's look at how to install and configure Chakra UI
Installing Chakra UI
If you don't have a yarn package manager installed, install it by going to official site. Once you have it installed, run the below command to install Chakra UI
yarn add @chakra-ui/react @emotion/react @emotion/styled framer-motion
Configuring Chakra UI
After installing the chakra UI and its dependencies, we need to wrap our parent component with ChakraProvider component. Now, all the components present inside our parent can access the chakra UI components.
//pages/_app.tsx
import { ChakraProvider } from "@chakra-ui/react"
function MyApp({ Component, pageProps }) {
return (
    <ChakraProvider>
        <Component {...pageProps} />
    </ChakraProvider>
    )
}
export default MyApp
Creating custom themes
To override the default theme, we need to import the extendTheme function from @chakra-ui/react package.
import { extendTheme } from "@chakra-ui/react"

const theme = extendTheme({ colors: { brand: { 100: "#f7fafc", 900: "#1a202c", }, }, })

export default theme
Then import the custom theme from the theme.js file to _app.js and pass the new theme to chakraProvider
<ChakraProvider theme={theme}>
  <App />
</ChakraProvider>
Now these custom themes are available in your component.
function Usage() {
  return <Box bg="brand.100">Welcome</Box>
}
MDX
MDX is the extension of markdown that allows you to write React Component inside markdown file. Markdown is a markup language with plain text formatting syntax. It flawlessly converts text to HTML.
The data for the blog posts are written in markdown and served from GraphCMS. I used mdx-bundler to compile the mdx code. Josh Comeau recommended this package in his blog post.
To compile the MDX code, we need to import the bundleMDX function from mdx-bundler. As a result, we'll get the code and frontmatter of the MDX file. It has inbuilt support for xdm configuration. It allows us to use the remark and rehype plugins.
import {bundleMDX} from 'mdx-bundler'

bundleMDX(mdxString, { xdmOptions(options) { options.remarkPlugins = [...(options.remarkPlugins ?? []), myRemarkPlugin] options.rehypePlugins = [...(options.rehypePlugins ?? []), myRehypePlugin] return options }, })
To use the bundled MDX, we need to import the getMDXComponent function from mdx-bundler/client.
 import {getMDXComponent} from 'mdx-bundler/client' function MDXPage({code}) { const Component = React.useMemo( () => getMDXComponent(result.code), [result.code], )

return ( <main> <Component /> </main> ) }
Reference
https://github.com/kentcdodds/mdx-bundler
Graph CMS
Graph CMS is the headless CMS based on GraphQL Content API and delivers your content across platforms. The data for the blog posts are coming from Graph CMS. It has a lifelong free personal account with sufficient amount of data transfer limit. For further reference regarding pricing, visit the pricing page.
Getting Started With Graph CMS
Now, we will create a new project and assign it the name and description. Then set the region near to you. It's where our content will be.
Graph CMS sets all the project dependencies, and it'll take us to the dashboard page. For creating a new model, navigate to the schema section and click the add button to add a new Model. Inside the model, we need to add all the fields.
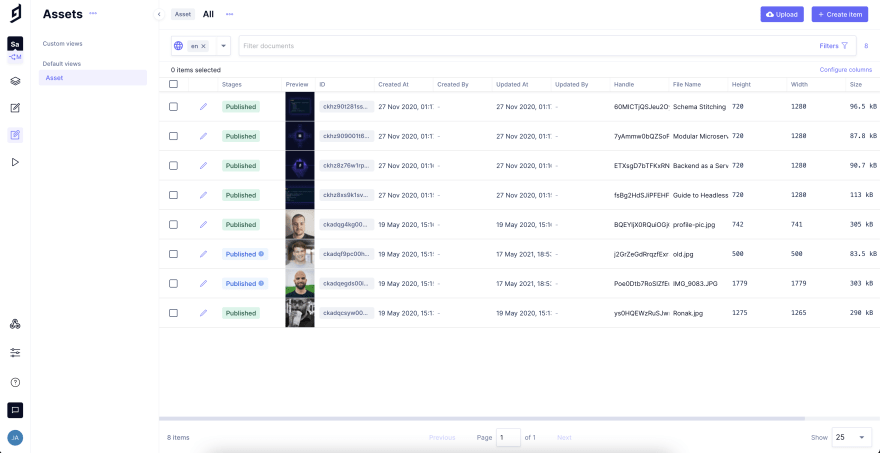
Now, we can start adding the content for our created model by navigating to the content section. By Clicking a create item button, we'll add new content for our model.
Add assets to our model, use the asset model it is the default system model present in the CMS. It supports all file formats.
To access data from API call, go to the endpoints section, which is present inside settings, then add data access permissions.
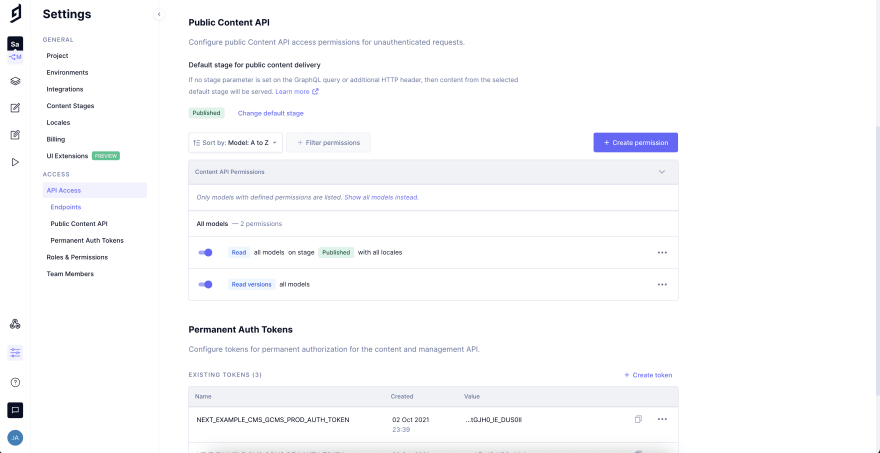
To fetch the data, copy the content API URL to access content from the graphQL call.
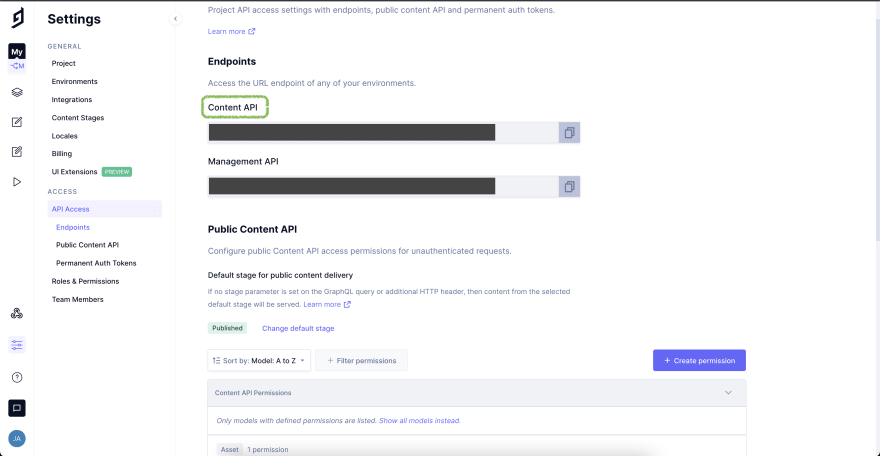
Pass the content URL to graphQL client to query data from Graph CMS. It looks like this
const client = new GraphQLClient(process.env.GRAPH_CMS_CONTENT\_API);

const query =gql`
    query Posts($slug: String!) {
    post(where: { slug: $slug }) {
        content
        files
            tags {
               tag
            }
        }
    }
`;

const { post } = await client.request(query, { slug });
Reference
https://www.hostinger.in/tutorials/what-is-a-cms/ https://www.contentful.com/r/knowledgebase/what-is-headless-cms/
Thanks to Amelia Watternberger, Josh Comeau, Kent C Dodds, Brad Traversy, and Maxime Heckel for inspiring me to create my blog.

Top comments (0)