Table of contents
Why Cloudways?
Cloudways is a managed cloud hosting platform offering the choice of the top cloud infrastructure providers (Google Cloud, Digital Ocean, AWS, VULTR, and Linode) through an intuitive user interface that allows you to focus mainly on achieving your business goals while you manage your applications as per your business needs and requirements. The result - complete peace of mind for you.
Cloudways offers a wide range of features which makes it an obvious choice for many businesses. Here is a quick list of the Cloudways Platform:
- Expert 24/7/365 Support
- Multi-Layered Security
- Smooth Team Collaboration
- Control over server and application management
- Performance-enhancing Add-Ons
- Real-Time Monitoring
ButterCMS Deployment Process
ButterCMS can be deployed on a wide range of technology stacks such as React, Angular, Gatsby, Ruby, RoR, Node.js, Express.js, Python, ASP.NET, Flask, Django, PHP, Flutter, and Gridsome. It's a lightweight headless CMS that allows you to disconnect your front end with your backend. You can review the integration documentation for more details.
For this guide, I am using the Cloudways PHP stack. Simply sign up for a free 3-day trial to test this implementation guide.
Choose Server Specifications
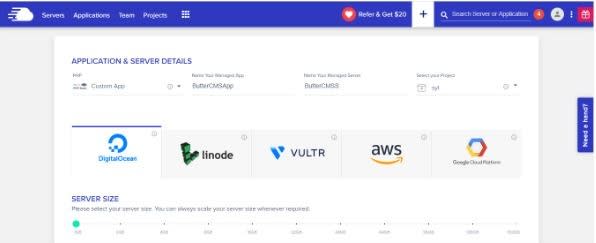
After signing up, you will be directed to the server launch page where you can launch a managed cloud server and an application by clicking the Launch button at the end of a simple form. During the process, you can:
- Choose the Custom PHP applications from the dropdown menu
- Enter the application, server and the project’s name
- Select the Cloud infrastructure provider
- Select the server specifications
- Select the server location
It takes a quick 5-7 minutes to set up the server with your specified configuration and app.
Deploy ButterCMS Files on the Server
I will use the Cloudways’ SSH Terminal to deploy the ButterCMS on the server.
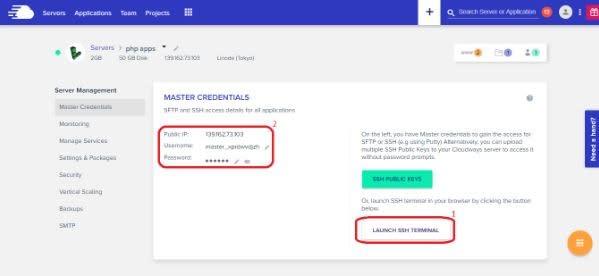
Visit the Server Management. Next:
- Launch the SSH Terminal
- Use the provided credentials to access the server through SSH
Now go to the application’s public_html folder. Use the ls command to navigate through the folders and files.
Use the following command to initiate ButterCMS deployment on the server.
composer require buttercms/buttercms-php
And that’s it. You’ve successfully deployed ButterCMS on the Server on the PHP application.
Tip: You can use a similar deployment process for almost any PHP powered application on a Cloudways managed cloud server by using the SSH Terminal.
Discover how ButterCMS works with your php app
Test Connection
Now, let’s try and check the connection.
For this, I assume that you’ve already signed up with ButterCMS and in the dashboard section, you can access the API Token.
Pull a Sample Blog Post
Using FileZilla, I established a connection with the Cloudways’ server to access the backend files and folders. I created a home.php file to pull a blog from the ButterCMS platform.
The home.php file contains the following code:
<?php
 require 'vendor/autoload.php'; // initiate and established the connection
 $apiToken = '12a6f976db677e6c10453cce70c61a948b0b00a6'; // API token declaration
 use ButterCMS\ButterCMS;

 try{
   $client = new ButterCMS($apiToken);
   $page = "1";
   $result = $client->fetchPosts([
    'page' => $page,
    'page_size' => 10
   ]);

   // Get the first post
   $posts = $result->getPosts();
   $post = $posts[0];

   echo $post->getTitle(); //gets the Title of the blog
   echo $post->getBody(); // gets the body of the blog
 }

// similarly you can pull more attributes of the blog like the author, publishing date, etc.

// You don't need to use try-catch functions, we used it to get the errors if there are any.
 catch(Exception $e){
  echo "Error";
  echo $e;
 }
?>
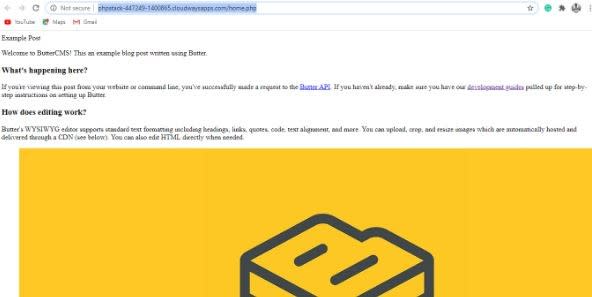
Visit Application Management > Access Details and click the application URL. In my case, the URL is http://phpstack-447249-1400865.cloudwaysapps.com/home.php
If you need to pull a specific page or all the posts and pages created by ButterCMS, visit the GitHub repo for more details.
Discover how ButterCMS works with your php app
Conclusion
ButterCMS makes it easy to post and publish blogs, testimonials, and landing pages without putting a hefty load on the server. This is what makes headless ButterCMS stand out from the conventional CMS options.
Deploying a blog powered by ButterCMS takes less than five minutes of your time and helps you get started quickly. With the state-of-the-art hosting features and amazing page load time, Cloudways is the obvious choice for ButterCMS projects.
I hope this guide proved helpful. If you have any questions, reach out to us through Live Chat or Email.
In case you need to learn and explore more about ButterCMS, visit the official knowledge base.


Top comments (0)