
I've wanted to play around with Amazon Lightsail for a while as it's an AWS service that I haven't used previously. I've also been tempted to try my hand at blogging, and this seemed like a great combination. I decided to test out Lightsail by spinning up a blog and writing my first post on the experience on said blog.
Lightsail is an all-in-one platform that makes it easy to build an application or website with fixed monthly costs. You can get started with Lightsail using an Amazon Free Tier account, that gives you the first 30 days (750 hours) for free. After that, the cheapest option will cost you $3.50 per month.
Launch an instance
If you navigate to the Lightsail console and click on Create instance, you'll see a variety of pre-baked options that you can choose.
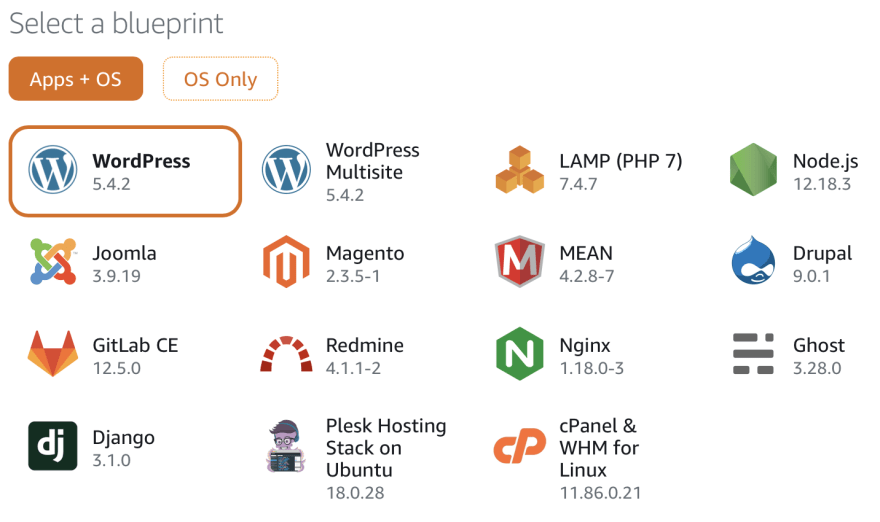
For this experiment, I chose to spin up an instance with WordPress pre-installed. Lightsail also lets you decide in which region you want your instance, so you can make sure it is as close as possible to your intended audience.
Scrolling down, you have the option to upload an SSH key for the instance or leave it at the default that Amazon generates for you. If you leave it at the default, make sure to download it by clicking on Change SSH key pair and selecting Download next to Default. You can also enable automatic snapshots, but note that these are not covered by the Amazon Free Tier and are charged at $0.05 per GB-Month of stored snapshot data.
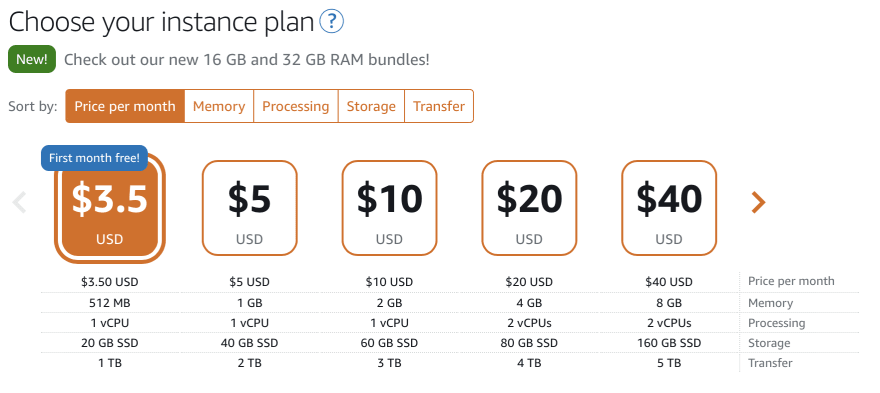
Lastly, you get to choose your instance size and cost. $3.50 per month gets you 512MB RAM, 1vCPU, 20 GB SSD storage and 1TB data bandwidth. Click Create instance and your instance should be ready within a couple of minutes.
Get your WordPress login details
Now that your instance is up, you need to gain access to the WordPress console somehow. The WordPress installation generates a password and stores it in a file on the file system. You need to SSH into the instance to retrieve it. You can do that directly from the Lightsail console in the browser or, if you prefer, you can use Putty or your Terminal using the key pair you either uploaded or downloaded during setup.
Once logged into your instance, run the following command to get the WordPress password:
cat $HOME/bitnami_application_password
Setup a static IP for the instance
Currently, your instance's IP is bound to change any time you reboot the instance. To make it a bit easier to work with it, you can create a static IP for free that won't change even if you stop and start your instance. To do this, click on your instance in the Lightsail console and navigate to the Networking tab. Click on Create static IP, choose a location, give it a name and click Create.
You can now connect to your WordPress admin console, by entering the following URL into your browser: http://static-ip/wp-login.php
Use the password you retrieved above with the username user.
Make sure to create yourself a new admin user with a strong password and remove the default user.
Point your domain to your blog
Your blog is now up and running, but you don't want to point readers at an ugly IP. You want to have a friendly domain name for your blog that makes sense and is easy to remember. You can use any domain registrar, like GoDaddy, for this purpose.
Once you have your domain registered, you can create a Lightsail DNS zone to transfer management of your domain to Lightsail. Go to the Networking tab on the Lightsail console and choose Create DNS zone.
Enter your domain and click on Create DNS zone. Lightsail will now display a list of name server addresses. You have to copy these and go to your domain registrar and add them to your domain configuration. Doing this will transfer management of the domain to Lightsail.
You now have to create an A record in Lightsail that points to your homepage. Navigate to the DNS zone you created and click on Add record. In the Subdomain box, enter an @ symbol to create an apex record that points the root of your domain to your blog. Choose your static IP from the dropdown box and click on the green tick button. After about 60 seconds, you should be able to connect to your blog using your domain.
I would recommend also adding an A record to point the www subdomain to your static IP.
Next up
You now have a functional blog running on AWS! That wasn't hard, was it? There are a couple of things left to do, and in the next post, I'll cover how you can easily add a free SSL certificate to your blog, so it looks a bit more professional. I also plan on covering other AWS services, software architecture in general and many other interesting topics, so stay tuned.


Top comments (0)