
This tutorial incorporates the latest improvements to Postman and builds upon the fundamental principles detailed in the blog Using the Oracle Identity Cloud Service REST APIs with Postman.
Background
The Oracle Identity Cloud Service REST APIs provide a way to integrate Oracle Identity Cloud Service with REST clients so that they can;
- Manage users and groups,
- Manage application and resource access,
- Perform federated single sign-on (SSO) and authorization in the cloud,
- Managing multi-factor authentication (MFA),
- Managing identity federation and integration with other identity systems.
The APIs support OAuth 2.0, OpenID Connect, and System for Cross-Domain Identity Management.
Postman is a tool used to test and develop APIs. It provides a graphical user interface (GUI) that makes it easy to construct and send HTTP requests, as well as view the responses returned by the API.
What Do You Need?
To use Oracle Identity Cloud Service REST APIs with Postman, you will need the following:
- An Oracle Identity Cloud Service tenancy: You will need access to IDCS in order to use the REST APIs. You can sign up for a free trial at ```
https://cloud.oracle.com/tryit
- **A Postman account:** You can create a Postman account for free at
- Access to Oracle Identity Cloud Service with the Identity Domain Administrator or Application Administrator roles.
- Familiarity with the REST architecture style.
- **API keys:** You will need to obtain API keys in order to authenticate your API requests.
- **Oracle Identity Cloud Service API documentation:** You will need to refer to this in order to learn about the available APIs and how to use them. The documentation is available at
https://docs.oracle.com/en/cloud/paas/identity-cloud/index.html
- **Postman client:** You will need to install the Postman client on your computer in order to make API requests. You can download the Postman client for free at
---
## Step 1: Register a Client Application
In this section, you register an application in Oracle Identity Cloud Service. This task is required to obtain the credentials (Client ID and Client Secret) used for authentication in REST API calls. The credentials are equivalent to service credentials (ID and password) that your client uses to communicate with Oracle Identity Cloud Service. This task also helps you determine which requests are authorized through the REST API.
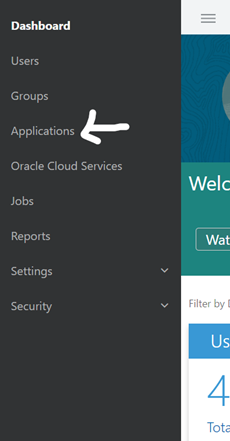
1. In the Oracle Identity Cloud Service administration console, expand the Navigation Drawer, click Applications, and then click Add application.

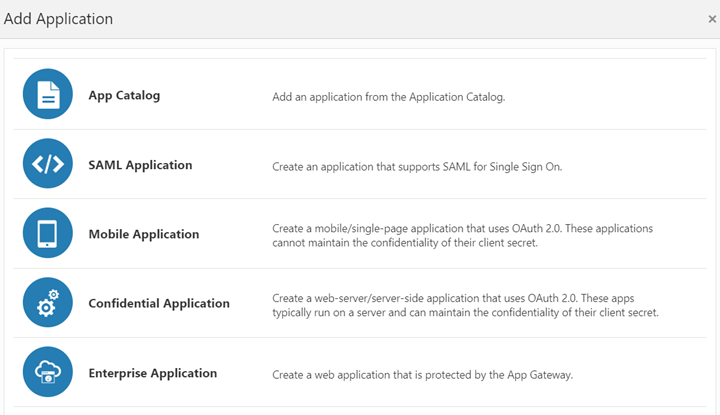
2. In the Add Application dialogue box, select Trusted Application or Confidential Application. Click launch workflow.
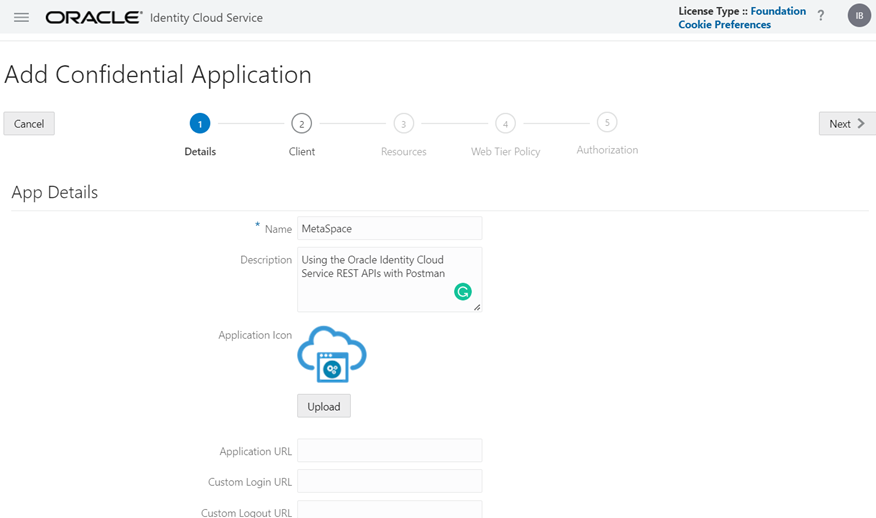
3. In the App Details section on the Add Trusted Application page, enter an application name and description, and then click Next.
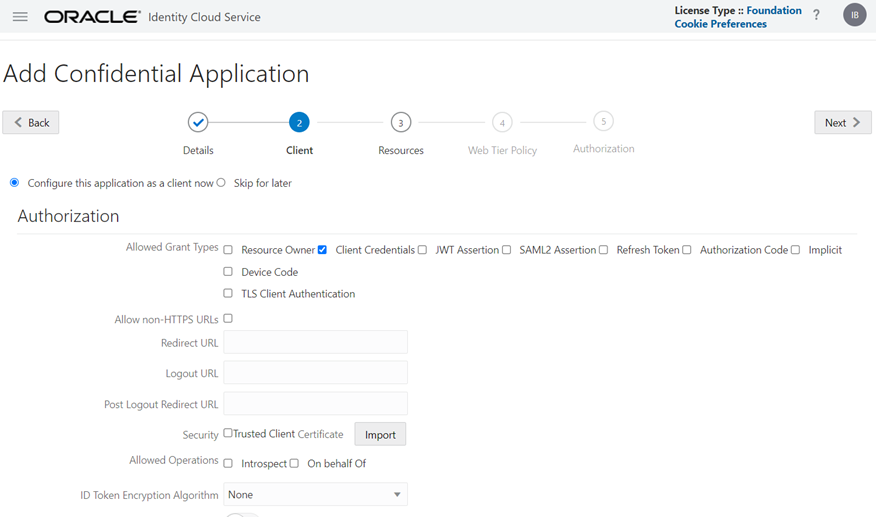
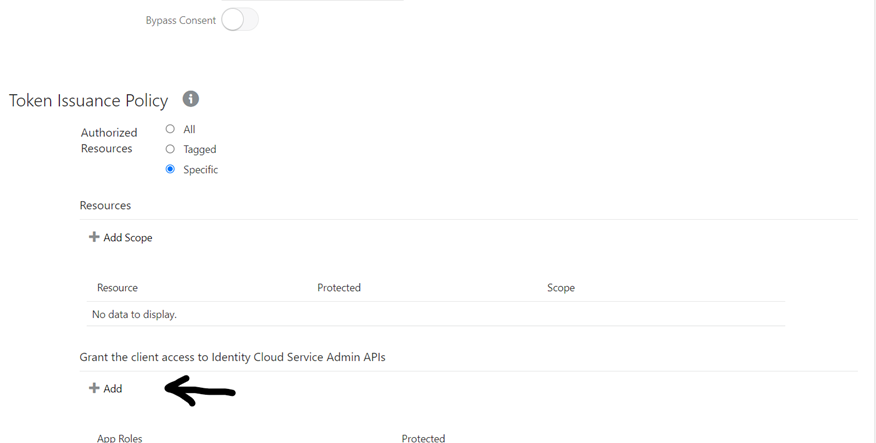
4. Select Configure this application as a client now, and then, in the Authorization section that appears, select only Client Credentials as the Allowed Grant Type.
5. Scroll down, and click the Add button below Grant the client access to Identity Cloud Service Admin APIs.
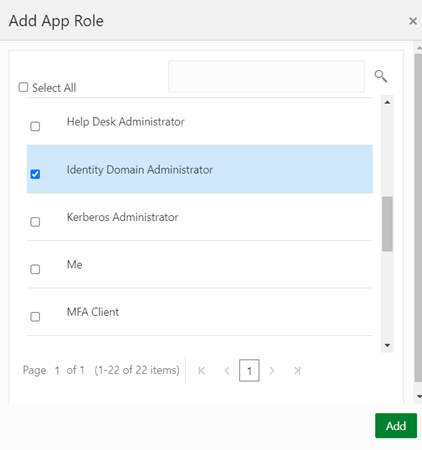
6. In the Add App Role dialogue window, select Identity Domain administrator in the list and click Add.
7. Click Next in the Client pane and in the following panes until you reach the last pane. Then click Finish.
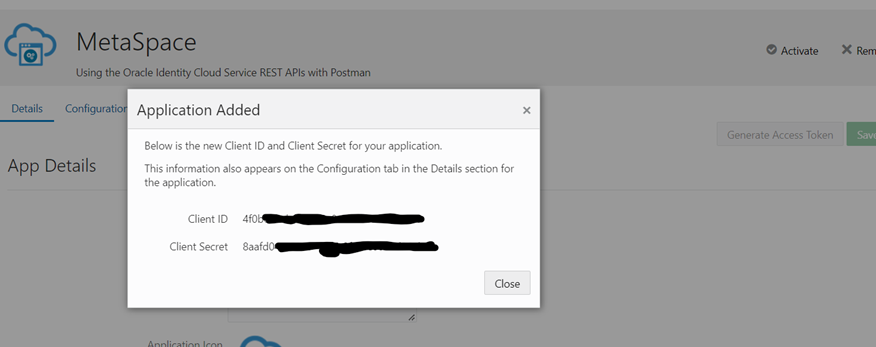
8. In the Application Added dialogue box, copy the Client ID and the Client Secret to a text file, and then click Close.
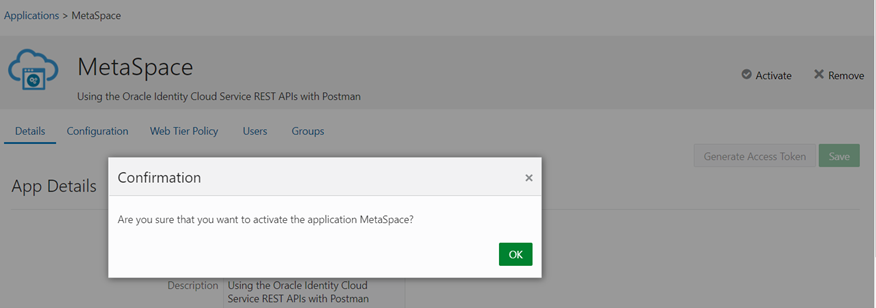
9. Click Activate, and then click Activate Application.
---
## Step 2: Set the Environment Parameters in Postman
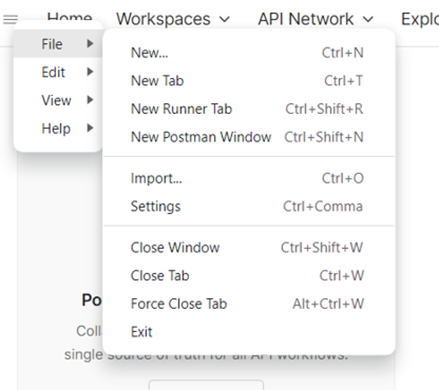
1. Open Postman, and click Import.
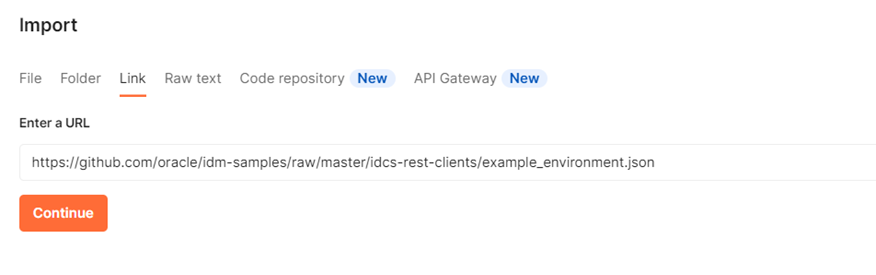
2. In the Import dialogue box, select Import From Link, paste the following GitHub environment variables URL into the box and then click Import: `https://github.com/oracle/idm-samples/raw/master/idcs-rest-clients/example_environment.json`
3. Click the Environment option, and then select Manage Environments.
4. In the Manage Environments dialogue box, to the right of the example.identity.oraclecorp.com environment, click Duplicate Environment.
5. Click the example.identity.oraclecorp.com copy, which appears below the original environment.
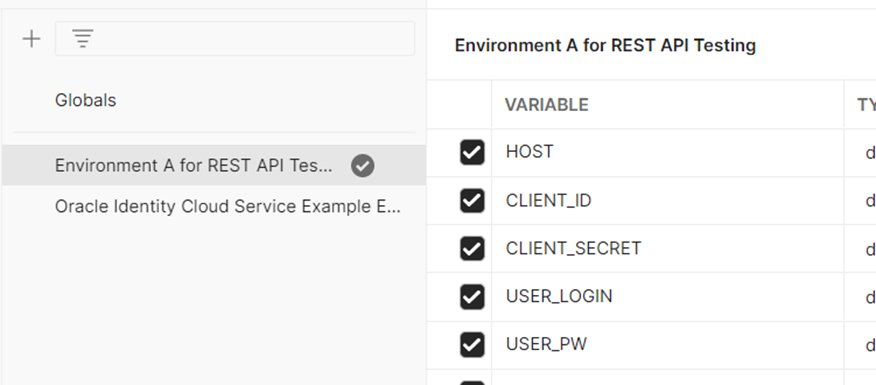
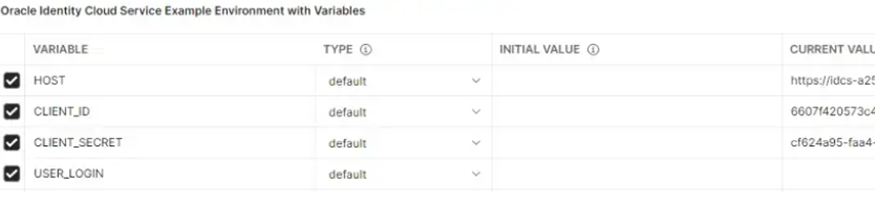
6. To update the environment variables, enter the following values, and then click Update.
- _**NAME:**_ Environment A for REST API Testing
- _**HOST:**_ Oracle Identity Cloud Service UI address; for example, `https://example.identity.oraclecorp.com`
- _**CLIENT_ID**_ and _**CLIENT_SECRET**_: The Client ID and the Client Secret that you copied into a text file from your Oracle Identity Cloud Service trusted application
- _**USER_LOGIN**_ and _**USER_PW**_: Your user login and password
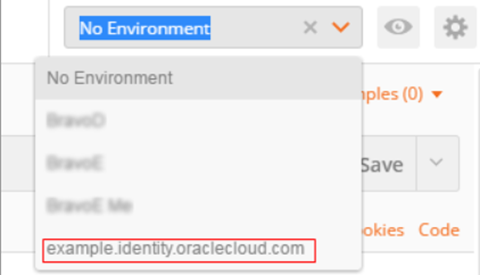
7. Click the Environment drop-down list, and then select the updated environment from the list.
---
## Step 3: Import the Postman Collection and Global Variables
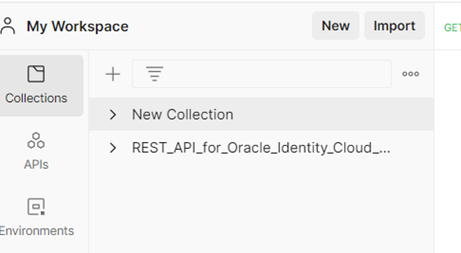
1. To import the Oracle Identity Cloud Service REST API Postman collection, on the Postman main page, click Import.
2. In the Import dialogue box, select Import From Link, paste the following GitHub Postman collection URL into the box, and then click Import:`https://github.com/oracle/idm-samples/raw/master/idcs-rest-clients/REST_API_for_Oracle_Identity_Cloud_Service.postman_collection.json`
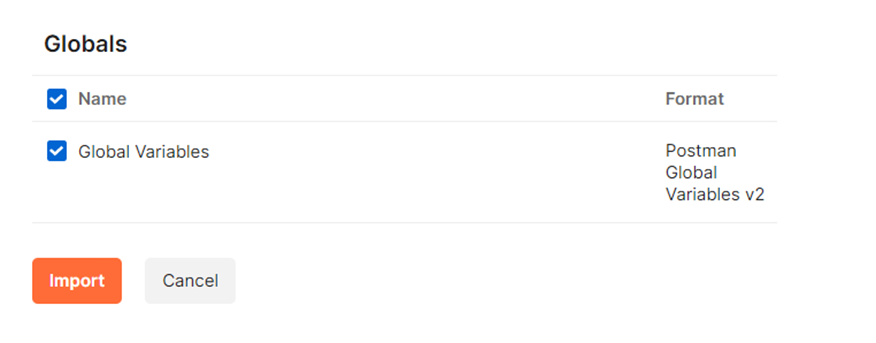
3. To import the global variables file, click Import.
4. In the Import dialogue box, select Import From Link, paste the following GitHub Postman Globals URL into the box, and then click Import:`https://github.com/oracle/idm-samples/raw/master/idcs-rest-clients/oracle_identity_cloud_service_postman_globals.json`
5. To view the imported variables, click the Environment options, and then select Manage Environments from the drop-down list.
6. In the Manage Environments dialogue box, click Globals.
---
## Step 4: Request an Access Token
To make API calls to Oracle Identity Cloud Service, you must authenticate your client against Oracle Identity Cloud Service, and then obtain an OAuth access token.
The access token provides a session between a client (in this tutorial, Postman) and Oracle Identity Cloud Service. By default, the access token has a timeout interval of 60 minutes, and then you must request a new access token to perform additional REST API calls.
1. On the Collections tab, expand OAuth, and then OAuth Tokens - Get (Authorize).
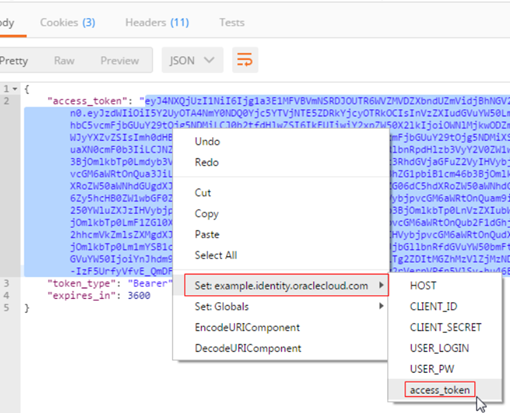
2. Select Obtain access_token (client credentials), and then click Send. The access token is returned in the response from Oracle Identity Cloud Service.
3. Highlight the access token content between the quotation marks, and then right-click. In the shortcut menu, select Set: example.identity.oraclecloud.com. In the secondary menu, select access token. The highlighted content is assigned as the access token value.
Subsequent REST API calls to Oracle Identity Cloud Service contain the access token as well as additional information about the request. The additional information is sent through a request Universal Resource Identifier, a header, parameters, or JSON code, and varies according to the REST API call and method that you request.
---
## Step 5: Create a User
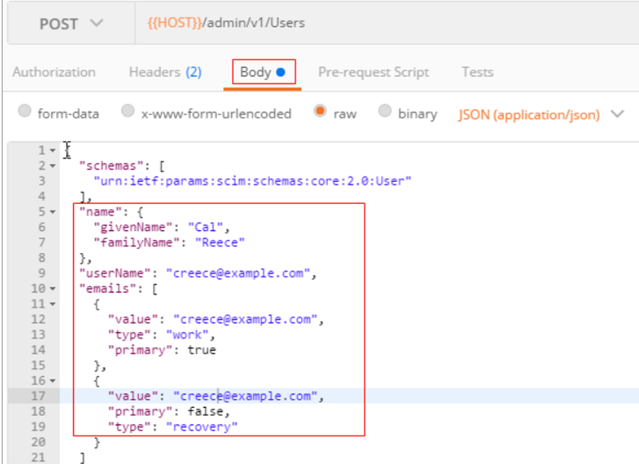
1. On the Collections tab, expand Users, and then Create.
2. Select Create a user. The requested information appears.
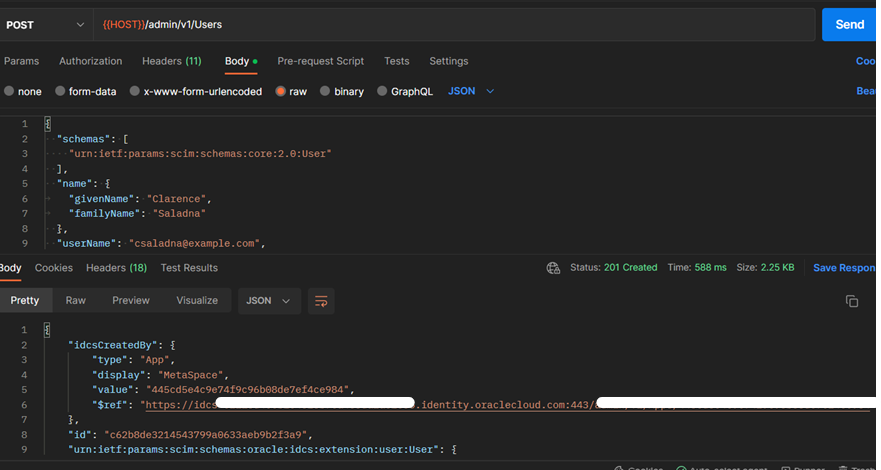
3. Click Body, and then click Send.
4. In the response, confirm that the status 201 Created appears and that the response body displays details about the user that was successfully created in Oracle Identity Cloud Service.
---
## Step 6: Test Other User API Calls
To test other user calls, you can set the user as a variable for reference.
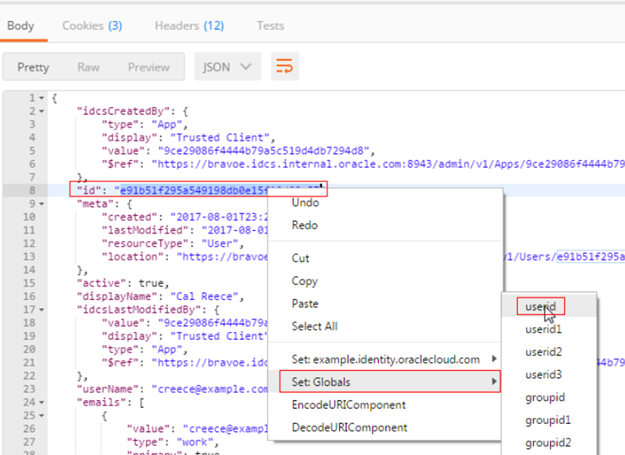
1. In the response body, select and right-click the id. In the shortcut menu, select Set: Globals, and then select userid. The unique id is assigned as the userid value.
2. On the Collections tab, expand Users, and then Search.
3. Select Search specific user, and click Send.
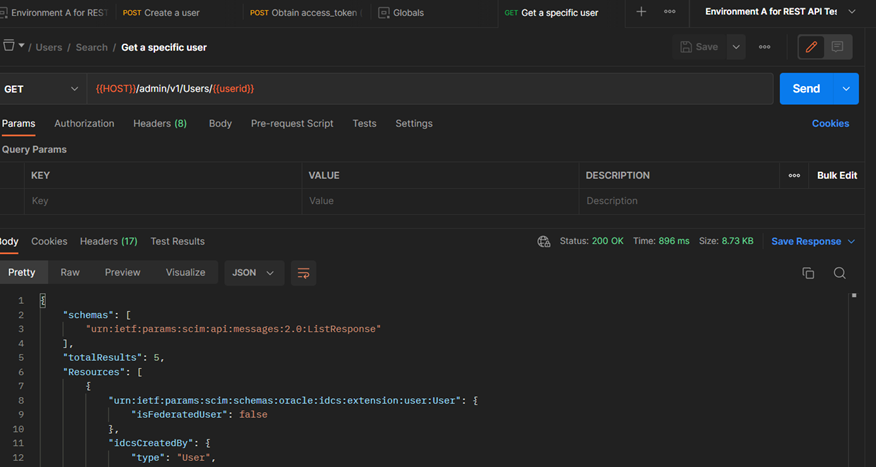
4. Scroll down and verify that the response body displays the status 200 Ok and details about the user.

Oldest comments (0)