
So, Azure DevOps... during these hard times with lockdowns and a spreading virus, it gets increasingly important and relevant to reflect upon the bus-factor. Not only from the perspective of a software team, but from a business critical point-of-view. Besides, faster and consistent delivery is a great bonus.
It's time to deploy DevOps principles, such that what was once a manual process, is automated and integrated into well-behaving workflows and single-click-or-less releases.
The issue
We have this project. What started out as an idea from the accountants at the upper floor, has grown into a critical application that supports their current workflow. Releases are manual and only when new changes are requested. The project know-how is limited to the single developer which had the idea pitched and with that, how the application is being built and released.
The basics
We got the source code and some post-it notes from the developer on how to publish the project.
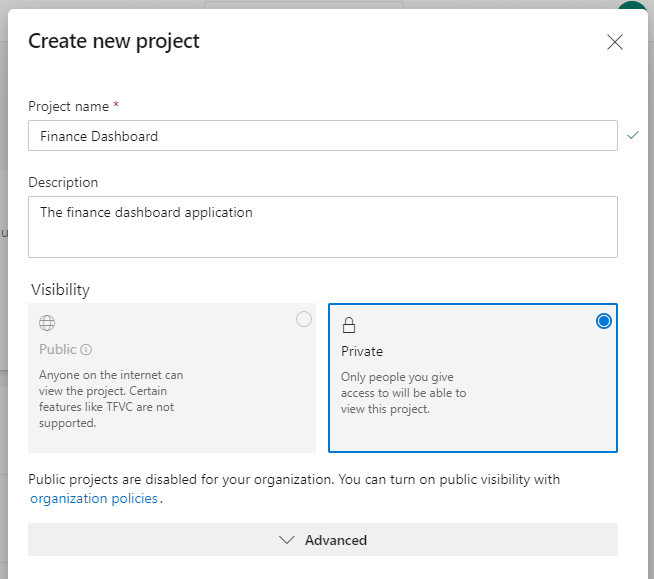
New territory, let's make some ground. First step is to create a new project for our application named Financial Dashboard.
Which then leads to the welcome screen for the project
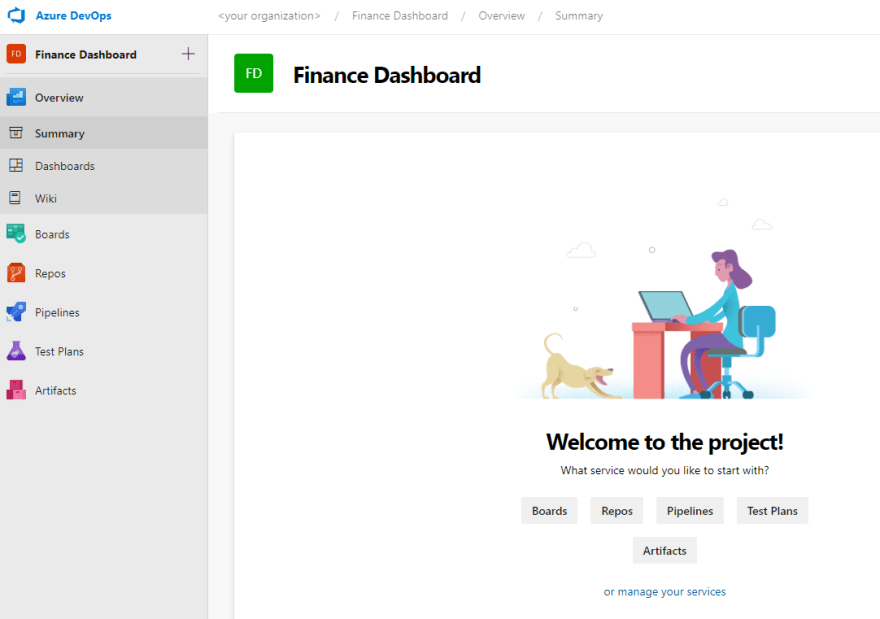
A quick TL:DR for each section available
- Overview
- Your Dashboard. Can be customized with things like project information and widgets
- Boards
- Project management tools like backlogs, boards, sprints
-
Repos
- Code repositories (a DevOps project can contain multiple repositories), branches and pull request management
-
Pipelines
- Build and Release pipeline management
- Test Plans
- Feature-rich testing platform
- Artifacts
- Artifact feeds for package platforms like NuGet, NPM, Pip etc
We will focus on Repos and Pipelines features during this post.
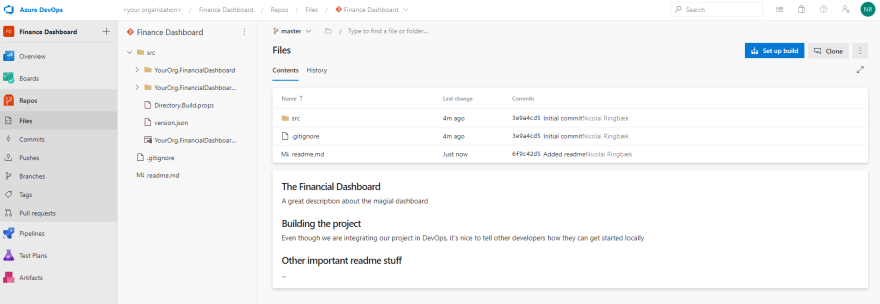
Empty repository. Add some code!
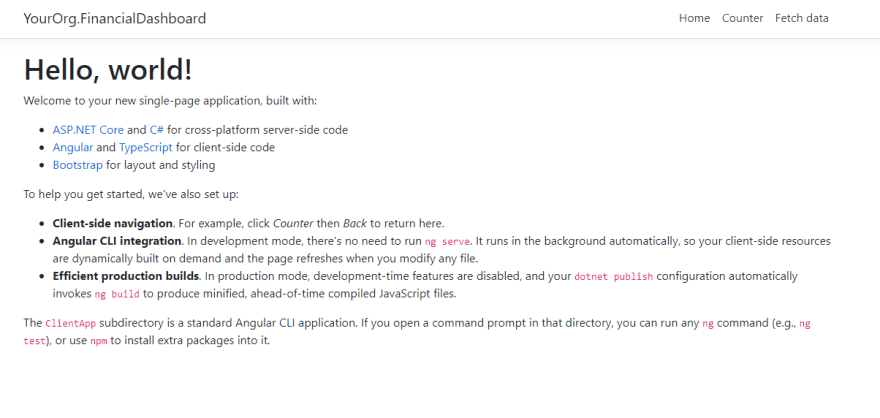
Our codebase is a newly created ASPNET Core application with an Angular frontend (dotnet new angular). The Angular application has been slightly updated to support test and code coverage in our DevOps build pipeline.
Next step is to create our code repository and prepare it to be integrated with our upcoming automated build and testing pipeline. By default, DevOps creates an empty repository with multiple options on how to initialize it. A side-note on DevOps is its ability to support multiple repositories inside the same project.
We created our Financial Dashboard with Git support. Use your favorite Git tool to push your code to the newly created repository.
Let the automation begin
Code in place - check. Time to introduce CI/CD principles. For now, we will keep things simple by only being concerned about the master branch and ignoring other things like pull requests.
Automatic build on push
First step is to create a build pipeline that triggers, when new code is pushed to our repository. The language used to describe these steps is called YAML.
The defined pipeline is a separated into 2 stages. The first one runs two jobs in parallel (if supported), a dotnet and a npm job, where both builds and runs any related tests. During so, we can speed up our initial stage and verify both our backend and frontend at the same time.
If the first stage succeeded and all tests completed successfully, the 2. stage is initiated. This stage calls dotnet publish to create our final compiled application and then copies the output to our artifact staging directory. This can be seen as our build pipeline output, which we later on will use in our release pipeline, when deploying the application.
trigger:
- master

pool:
  vmImage: 'windows-latest'

variables:
  dotnetConfiguration: 'Release'
  angularConfiguration: '--prod'
  angularClientSrc: 'src/YourOrg.FinancialDashboard/ClientApp'
  dotnetBackendSrc: 'src/YourOrg.FinancialDashboard/YourOrg.FinancialDashboard.csproj'

stages:
- stage: BuildAndTest
  jobs:
  - job: 'Dotnet'
    steps:
    - task: DotNetCoreCLI@2
      displayName: 'dotnet restore'
      inputs:
        command: restore
        projects: 'src/**/*.csproj'

    - task: DotNetCoreCLI@2
      displayName: 'dotnet build'
      inputs:
        command: build
        projects: 'src/**/*.csproj'
        arguments: '--configuration $(dotnetConfiguration)'

    - task: DotNetCoreCLI@2
      displayName: 'dotnet test'
      inputs:
        command: test
        projects: 'src/**/*Tests/*.csproj'
        arguments: '--configuration $(dotnetConfiguration)'

  - job: 'Npm'
    steps:
    - task: Npm@1
      displayName: 'npm install'
      inputs:
        command: 'install'
        workingDir: '$(angularClientSrc)'

    - task: Npm@1
      displayName: 'build angular client'
      inputs:
        command: custom
        customCommand: run build -- $(angularConfiguration)
        workingDir: '$(angularClientSrc)'

    - task: Npm@1
      displayName: 'angular client test'
      inputs:
        command: 'custom'
        workingDir: '$(angularClientSrc)'
        customCommand: 'run test -- --watch=false --code-coverage'

    - task: PublishCodeCoverageResults@1
      displayName: 'publish angular client code coverage results'
      condition: succeededOrFailed()
      inputs:
        codeCoverageTool: Cobertura
        summaryFileLocation: '$(angularClientSrc)/coverage/cobertura-coverage.xml'
        reportDirectory: '$(angularClientSrc)/coverage'
        failIfCoverageEmpty: true

    - task: PublishTestResults@2
      displayName: 'publish angular client test results'
      condition: succeededOrFailed()
      inputs:
        testResultsFormat: 'JUnit'
        testResultsFiles: 'TESTS*.xml'
        searchFolder: '$(angularClientSrc)/junit'
        failTaskOnFailedTests: true
        testRunTitle: 'Angular'

- stage: PublishApplication
  jobs:
  - job: PublishApplication
    steps:
    - task: DotNetCoreCLI@2
      displayName: 'dotnet publish'
      inputs:
        command: 'publish'
        publishWebProjects: true
        arguments: '--configuration $(dotnetConfiguration) --runtime win-x86 --output $(Build.ArtifactStagingDirectory)'
        zipAfterPublish: false

    - task: PublishBuildArtifacts@1
      displayName: 'public artifacts'
      inputs:
        pathtoPublish: '$(Build.ArtifactStagingDirectory)'
        artifactName: 'financial-dashboard'
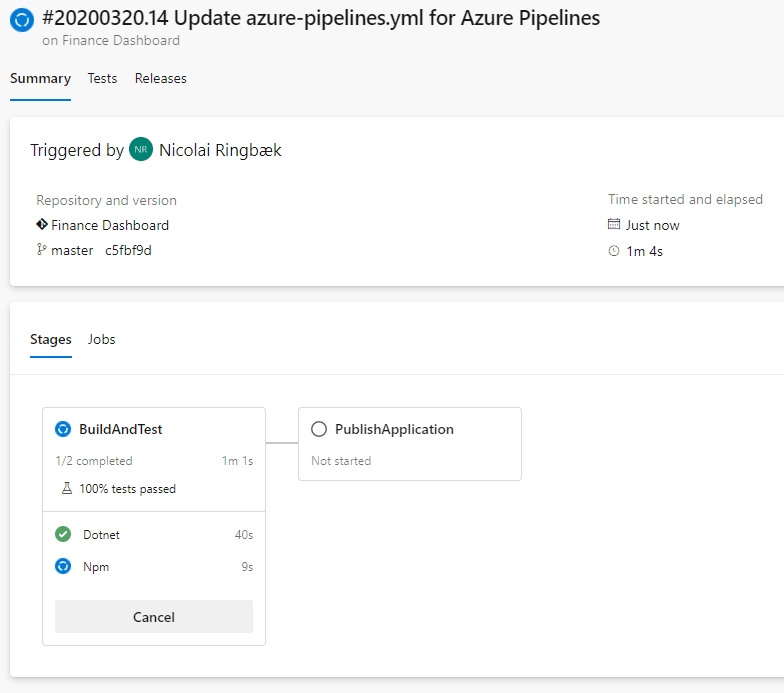
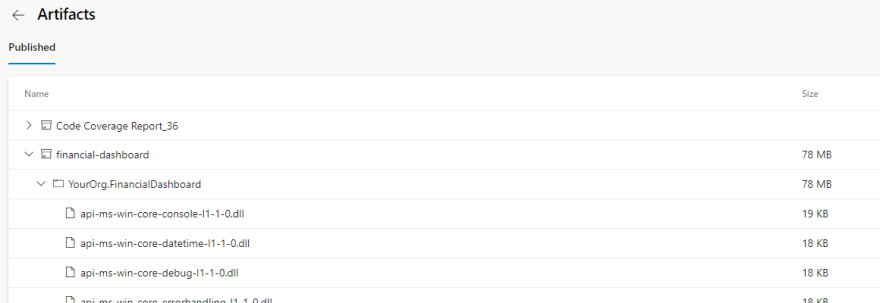
When the build pipeline is running, we can follow the status of each individual stage and task. In addition to this, the output for each task is collected during execution. When completed, we end up with an output artifact containing our published application.

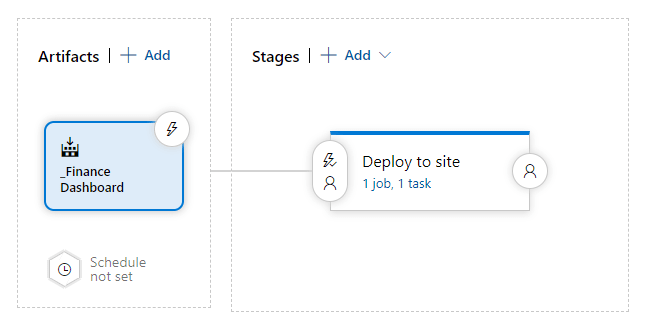
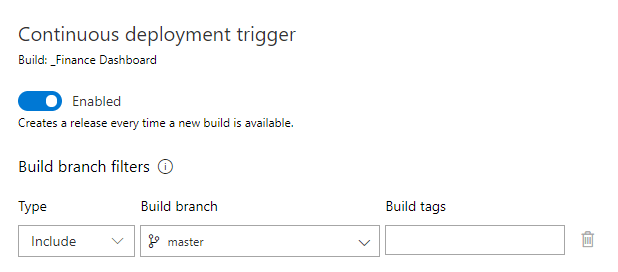
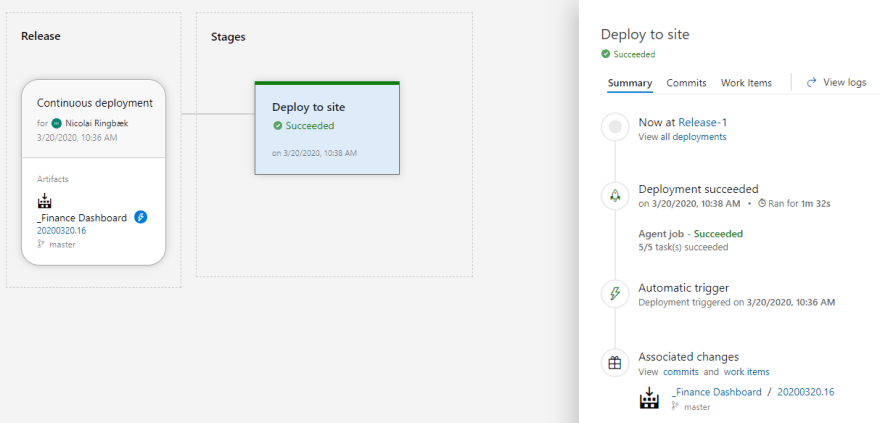
Deployment trigger
With out published artifact ready, it's time to create the deployment pipeline. For this, we will be using the newly created build artifact.
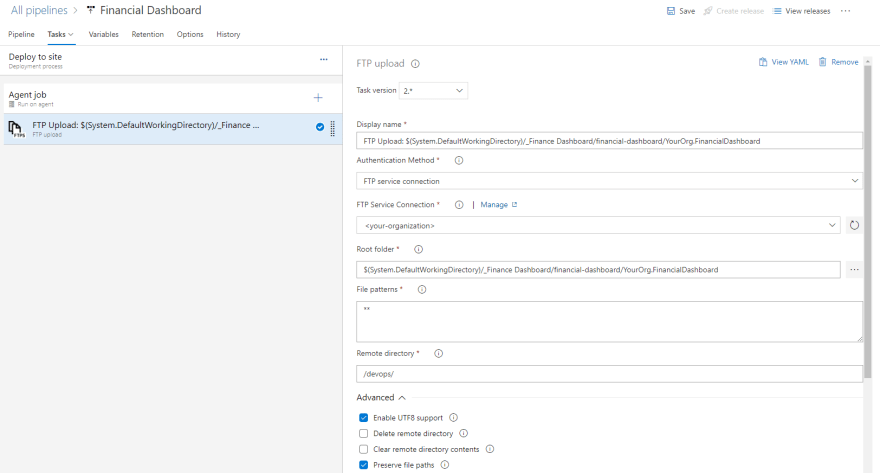
The published artifact is created as a self-contained application targeting win-x86. For this specific deployment, the we will utilize FTP, since the hosting machine is external without access to the IIS. If you're using any Azure-hosted services or have access to the IIS, specific deployment tasks exists that manages and publishes our artifacts, while handling things like managing instances, setting release variables and temporarily stopping any running applications.
We don't have any database in our example, but you can easily manage deployments to these servers too. Using Entity Framework? Create a migration update script during build, use the built-in database deployment task and you're done.
Interested in DevOps?
And that's it. We've now implemented DevOps concepts such that when we push code to our repository, it automatically triggers a build which runs and verifies the tests. If successful, the generated artifact is then handed over to the deployment pipeline which automatically releases our application. I started our with single-click releases... but how about no-click releases ;)
If you have any questions about DevOps, have questions or want to learn more about specific stages, feel free to comment below

Top comments (0)