MongoDB is a non-relational database (NoSQL) that keeps data in BSON (binary JSON) documents, and organizes it by means of collections rather than tables. This enables faster development and allows more flexibility as the schema can be easily changed. MongoDB is unbeatable when a large number of entries need to be inserted or updated. When you need huge amounts of data written, MongoDB is an excellent option. In this article, I am going to explain how to install MongoDB on a server powered by ispmanager 6. You can use a pro or host control panel edition with Docker container support.
1. Getting started
Initially, we will have to complete two operations via the console: check for AVX support and align the mapping between the DB ports and server ports. We can connect to the server via SSH or use ispmanager’s built-in SHELL-client. I’m going to use the SHELL-client. Accordingly, I will follow the control panel’s home menu to Administration → Shell-client.

How to get to Shell-client in ispmanager: Home Menu → Administration → Shell-client
Checking for AVX support
Keep in mind that MongoDB 5.0 and more recent versions will require AVX support from your VPS/Dedicated Server processor. Here is the command you use to see if the server hosting your control panel has AVX support:
cat /proc/cpuinfo | grep -i avx

An empty line output means there is no AVX support on the server
An empty command output means there is no AVX support on the server that hosts your control panel. We will need this information later on, when we get to configure the container tag: the recommended tag in this case will be 4.4-rc.
If the command returns something like flags : … avx … , this means that the server with the control panel supports AVX, and you can pick any tag.
We will get back to tag designations later.
Port mapping
Our next step is to align the mapping of the ports used by MongoDB with that of the open ports on the server. The port that “hears” MongoDB inside the container is port 27017. For better security on the server side, it is advisable to specify another available port – 16793, for instance.
To make sure the port 16793 is available on the server, use: lsof -i -P | grep :16793. If an empty line returns, this means the port is available for use.

An empty line output means port 16793 is available
2. Adding MongoDB via Docker
Now let us see about creating a container for MongoDB in ispmanager.
To add MongoDB in a Docker container, select Docker from the ispmanager Home Menu and click Create a Container.

Creating a container in ispmanager
Type mongo into the search bar in the Images tab, and select the official mongo image. It is marked with the green Official Image bar.

Searching for the MongoDB image
The screen with basic container settings comes on:

Basic container settings
Now let’s complete the Create a Container form.
Container name
Type the name of the container you are creating, e.g.mongo-db.
Tag
Select the image tag we will be using for our container: the default tag is “latest”. As of the date of this article, the “latest” tag corresponds to version 7.0. We have already checked whether the server supports AVX. If it does not, it is advisable to use the 4.4-rc tag. If it does, use any tag.
Auto start
I recommend the choice of Always Restart, so that if the server reboots or some other disruption occurs, the MongoDB container will restart automatically.
RAM limitation
The control panel will create a container with unlimited RAM by default. But if there is a free RAM crunch on the computer, you may want to restrict the RAM that will be available for the container.
Folder mapping
Here is how folder mapping works: the target folder on the server (e.g. /opt/data) gets mounted inside the container using the path we specify (e.g. /tmp/test). Everything the container writes to the /tmp/test folder will be available to system users via the /opt/data path. It works the other way too: what we write to the /opt/data folder will be available inside the container via the /tmp/test path.
In this case, we do not need to align the folder mapping between the system and the container.
Volumes
In Docker, volumes operate as a permanent repository that is not tied to the container’s life cycle. The data in the volumes will survive if the container gets deleted. A volume may be connected to multiple containers.
Volumes are used exclusively in Docker. Only a privileged user gets to manage volumes. Unlike regular folders on the server, this restriction provides extra protection for the database.
In our case, we are going to create a volume for the storage of DB entries, so that no data written to MongoDB gets lost when the container is deleted.
Click on Add Volume. A few new boxes will open:
- Let’s keep Create a New Volume in the Volume box.
- Let’s put a relevant name such as mongo-data in the Volume Name box.
- In the Mount Point Inside a Container box, let’s specify /data/db – this is the path to where MongoDB saves the written data.

Creating a new volume for the MongoDB container
Port mapping
Now let us proceed to the next section of the form. Click Add Port Mapping. In the Server Port box, type in our available port 16793, which we identified at the stage of getting started. In the Container Port box, specify 27017.
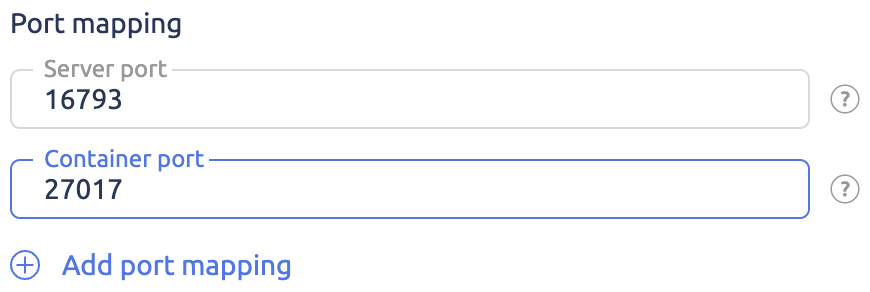
Port mapping
The environment variable
The one last thing we need to do on this form is specify the login and password for the database administrator. This can be done via the environment variable.
- Click Add a Variable. In the Name box, add the variable named MONGO_INITDB_ROOT_USERNAME. This variable initializes a user with root privileges in MongoDB. In the Value box, specify the user’s login name, such as supermongouser, for instance.
- Once again click Add a Variable. In the Name box, add the variable named MONGO_INITDB_ROOT_PASSWORD. This variable sets up the user named in MONGO_INITDB_ROOT_USERNAME. Which, in our instance, is supermongouser.
- In the Value box, type in the password. A strong password is advisable. Example: %l~V$1QwoAWjjEXpbnCjKtsykC{o

Adding the environment variables
Finalizing container creation
When all the boxes are filled, click Create. You will be taken back to the container page. In a little while, a notification will pop up in the bottom right-hand corner, telling you the container has been created. Now you can log in to the MongoDB database with your control panel address and the server port you specified in the Port Mapping section.

Notification of a container created successfully
3. Testing the MongoDB container in action
Let’s see if the database container works well. Let’s try to log in to the newly created MongoDB container via an external device. In our case for the client named mongosh: *mongosh "mongodb://x.x.x.x:16793/" -u "supermongouser" -p - *, where x.x.x.x is the server’s IP address. We will be asked to enter the password we had entered before.
If the authentication is successful, we will be connected to the test database. At this point, if you enter the command show dbs, you can view the database lists, then switch to the one you need and work with it. Congratulations! MongoDB is now installed in a Docker container and ready for use!

MongoDB login test
4. Security tips
Docker has two peculiarities that must be watched in order to keep the database secure.
- Docker will dynamically write its rules to iptables every time at startup. Therefore, there is a need to restrict access to the MongoDB container by writing a script that will add restriction rules at the beginning of the table for the specified port at Docker startup. Alternatively, write a script that will use CRON to scan the iptables for the appropriate rules, and if the same are found absent, will add such rules (external access will be available for a certain time). For that reason, one is strongly advised to use any server port except the standard port 27017.
- All environment variables, whether programmed by us or configured inside the container, will be displayed when a command runs on behalf of
root/sudoor the user on the Docker group. For example, the commanddocker exec mongo-db /usr/bin/env will return, inter alia, the name of the user with root privileges and the password for MongoDB. This is something one should also keep in mind – and restrict the circle of users with root or Docker privileges accordingly.
How to migrate to ispmanager with Docker support
Download ispmanager 6 and enjoy it! Use it free of charge for two weeks if you’ve never had the control panel before.
Download ispmanager

Top comments (1)
Thank you for detailed description for setting up all specific variables of MongoDB container. It is really valuable.