In situations when you want to conduct scheduled tasks without having to worry about the infrastructure, serverless architecture is an excellent option to consider. Over the course of this piece, I will demonstrate how I utilized Amazon Web Services Lambda and Amazon EventBridge to automate a Python-based API update script that runs on a regular schedule.
Use Case
Let's assume you have a website or app that requires you to pull information from a third-party API at regular intervals. The information could be prices, exchange rates, weather, or analytics results. You already have an existing Python script that functions to accomplish this upgrade.
Now, the objective is to execute this script on a regular basis without any need to work with any servers.
Step 1: Create Your Lambda Function
Your Python script needs to be prepared and packaged in such a way that it can be executed by AWS Lambda. This is the first stage.
Your working directory ought to have the following:
.
├── lambda_function.py
├── requirements.txt
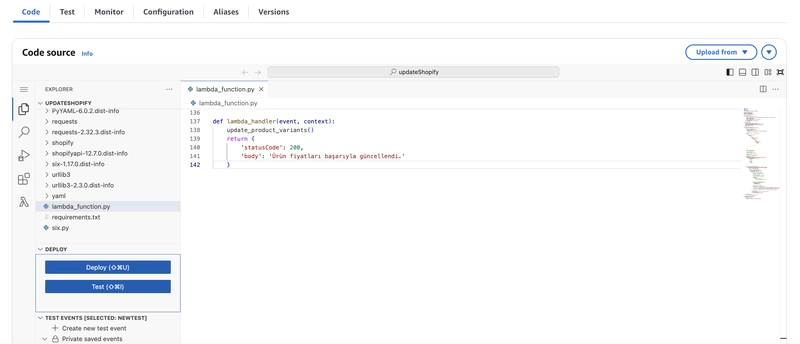
lambda_function.py:
When you run a Python script on AWS Lambda, the conventional name assists AWS Lambda in identifying and running your function in the right way. Your primary Python script must be lambda_function.py.
Also you must define lambda_handler(event, context). The lambda_handler() function serves as an entry point for AWS Lambda and will directly be called when your function gets invoked.
requirements.txt:
Requirements.txt contains a list of all the dependencies that your code needs.
After you've structured your folder and written your Lambda function code, the next step is to package your Python script along with its dependencies. AWS Lambda does not automatically install Python packages from requirements.txt — you must include all dependencies in your deployment package:
- Install dependencies locally into your project folder:
pip install -r requirements.txt -t .
- Create a Deployment Package (ZIP):
zip -r lambda_shopify_update.zip .
Double check that you are zipping up the contents of the folder, not the folder itself. That is important — AWS needs to see the handler file (i.e., the lambda_function.py) in the root of the ZIP file.
Step 2. Upload to AWS Lambda
Now go to the AWS Console:
- Open AWS Lambda
- Click “Create function”
- Choose “Upload from → .zip file”
- Upload your lambda_shopify_update.zip
- Test your lambda function
Step 3: Automating with EventBridge
Once your Lambda function is working correctly, the next step is to automate its execution using Amazon EventBridge. EventBridge is a serverless scheduler that lets you trigger your Lambda function on a regular schedule.
- Go to the Amazon EventBridge section in the AWS Console.
- Click “Create rule” to set up an automatic trigger for your Lambda function.
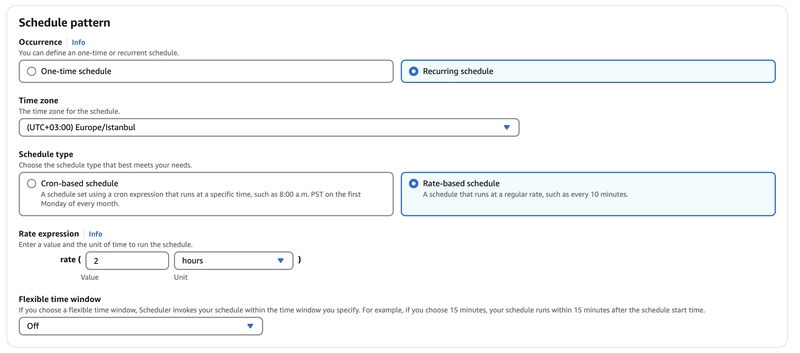
- Under Rule type, choose “Schedule” to trigger your function based on time (rather than an event).
- Select “Rate-based schedule” to run your Lambda at a regular interval.
- Alternatively, you can use “Cron-based schedule” for more specific timing (e.g., every day at 08:00).
-
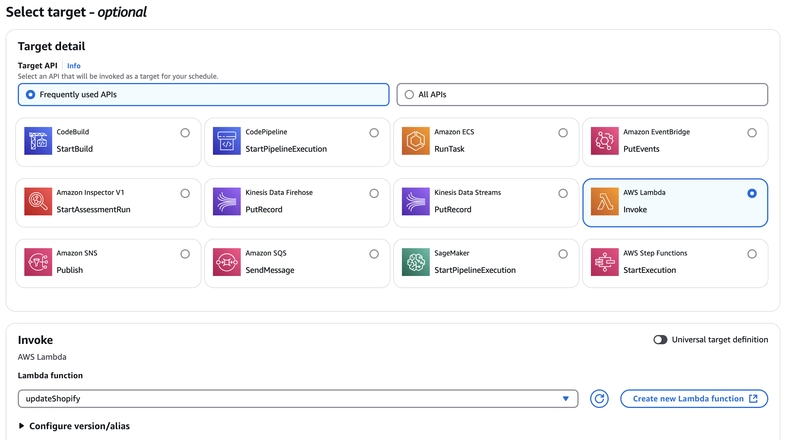
In the Target section:
- Choose AWS Lambda.
- Select your deployed Lambda function.
- Click Next.
Review your configuration, and click “Create rule”.
Your Lambda function is now scheduled to run automatically at the interval you defined — no manual execution needed.

Top comments (4)
Super clear, thanks.
Great effort!🙌
Thanks for the informative content
Great job! Thanks,