
Using custom React components versus raw HTML while coding makes a huge difference in how fast you get things done. In this tutorial, I'm going to show you how to build three simple, game-changing React components.
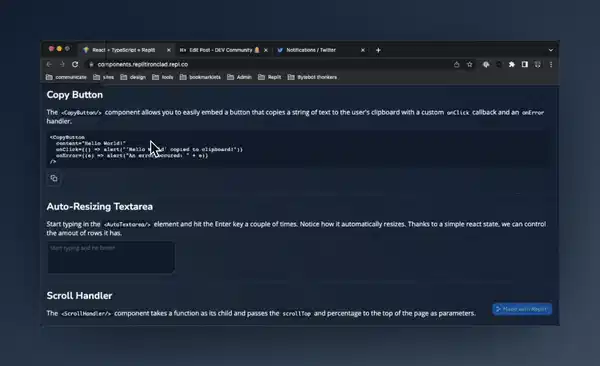
Copy Button 📄
A simple copy to clipboard button may sound simple, but you'd be surprised how much work you'd be saved if it was a React Component!
1. Create the component
I prefer to use a clean icon from Feather Icons. This is the basic structure of our component.
import { Copy } from 'react-feather'

export const CopyButton = () => {
  return <button>
    <Copy size={16}/>
  </button>
}
2. Props
Include content, an onClick handler, and an onError handler. Copying to clipboard via window.navigator returns a promise so we'll need to handle promise rejection errors accordingly.
import { Copy } from 'react-feather'

export const CopyButton = ({
  content,
  onClick=()=>{},
  onError
}: {
  content: string;
  onClick?: () => void;
  onError?: (err: Error) => void;
}) => {
  return <button>
    <Copy size={16}/>
  </button>
}
3. Functionalize
Now we'll create a copy function, call the callbacks accordingly (no pun intended), and bind it to the button's onClick listener.
export const CopyButton = ({
  content,
  onClick=()=>{},
  onError
}: {
  content: string;
  onClick?: () => void;
  onError?: (err: Error) => void;
}) => {
  const copy = () => {
    navigator.clipboard.writeText(content)
      .then(onClick)
      .catch(e => {
        if(onError) {
          onError(e)
        } else {
          console.log(e)
        }
      });
  }
  return <button onClick={copy}>
    <Copy size={16}/>
  </button>
}
Add some CSS, and you're all done ✨!
Auto-Resizing Textarea 🤖📝
Auto-resizing <textarea> elements are quite fancy and very helpful if a user has to type a long post or enter a lot of text.

1. Create the component
Render the <textarea> element.
export const AutoTextarea = ({ ...props }) => {
  return (<textarea {...props} />)
}
2. Create a value state
Attach a value state so we can have a controlled input
import { useState } from "react";

export const AutoTextarea = ({
  ...props
}) => {
  const [value, setValue] = useState("");

  return (
    <textarea
      value={value}
      onChange={e => setValue(e.target.value)}
      {...props}
    />)
}
3. Regex Magic
Use a regular expression to search for the \n (breakline) character and calculate rows based on that.
import { useState } from "react";

export const AutoTextarea = ({
  ...props
}) => {
  const [value, setValue] = useState("");

  return (
    <textarea
      value={value}
      onChange={e => setValue(e.target.value)}
      rows={/\n/.test(value) ? Number(value.match(/\n/g)?.length) + 1 : 1}
      {...props}
    />)
}
Your component should now be ready to roll!
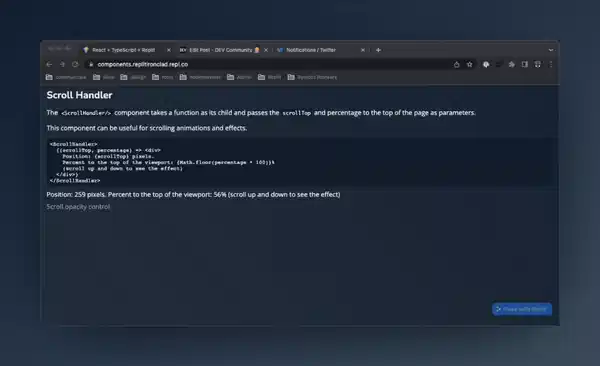
Scroll Handler 🖱🪄
Controlling element styles based on their scroll position is a very satisfying and beautiful web design trend. A good example of a site that uses something similar is https://boring.samalander.dev/
1. Create the Component
The wrapper for this component will be a <div> element.
export const ScrollHandler = () => {
  return <div></div>
}
2. Props + hooks
The children prop passed into this component will be a function with scrollTop and percentage as parameters.
import { ReactNode, useEffect, useState, useRef } from "react";

export const ScrollHandler = ({
  children,
  ...props
}: {
  children: (scroll: number, percentage: number) => ReactNode;
}) => {
  const [scroll, setScroll] = useState(0);
  const scrollRef = useRef<HTMLDivElement>(null);

  return <div {...props} ref={scrollRef}>
    {children(scroll, (window.innerHeight - scroll)/window.innerHeight)}
  </div>
}
3. Functionalize
Let's attach a useEffect hook and a scroll listener to the component.
import { ReactNode, useEffect, useState, useRef } from "react";

export const ScrollHandler = ({
  children,
  ...props
}: {
  children: (scroll: number, percentage: number) => ReactNode;
}) => {
  const [scroll, setScroll] = useState(0);
  const scrollRef = useRef<HTMLDivElement>(null);

  useEffect(() => {
    if(scrollRef.current) {
      window.addEventListener("scroll", (e) => {
        const clientRect = scrollRef.current?.getBoundingClientRect();
        setScroll(clientRect?.top || 0);
      })
    }
  }, [scrollRef]);

  return <div {...props} ref={scrollRef}>
    {children(scroll, (window.innerHeight - scroll)/window.innerHeight)}
  </div>
}
4. Usage
Using this component may be a little confusing if you've never tried using the React children prop as a function before.
An example of usage is as follows:
<ScrollHandler>
  {(scrollTop, percentage) => <div>
    Position: {scrollTop} pixels. Percent to the top of the
    viewport: {Math.floor(percentage * 100)}%
  </div>}
</ScrollHandler>
As the event listener fires off, scrollTop (first parameter) is assigned the value of the absolute top of the div element. percentage (second param) is how far the component is to the top of the page.
And that's it! Thanks for reading!
Live demo: https://components.ironcladdev.repl.co/
Source Code: https://replit.com/@IroncladDev/Components
If you've enjoyed this, don't forget to follow me on Twitter and Replit
Thanks for reading! Catch y'all next time!

Latest comments (9)
Great article. The use of symbols like 💪 and ⚛️ also adds a fun touch to the article..
Nice, some of these could also work as hooks, seperating the logic from the UI.
Recently refactored some search logic where it was repeated for different UI / places on the page to a useSearch hook.
The textbox idea doesn't work if the person writes a lot on the first line. If their is an overflow of characters in a singular line it wraps it but the textbox doesn't expand.
Ah that makes sense. If I manage to figure it out, I might make a new post on that.
Oh, don't worry the solution is extremely simple. Take a look at this guide: medium.com/@oherterich/creating-a-....
Small Change: Set the overflow to hidden in the textarea's styling to remove the scrollbar that some might get.
Nice ideas!
Thanks for sharing!
Thank you!
And you're welcome :)
It Was Nice To See the Scroll Handler 🖱🪄
Thanks! I'm glad you liked it!