This is a guest post from Simon Grimm, Ionic Developer Expert and educator at the Ionic Academy. Simon also writes about Ionic frequently on his blog Devdactic.
Introduced a while ago, Sign in with Apple makes it easy for users to sign in to your apps and websites using their Apple ID. As of April 2020, this feature is required if you use any sort of 3rd party or social login on iOS (some exclusions apply). This includes Facebook Login, Google Sign-In, Sign in with Twitter, Sign In with LinkedIn, Login with Amazon, or WeChat Login.
The flow of this authentication process is mostly the same as with any other OAuth provider, which means it should be familiar, but it involves a lot of detailed configuration in different places.
To make this process easy for you, we’ll go through all necessary steps together in order to implement this new sign in functionality in your Ionic app using Capacitor. After you are done with the implementation you will have an identity token from Apple that you could use to build a full authentication flow with e.g. Firebase or your own custom backend!
Apple App Configuration
Before we do any coding, we need to configure a few things. First of all, you need an Apple App ID - either create a new one like in the image below or use your already existing ID.
If you need a new one, simply click the plus the create a new identifier inside your Apple developer account.
Besides the regular information, it’s important that you enable Sign In with Apple further down the page in the list of capabilities.
You will later need the bundle ID you specified in here, so leave the tab open or remember it.
Setting up Your Ionic App
Now we can get into some code. Let’s start by creating a new Ionic app with a blank template and Capacitor integration:
ionic start appleApp blank --type=angular --capacitor
cd ./appleApp
npm i https://github.com/rlfrahm/capacitor-apple-login
We only need to install the Capacitor community plugin for Apple Sign In to implement the Apple Sign-in additionally.
If you haven’t done during initialization you also need to make sure Capacitor uses the right Bundle ID for your app, so open the capacitor.config.json and insert the name of the App ID that you created in our first step:
{
  "appId": "com.devdactic.appleauth",
  "appName": "appleApp",
  "bundledWebRuntime": false,
  "npmClient": "npm",
  "webDir": "www",
  "cordova": {}
}
To add the iOS project and build the native app through Capacitor you can now simply run:
ionic build
npx cap add ios

# Whenever you make changes
ionic build && npx cap copy
Now we just need a few more lines...
Building the Apple Sign In Flow
First of all, you should check on which platform your app runs, since the plugin we installed only works for native iOS apps.
For the login process, you only need to call the Authorize() function on the Capacitor plugin, which will then trigger the native Apple dialog. Once we get the result, we can use the token to perform any kind of other operation or authentication against another service.
You can now change your app/home/home.page.ts to:
import { Component, OnInit } from '@angular/core';
import { AlertController } from '@ionic/angular';
import { Plugins } from '@capacitor/core';

@Component({
  selector: 'app-home',
  templateUrl: 'home.page.html',
  styleUrls: ['home.page.scss'],
})
export class HomePage implements OnInit {
  showAppleSignIn = false;
  user = null;
  constructor(private alertController: AlertController) {}
  async ngOnInit() {
    const { Device } = Plugins;
    // Only show the Apple sign in button on iOS

    let device = await Device.getInfo();
    this.showAppleSignIn = device.platform === 'ios';
  }

  openAppleSignIn() {
    const { SignInWithApple } = Plugins;
    SignInWithApple.Authorize()
      .then(async (res) => {
        if (res.response && res.response.identityToken) {
          this.user = res.response;
        } else {
          this.presentAlert();
        }
      })
      .catch((response) => {
        this.presentAlert();
      });
  }

  async presentAlert() {
    const alert = await this.alertController.create({
      header: 'Login Failed',
      message: 'Please try again later',
      buttons: ['OK'],
    });
    await alert.present();
  }
}
The response you get from Apple will have the following structure (for successful authentication):
{
  "response": {
    "email": "foo@bar.com",
    "identityToken": "importantToken",
    "familyName": "Grimm",
    "user": "AppleUserId",
    "givenName": "Simon",
    "authorizationCode": "authCode"
  }
}
The response also depends on whether the users allow to show the email or hide it, in the latter case you will receive a more anonymous email from Apple which will forward all emails to the real user email.
It’s also important to note that you will see this full response only during the first successful sign in. After that, the familyName, givenName and email fields will be null, so be cautious if you use the information of this token to update your user records!
Note: I’ll show you a way to reset the whole process at the end so you can test it more than once!
Now the view is actually the most boring part of this tutorial - simply add a button and perhaps surround everything with a little check on the user, so we can print out all the user information from the token if we are logged in.
The following code goes to your app/home/home.page.html:
<ion-header>
  <ion-toolbar>
    <ion-title>
      Apple Sign In
    </ion-title>
  </ion-toolbar>
</ion-header>

<ion-content class="ion-padding">

  <ion-card *ngIf="!user; else welcome">
    <ion-card-content>
      <ion-button expand="full" (click)="openAppleSignIn()" *ngIf="showAppleSignIn">
        <ion-icon name="logo-apple" slot="start"></ion-icon>
        Sign in with Apple
      </ion-button>
    </ion-card-content>
  </ion-card>

  <ng-template #welcome>
    <ion-card>
      <ion-card-header>
        <ion-card-title>Welcome back!</ion-card-title>
      </ion-card-header>
      <ion-card-content>
        {{ user | json }}
      </ion-card-content>
    </ion-card>
  </ng-template>

</ion-content>
Now we are ready, but in order to run everything successfully we also need to apply a little change to our native project.
Xcode Settings
You should have already added the iOS platform by now, so run a new build with your code changes and then open the workspace file of your project either from finder or by running:
npx cap open ios
Inside the Xcode project, we need to navigate to Signing & Capabilities -> Add Capability, and from the list select Sign In with Apple like you did in our first step inside your Apple identifier as well.
Now you can finally build the app on your device and go through the Apple Sign In flow - and you should also see the identity token of the Apple response printed in your card!
Testing Apple Sign In
In most cases, you want to test the process a few times, but after going through the initial dialog once, you won’t see it again, even if you uninstall the app.
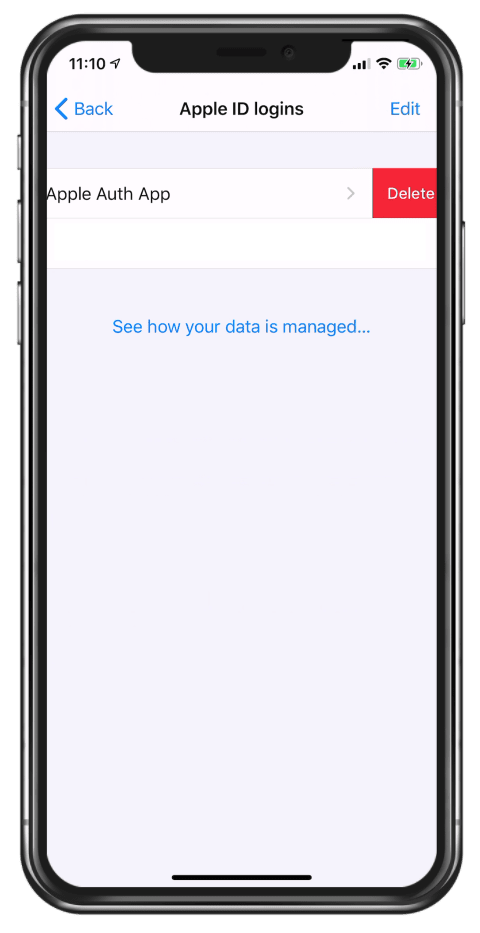
But here’s a fix to reset your data that allows you to perform everything fresh again: Inside your iOS device, open the settings app and navigate to Apple ID -> Password & Security -> Apple ID logins. In this screen, you can see all the apps where you used Apple Sign In, and you can simply delete the entry for your own app.
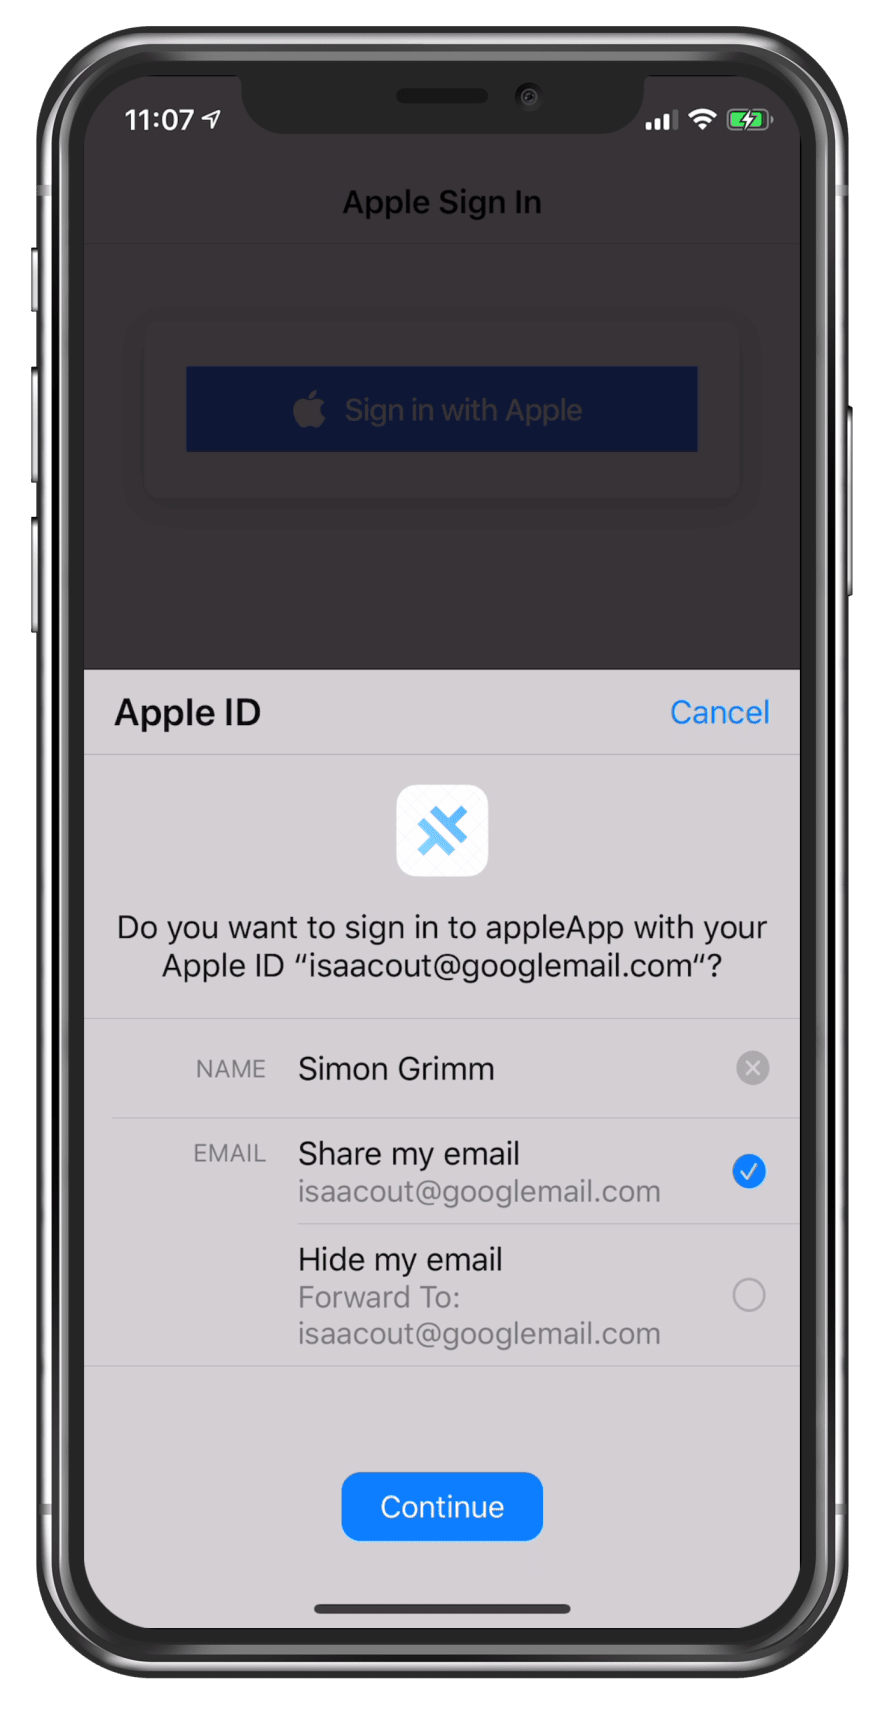
Now you can test the process again inside your app, and the initial dialog to sign in will show up again like in the image you see below.
Conclusion
Implementing the new Apple Sign In flow is certainly not hard from a code perspective, but it’s important to configure everything correctly in order to make it work.
Of course, this is not yet a full authentication mechanism - you could add something like Firebase to the mix and pass the identity token to Firebase and create users based on that data. If you want to see a post about that as well just leave a comment and I’m happy to share it with the community!
For everyone still using Cordova, you can of course also use a Cordova plugin instead of Capacitor - the process will mostly be the same.
If you want to learn more about Ionic with a library of 40+ courses and supportive community, you can also join the Ionic Academy and get access to a ton of learning material.
And don’t forget to subscribe to my YouTube channel for fresh Ionic tutorials coming every week!


Top comments (0)