Background
As the world around us gets more and more intertwined with the World Wide Web, the need to secure our Internet experience has never been more important than ever. With the rise of IOT (Internet of Things), we are seeing an increasingly digitalized world where almost everything has to be connected to the Internet to perform basic functions. The way the internet works, when we connect to the internet our ISPs(Internet Service Providers) allocate what is known as an IP address, an IP address can be easily described as an address used to identify a device on the internet, similar to the home address of an individual, which a postman uses to determine where specific letters (in digital terms packets of data) are eventually directed and sent to.
The major problem with surfing on the internet is that many times our browsing activities and transactions can be easily accessed and manipulated by malicious actors and hackers, this is where a VPN comes in, a VPN stands for Virtual Private Network it is used to encrypt and anonymize our activities on the web. , many users and organizations use it to secure their online activities that could be easily subjected to a cyberattack, many also use it to escape the limitation of location-based IP restrictions. VPN services are in quite demand, I will do a walkthrough on how we can easily build our own custom VPN server with the help of an opensource tool(OpenVPN) and using a cloud platform
We can create a server on any of the popular cloud platforms, most of these platforms offer basic free credits for the first few months of usage, I will demonstrate with the Azure cloud platform but it is basically the same step on other cloud platforms, we will create a compute instance where the OpenVPN tool is preinstalled using the OpenVPN Access Server, the tool has a free tier that allows for two VPN connections it can be easily accessed from the marketplace of any of the cloud platforms, a simple instance without much computing power will do the job.
Setup Guide
From the Azure portal, search for 'Marketplace', after navigating to Azure MarketPlace, search for OpenVPN, you will see the OpenVPN Access Server service

When the service has been selected, create an administrator username and password for the instance. you can leave most of the default settings the same, with Azure there is an option to enable auto shutdown keep that off to enable our VPN to be always available.

Once the instance has been created copy the public IP address it will be used to configure the OpenVPN server, after this is done SSH into the compute instance with your details.
ssh openvpn@192.174.232.165
Read and accept the OpenVPN agreement and allow the default settings to be used, you can choose when you come to this option to create a different admin profile.

When this is all done, log into the OpenVPN Server admin section with your public IP address.

When inside, change the hostname to reflect your public IP address and save the settings. This is crucial to the VPN functionality as it should not be connected to a different IP address.

After this is done, download the client software on your system or device and download your VPN user profile which will configure the client profile.


Input your password and connect to the VPN

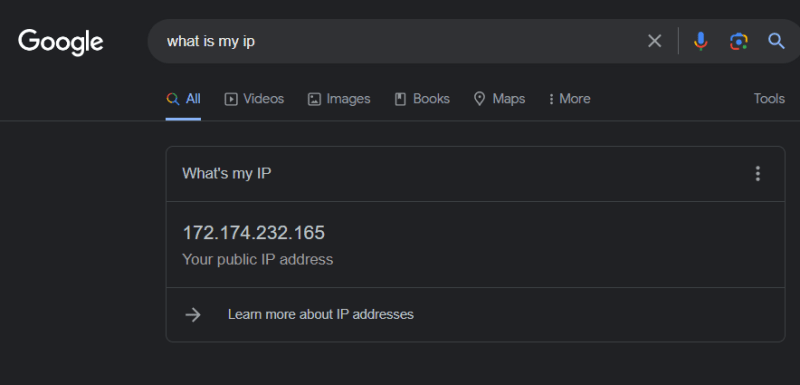
You should be able to connect to the internet with the VPN server, now if you check your IP it should be the same as the one on your VPN profile.
Awesome! Your VPN is now up and running! This can also be further configured to fit your custom needs and requirements. Let me know in the comment section if you have any feedback or ideas about it.

Top comments (0)