I recently went through the pain of developing a .NET Core MVC website on MacOS. This post is meant to help you get started using Identity authentication and MySQL as your backend database.
I’m going to assume you have .NET Core SDK installed. If you don’t make sure you install the latest version. The current version is 2.2 since 3.0 is still in preview. To confirm you have installed it correctly, open up terminal and type dotnet --info. I just gave it a try and realized I’m not even running the latest version of .NET Core. This whole time I thought I was running version 2.2 but instead I’m running 2.1.9. This explains all the issues I was having.

Before we get started, this is the environment I’m currently using:
- .NET Core 2.1.9 (forgive me)
- Visual Studio 2019 for Mac (free community edition)
- MAMP Pro (for MySQL)
Of course you don’t need MAMP Pro to run MySQL. You can install MySQL directly but I had been doing some PHP development in the past and MAMP Pro came in handy back then.
Ok lets get started! Open up terminal and run the following commands:
mkdir IdentityProject
cd IdentityProject
dotnet new mvc --auth Individual
You can create a new project through the Visual Studio interface but as of 06/02/2019, you don’t have the option to choose the authentication type. The command line is the way to go. Now that we created our project, lets install the required Nuget packages.
- Microsoft.EntityFrameworkCore.Tools
- Microsoft.EntityFrameworkCore.Design
- Pomelo.EntityFrameworkCore.MySql
Run the following command in terminal making sure you’re still in the IdentityProject directory:
dotnet add package Microsoft.EntityFrameworkCore.Tools
Immediately I’m hit with a version conflict error. This is due to the fact that I am not running the latest version of .NET Core. If you are using the latest version then you shouldn’t have this error. At least thats what I’m assuming.

Ok lets remove that package and install the correct version.
dotnet remove package Microsoft.EntityFrameworkCore.Tools
dotnet restore
To save you the trouble of figuring out which version you need to install, I’m just going to tell you that I need version 2.1.8 installed. I figured this out after some trial and error so lets try this again.
dotnet add package Microsoft.EntityFrameworkCore.Tools --version 2.1.8
dotnet add package Microsoft.EntityFrameworkCore.Design --version 2.1.8
dotnet add package Pomelo.EntityFrameworkCore.MySql --version 2.1.4
dotnet restore
Now we should be good to go. Open up the project in Visual Studio. You should have a plain MVC project in front of you.

The next step is to set up your MySQL database. Open MySql and create a new database. Lets call it IdentityDB. Now we have a blank database with no tables. Open up appsettings.json in Visual Studio and add the connection string to your database.
{
  "ConnectionStrings": {
    "DefaultConnection": "server=127.0.0.1;port=8889;database=IdentityDB;user=root;password=<YOUR_PASSWORD>;CharSet=utf8;SslMode=none;"
  },
  "Logging": {
    "LogLevel": {
      "Default": "Warning"
    }
  },
  "AllowedHosts": "*"
}
Let’s make some changes to Startup.cs to switch from using SqlLite to MySQL.
services.AddDbContext<ApplicationDbContext>(options =>
                options.UseMySql(
                    Configuration.GetConnectionString("DefaultConnection")));
Now we need to create the initial migration to allow entity framework to create the Identity tables for us. From terminal and from within the IdentityProject directory run the following command:
dotnet ef migrations add InitialCreate
You should be able to see your migration files from Visual Studio. Normally they would be under Data >> Migrations but sometimes the Migrations folder gets created in the root. Either way the files should be there. Now run the following command to create the identity tables in your database:
dotnet ef database update
I received the following error:
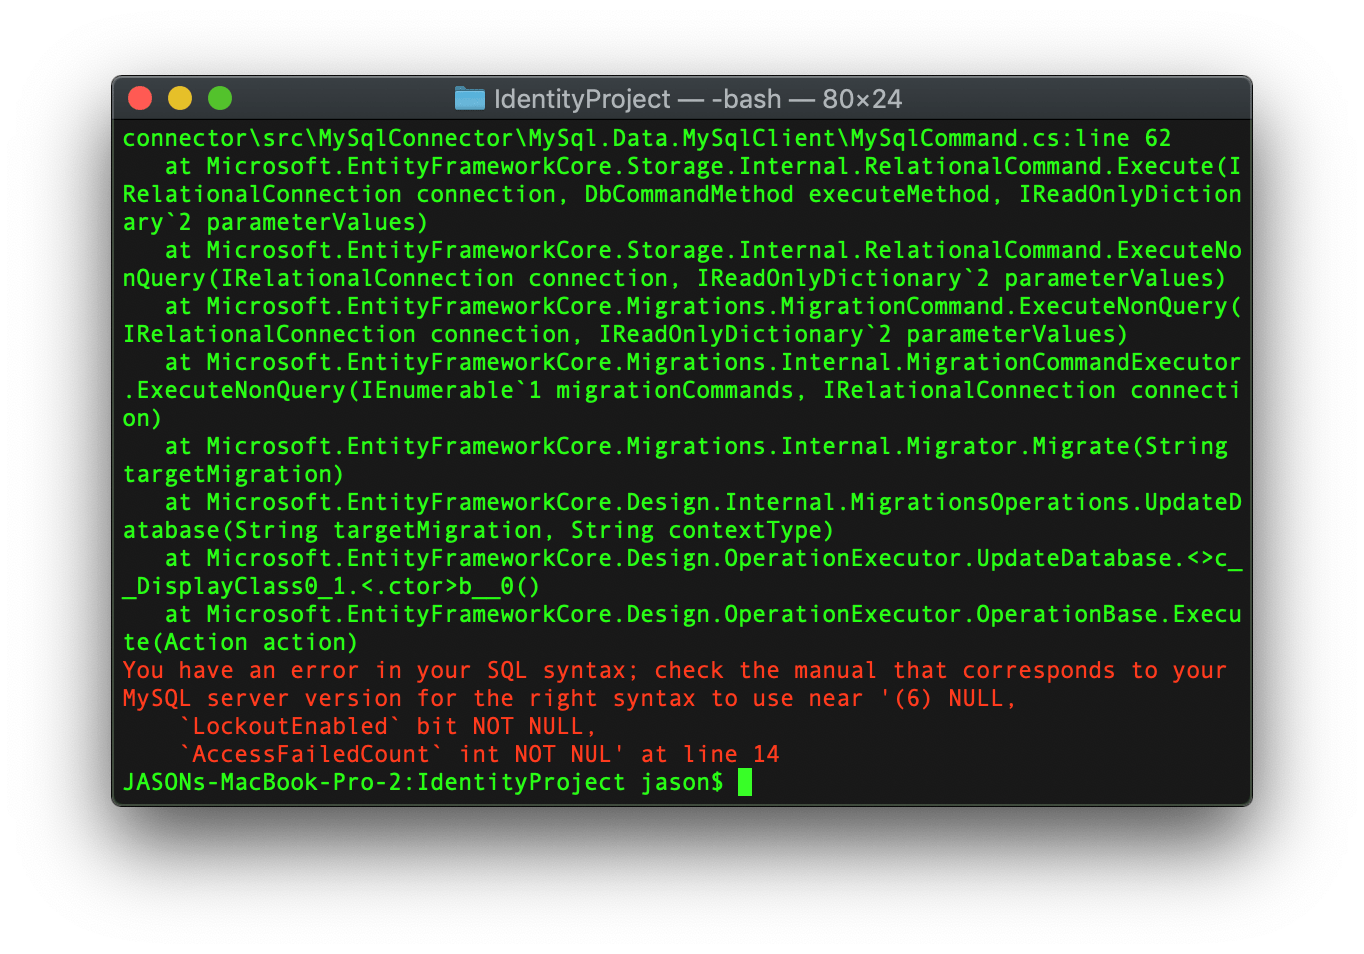
I think this is caused by running an older version of MySql. I’m currently using MySql 5.5 and the latest is 8.0 so I’m way behind. To fix this error open up CreateIdentitySchema.cs from your migrations folder. Locate the code that creates the AspNetUsers table. Note: if you don’t have a CreateIdentitySchema.cs file then the code is located under InitialCreate.cs.
Also keep in mind that these files are prefixed with numbers.
Locate the following line:
LockoutEnd = table.Column<DateTimeOffset>(nullable: true),
and change it to:
LockoutEnd = table.Column<DateTimeOffset>(nullable: true, type: "DateTime"),
We should be good to go. Before we perform the migration, open up your database and Drop any tables that might have been created while performing the first migration. This is to ensure you don’t run into any conflicts. Now run the following:
dotnet ef database update
If you didn’t receive any errors you should have all the identity tables in your database.

That should be it! Run the project from Visual Studio and register a new user.
Bonus
One thing I noticed when I was working with .NET Core was the missing Account controller that I was so used to seeing. Since .NET Core 2.1, all these pages are now part of the Razor class library. If you need access to these pages to modify the UI or change the backend code, you’ll need to scaffold them out. To do this you first need to install the code scaffolder:
dotnet tool install -g dotnet-aspnet-codegenerator
Once installed, add the package to your project:
dotnet add package Microsoft.VisualStudio.Web.CodeGeneration.Design --version 2.1.8
dotnet restore
You can omit --version 2.1.8 if you’re using the latest version of .NET Core. Now run the following command to list the pages you can add to your project.
dotnet aspnet-codegenerator identity --listFiles
You can pick and chose which files to expose in your project by running the following:
dotnet aspnet-codegenerator identity --files="Account.Manage.ChangePassword;Account.Register;Account.ResetPassword;Account.ResetPasswordConfirmation"
You can now view all the identity files you chose under Area >> Identity >> Pages >> Account

Top comments (2)
Nice blog and informative content,
We are providing Best Dot NET Training in Hyderabad,
Thanks for sharing with us,
DOT NET Training in Hyderabad
DOT NET Online Training in Hyderabad
Thanks a lot for this Jason. You are a timesaver!!!
For mysql, make sure to check the latest here github.com/PomeloFoundation/Pomelo...
If you don't have ef cli: dotnet tool install --local dotnet-ef //optional --version