
Firebase probably is a popular and by far the most widely used backend with Flutter. In this series of FlutterFire, we’ll be covering everything one needs to know about Flutter Firebase Integration and everything one might need if they plan on using Firebase as a backend for their Flutter Applications.
Starting with this article, where we’ll be taking a look at how we can integrate Firebase User Authentication in our Flutter Apps.
User Authentication is one of the crucial parts of a Flutter Application. There are plenty of ways you can do this with Firebase i-e; Anonymous Sign-In, Email, and Password, Google Sign-In, etc. In this tutorial, we’ll be going through the anonymous sign-in and signing in using email and password.
Why choose Firebase?
Firebase goes very well with Flutter and is very reliable. If you’ve had a chance to read the official Flutter documentation, you’ll find a section dedicated to the Firebase documentation guide with Flutter. You can check that out here.
Without any further ado, let’s take a look at the diagram so we can understand and remove the complexity of its layout structure altogether.

Let’s start off with breaking down the figure. With MyApp being the root of our application, the Wrapper widget sits under it. That Wrapper widget is responsible for showing the different screens to the user based on the login status of the user. For instance, we would want to show the homeScreen only in the case where the user is logged in and otherwise we would want to show the login or the register screen.
After creating the base Flutter Project, let’s create a Firebase Project and link the firebase project to our project. There are two ways you can do this: By going to the firebase console and manually setting up the project and then placing the services.json file in the required directory or by using Firebase Command Line Interface for Flutter called FlutterFire CLI. To make things easier, we’ll set up the project using FlutterFire CLI. Assuming you have FlutterFire installed (check guide), Inside the project directory, type the following command:
flutterfire configure
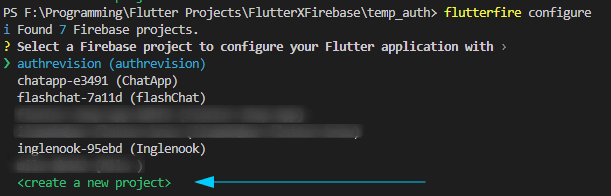
After logging in to your google account, it’ll show you the list of all the firebase projects you have and at the very end, give you an option to create a new project. While creating a new project, it’ll ask you for a name that you want to set for your project.

After that, you’ll be presented with a list and asked for which platforms you want to create the project. And that is pretty much it.
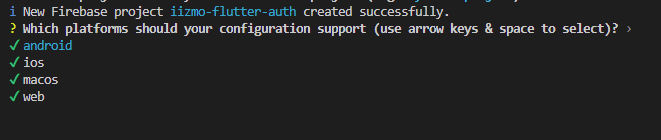
The rest will be handled by FlutterFire itself! No need to download any additional files and struggle to place them in the right directory.
Now that our project is configured with Firebase, let’s start building and take a look at how different pages will look.

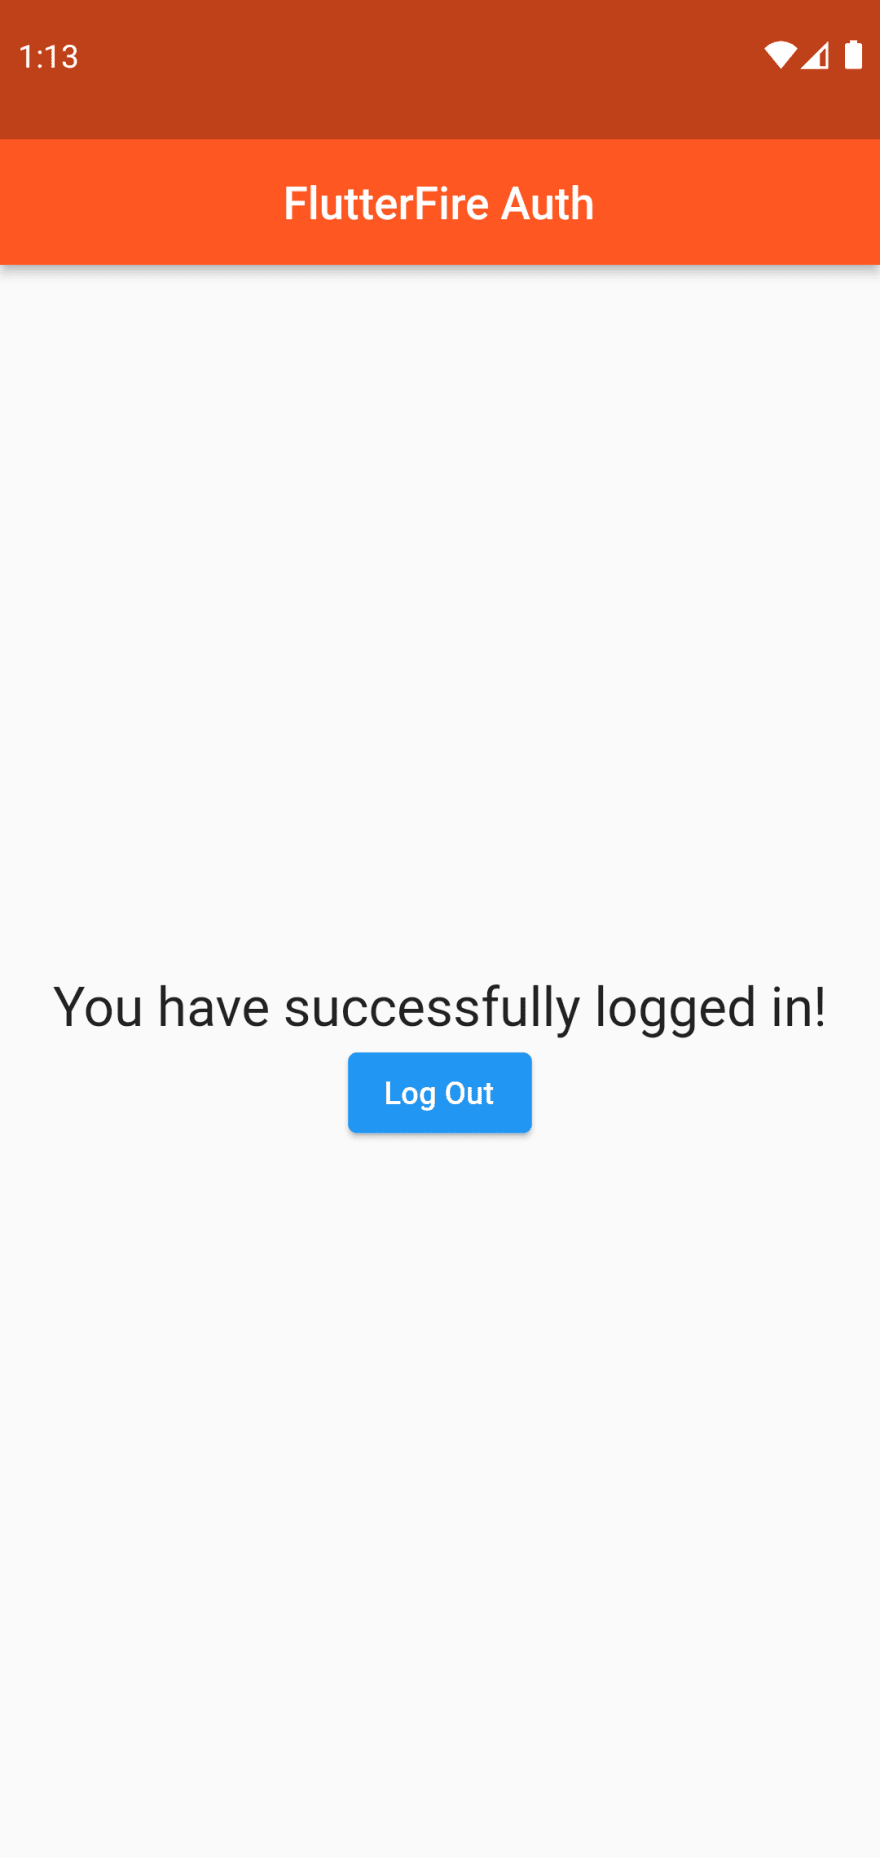
For the homesceen, we’ll have an app bar showing the title of our application. In the body, We’ll have a column containing a text widget and an elevated button which will be used to log the user out of the application.
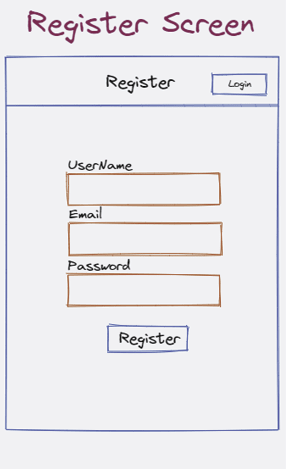
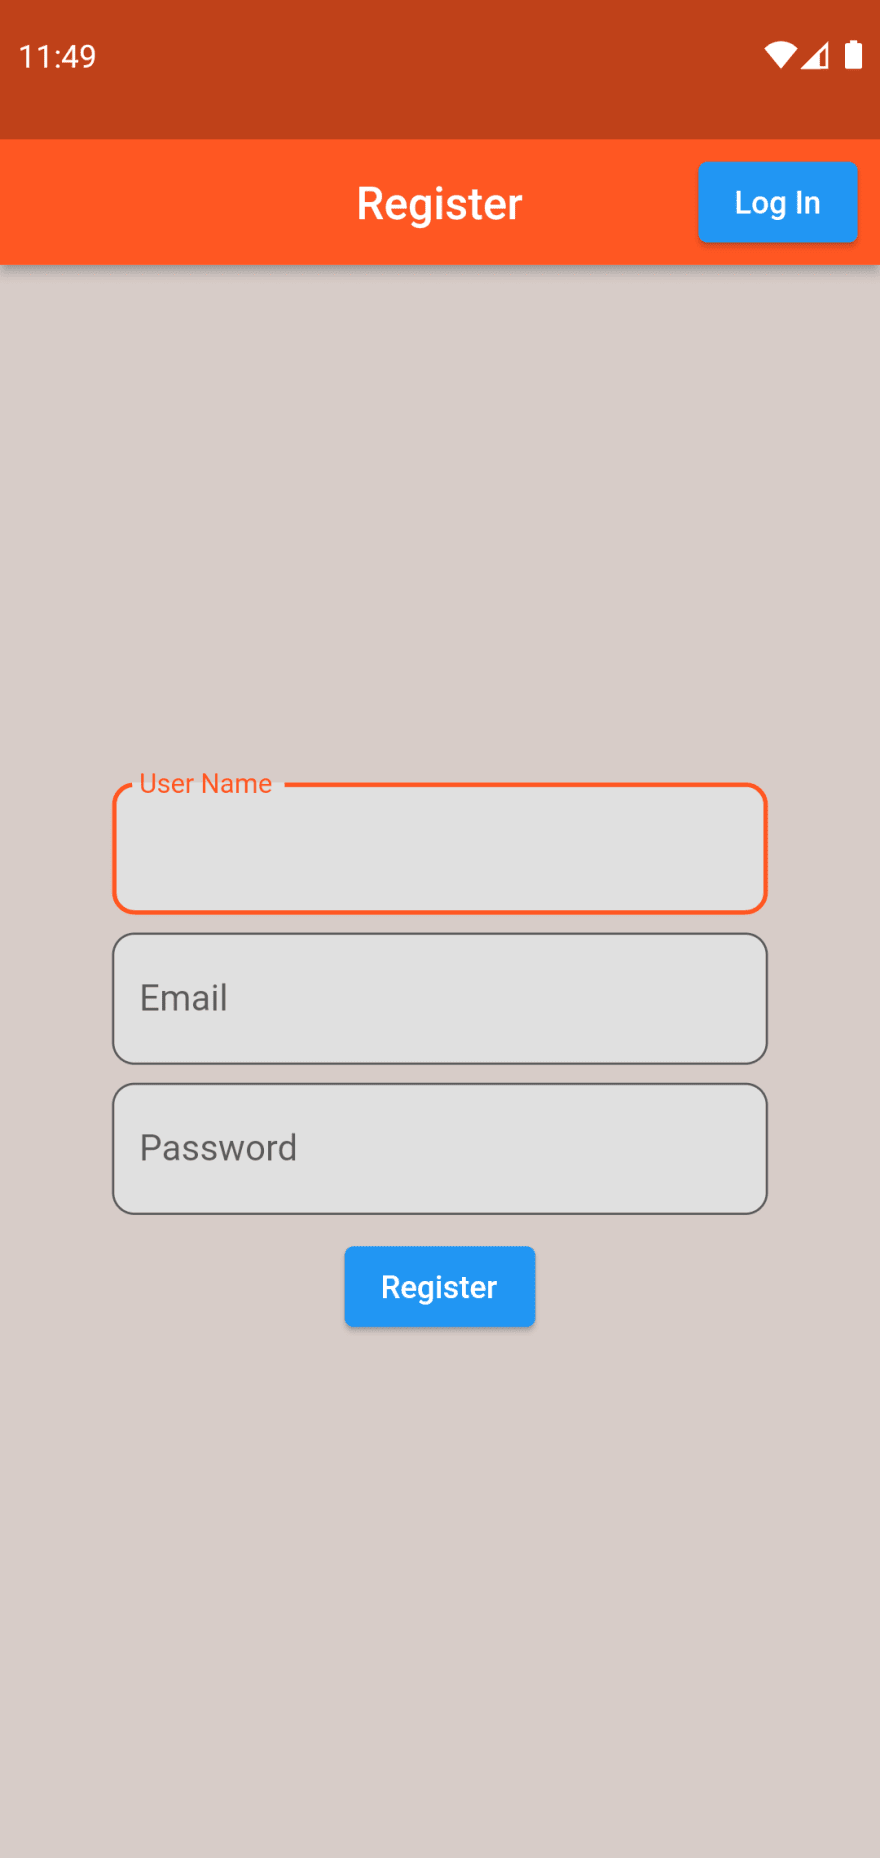
As for the RegisterScreen, we’ll have an app bar showing the title of the screen with a button to switch to the loginScreen. In the body, We’ll be taking the username, email, and password of the user and registering them on firebase using the register button.
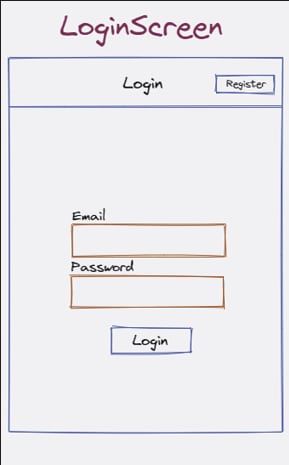
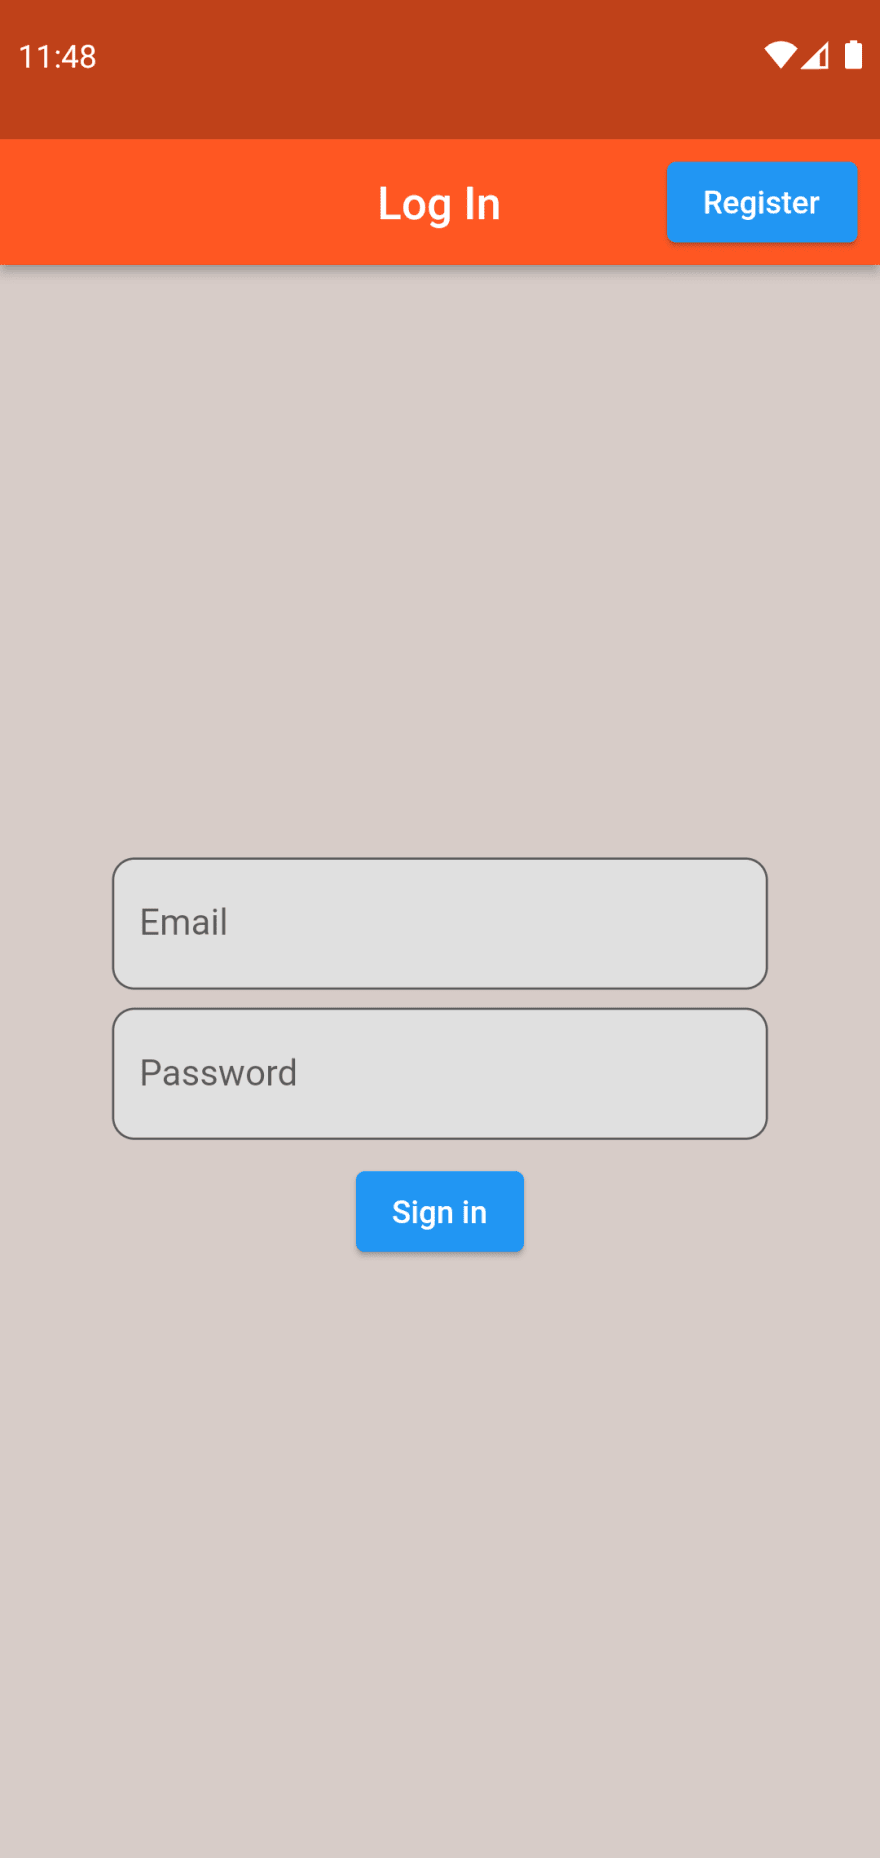
The LoginScreen is pretty much like the RegisterScreen.In this one,we’ll have an app bar showing the title of the screen with a button to switch to the RegisterScreen. In the body, We’ll be taking the email, and password of the user and sign them into the application (If they already have registered). If not, we’ll ask them to register first.
Nothing too fancy, right? Well, This is where the fun part begins. Let’s jump into the Flutter side of things now.
Starting off with the main.dart file:

Nothing to talk much about here, Just the usual firebase setup and the MyApp Widget in the main function that contains a Material Widget with some basic theme setup and routes setup. The initial routes return the Wrapper() widget responsible for showing relavant screens which we talked about earlier. Before we take about this Wrapper() widget, let’s take a look at the Login and the Register Screens. The code for the Register Screen looks like this:

For now, we’ll just ignore the onPressed function but will later talk about it when we will define the functions for Registering and Logging the User in for firebase. For the rest, we have a form with some basic validation in place for the formfields and a button to Register the user.
The Screen looks something like this:
The Login Screen code looks very similar to the Register screen code and it looks something like this:

Visually, the screen’s nothing too fancy and has two formfields now unlike the Register Screen which had three. Also, there’s a button below the formfields to log the user into the application and looks something like this:
Now we get to the main part, the part where we define the functions for the users to register and then log into the application. Before anything, Go to the firebase console and allow the Email and Anonymous Authentication Methods. Here’s how to do it:
go to Firebase Console
From the list of projects, select your project:

After choosing the project, Under build, choose Authentication
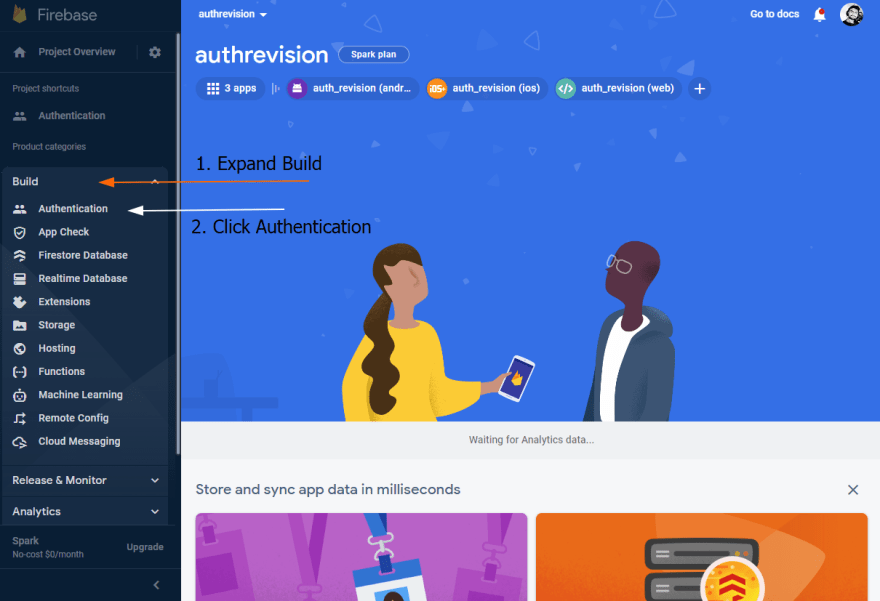
Under Sign-in methods, Click add a new Provider and choose Email/Password and Anonymous Sign-in or whatever other methods you fancy. We’ll be adding Email/Password and Anonymous Login for now. Just make sure that the methods you’re adding have their status enabled.

Now, we’re all set from Firebase Console and need to define the methods that take the credentials from the user and register them onto firebase and then log them into the application.
Conveniently, Firebase has built-in methods for basic authentications including one for anonymous sign-in and email/password sign-in. We’ll be using them to our help. Now, let’s define the methods in dart one by one.
After installing Firebase core and Firebase Auth packages, an instance of FirebaseAuth is exposed to us using which we can access the different firebase authentication methods. Let’s start off with the very basic AnonymousLogin function.
The Firebase equivalent of the function is called signInAnonymously which can be accessed through the FirebaseAuth instance that we talked earlier about as:

Using the FirebaseAuth instance, this function calls the signInAnonymously method and logs the User into our application.
Next, for the Email/Password Registering, the firebase function createUserWithEmailAndPassword comes in handy. The function requires two parameters. Yeap you guessed it right. The Email and password that we can pass through the constructor. The Function returns a UserCrendentials Object which has our Firebase User.

Coincidentally, my dart method has the same name as the firebase function but do keep in mind that those are two different methods.
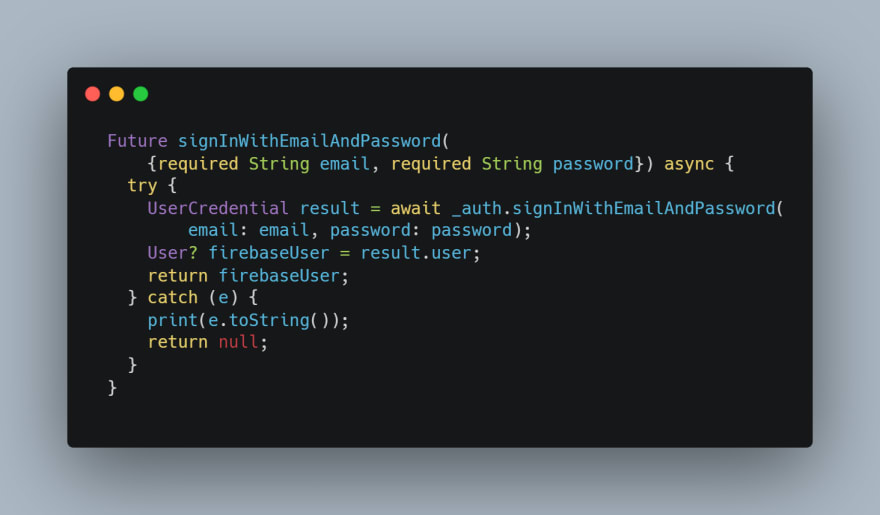
Now for the final Firebase Method, let’s take a look at the login function which thankfully is called signInWithEmailAndPassword.
The function, like the register user function, requires Email and Password as a parameter and returns a UserCredential which contains our firebase User. The code looks something like this:
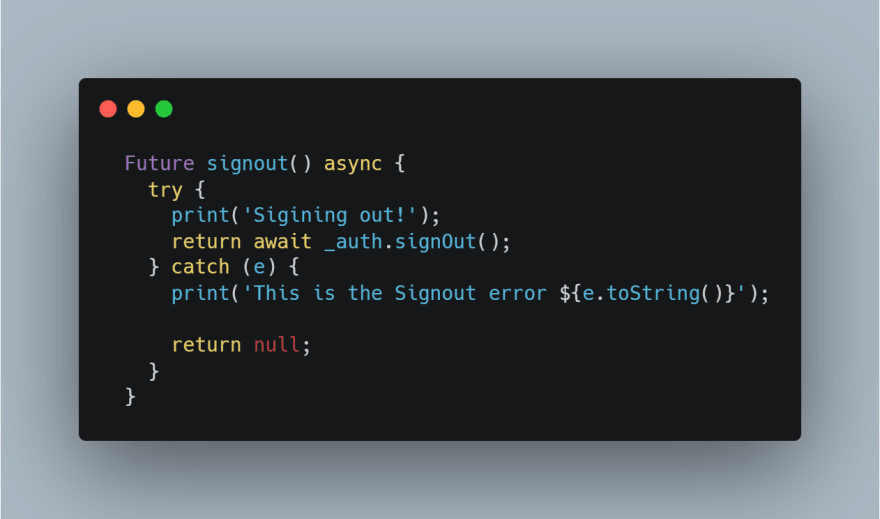
We’ve talked about Registering, Sign-in but what if the user wants to logout? Firebase got you covered there as well. The firebase function signout comes to handy there. It works like this:
Now that all is set in terms of functions, let’s talk about the onPressed Function that we skipped earlier. Since all the Firebase Functions return Futures meaning that they may take some time. We use async/await so to tell Dart that this particular function is supposed to take time to return something back. And once we get the value back, we know that its a Future of type dynamic so we store it in a variable and then use it to perform actions like showing the LoadingSpinner until we get a response back from the Future.
Aren’t we still missing something? Yes, indeed we are. Remember we talked, well, not really talked but mentioned the Wrapper widget and almost forgot it afterwards? Not really :’p
Let’s talk about why it's needed and why is it a significant part of our application. Reminding ourselves of the widget tree diagram we saw are the very beginning, we know that the Wrapper widget stands below the MyApp widget and above the homeScreen and the Login and the RegisterScreen.
But why is it so? To Answer that, let’s take a look at the code:
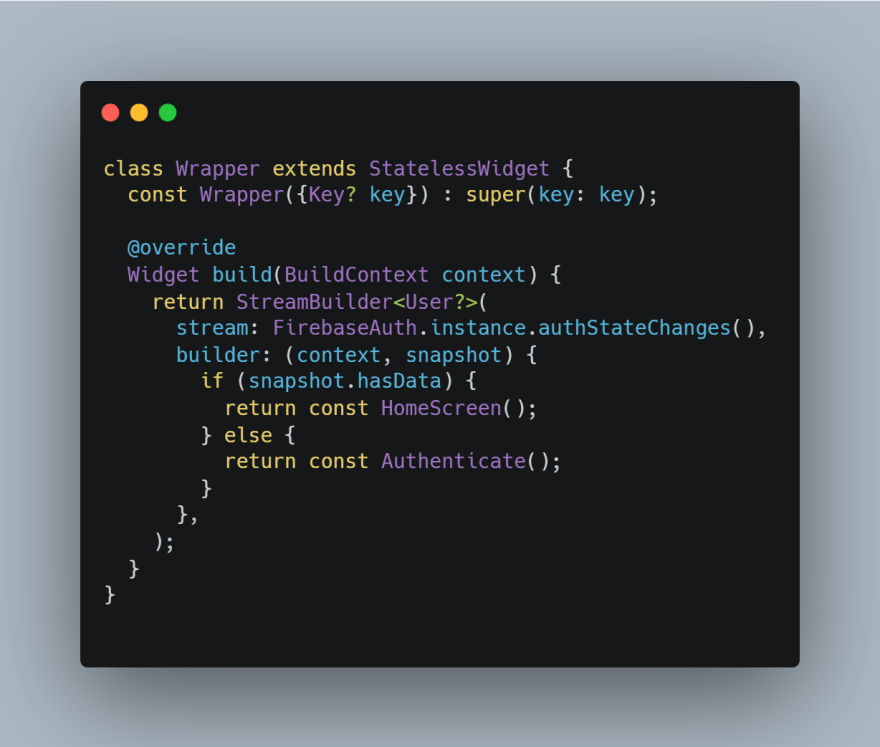
So, in very simple words, Streams are like continuous Futures. What I mean by it is that a Stream is a sequence of continuous asynchronous events. Unlike Futures, where we ask for the Future response, the Stream keeps on returning new responses back (if there are any). The StreamBuilder used here is just like *FutureBuilder but for Streams. The FirebaseAuth instance provides a stream called *authStateChanges** which as the name suggests provides the authentication changes stream. The StreamBuilder in the Wrapper Widget is listening to any changes in the authentication status and based on the current authentication status, it either shows the HomeScreen
or if the user logs out, shows the relevant Authentication Screen (Login / Register).
That’s all for now Folks! This is the first of many in the series. Thanks for reading this article ❤️
Clap 👏 If you learned something new today.
Feel free to post any queries or corrections you think are required ✔
Do leave feedback so I can improve on my content. Thank you! 😃
You can also Follow me on:
If you’re interested, here are some of my other articles:
Demystifying Dart: Execution Thread & Dart Call Stack
Flutter 3.3: What’s New?
Getting Started with Git and Github

Top comments (0)