In this part we will understand how to send notification from NodeJs server.
If you want to integrate with react then, check out here
Lets create a node server first.
I am guessing npm and node is already installed if not then Install using nvm
Initialize a NPM Project
npm init -y
Install dependencies
npm i express firebase-admin
Now lets generate a firebase private key for admin
Firebase Admin SDK private key
- Open firebase console
- Select the project (Use same if you are following from previous chapter, FCM with React)
- Open a project settings
- Go to service accounts
- Generate a new Key pair
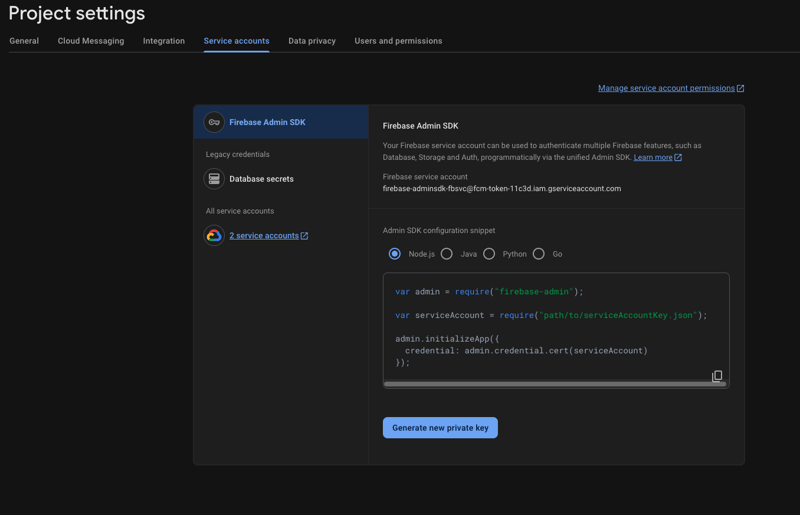
This action will download a JSON file.
Rename the file google-cloud-service-account.json for simplicity
Create a file app.js (Make sure you update entry point in package.json)
touch app.js
const http = require("http");
const express = require("express");
const queue = require("./services/queue");
const app = express();

const admin = require("firebase-admin");
const serviceAccount = require("./config/google-cloud-service-account.json"); // Make sure to provide a correct path

admin.initializeApp({
    credential: admin.credential.cert(serviceAccount),
});

const router = express.Router();

router.get("/", (req, res) => {
    res.send("Hello World");
});

app.use(router);

const server = http.createServer(app);

server.on("request", (req, res) => {
    console.log("Request received");
});

// We are not mentioning the host name here, so it will listen on all the available network interfaces
server.listen(3000, () => {
    console.log("Server is running on " + JSON.stringify(server.address().port));
});
This creates a server using express and http
Note - We have not used app.listen to create server instead http.createServer() to achieve more flexibility
Create a route to send notification
create user.routes.js
touch user.routes.js
Add this code
const express = require("express");
const messaging = require("../services/firebase");
const router = express.Router();

router.get("/user-action", (req, res) => {
    // User request comes for specific action

    //Once the action is performed, we can send the notification to the user

    // Here we are sending a notification to the specif this user with mentioned token
    const registrationToken = "REGISTRATION_TOKEN";

    const data = {
        title: "Hello from the server",
        body: "This is a test notification",
    };

    const message = {
        notification: {
            title: data.title,
            body: data.body,
        },
        token: registrationToken,
    };
    messaging
        .send(message)
        .then((response) => {
            console.log("Successfully sent message:", response);
            res.send("Notification sent");
        })
        .catch((error) => {
            console.log("Error sending message:", error);
            res.send("Error sending notification");
        });
    // res.send("Send notifications");
});

module.exports = router;
Update your app.js
const http = require("http");
const express = require("express");
const app = express();
const userRoutes = require("./user.routes");

const router = express.Router();

router.get("/", (req, res) => {
    res.send("Hello World");
});

app.use(router);
app.use("/users", userRoutes);

const server = http.createServer(app);

server.on("request", (req, res) => {
    console.log("Request received");
});

// We are not mentioning the host name here, so it will listen on all the available network interfaces
server.listen(3000, () => {
    console.log("Server is running on " + JSON.stringify(server.address().port));
});
Now lets add Registration Token of the client device
Create a device token
Follow these instruction to create a device token.
Replace the token with REGISTRATION_TOKEN in user.routes.js
Restart your server
Visit the url
http://localhost:3000/users/user-action and you will receive a notification at the client device.
You can find the entire working code here
Happy Coding


Top comments (0)