
As more and more businesses are moving their applications to the cloud, the need to automate the deployment and management of infrastructure has become increasingly important. One of the common tasks in cloud computing is setting up web servers on virtual instances, and managing them, which can be a tedious and error-prone task if done manually.
This is where automation tools like Terraform and Github Actions come in handy.
Terraform is an open-source infrastructure as code software tool that allows developers to manage their infrastructure using code, and is particularly useful for managing cloud resources such as AWS EC2 instances.
Github Actions, on the other hand, is a powerful continuous integration and continuous deployment (CI/CD) tool that can be used to automate the deployment of code changes to cloud environments.
In this article, I will teach you how to use Terraform and Github Actions to automate the installation of web servers(apache and nginx) on AWS EC2 instances. By automating this process, we can save time and reduce the risk of human error, while also allowing us to easily replicate our infrastructure across multiple instances.
Prerequisites
- Be familiar with AWS and it's services
- Understand how Github works
- Know what web servers are
- Familiarity with Terraform
Contents
- Setting up AWS and Terraform
- Creating the Github repository and setting up Github Actions
- Writing the Terraform code
I. Setting up AWS Access Key and Secret Key
To get started with automating the installation of web servers on AWS EC2 using Terraform and Github Actions, you need to set up an AWS account.
Creating an AWS account and setting up access keys
If you don't have an AWS account already, create an AWS account by visiting the AWS website and following the instructions to sign up.
Once you have an account, you will need to create an access key that Terraform can use to interact with your AWS account. To do this, go to the AWS console and navigate to the IAM service.

Under the "Access management" section on the left hand pane, select "Users" and create a new user. Give the user a name and choose "Programmatic access" as the access type. Next, assign the user to a group that has the necessary permissions or directly attach the permission policies necessary for managing EC2 instances, load balancers, and auto scaling, then create the user.

Finally, you will be prompted to download the access keys for the user. Keep these keys safe as they will be used to configure Github Actions and Terraform.
If you got stuck in any part, you should watch this short tutorial on how to create AWS access keys. You can also follow AWS guide on creating access keys here.
II. Creating the Github repository and setting up Github Actions
Once we have set up our AWS account, the next step is to create a Github repository for our project and set up Github Actions to automate the deployment of the web server on AWS EC2.
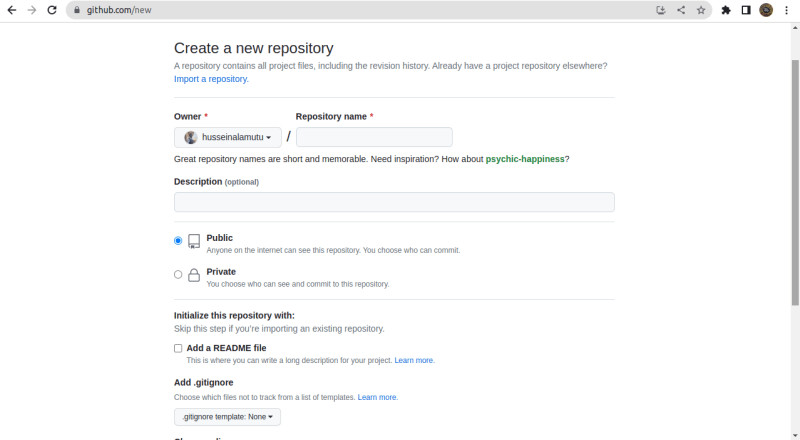
Creating a new Github repository for the project
Go to the Github website and sign in to your account. Create a new repository by clicking on the "New" button in the top right corner of the screen. Give your repository a name, choose any other settings that you prefer, and click on the "Create repository" button to create the repository.
Configuring Github Actions to automatically deploy the web server on AWS EC2
Github Actions allows us to automate various tasks in our repository, including the deployment of our web server on AWS EC2.
To set up Github Actions, go to the "Actions" tab in your repository and click on the "Set up a workflow yourself" button. This will allow you to create a new workflow file that defines the actions you want to perform.

In the workflow file, you can define the triggers for when the actions should be executed, such as on pushes to a specific branch or on a schedule. Then, you can define the steps that should be executed as part of the workflow.
For this example:
Define the triggers to be when you make a push to your main branch.
on:
  push:
    branches: main
Then, define a step to configure AWS credentials using the access keys you created earlier, and another step to run Terraform commands to deploy the web server on an EC2 instance.
# configuring AWS access keys
env:
  AWS_ACCESS_KEY_ID: ${{ secrets.AWS_ACCESS_KEY_ID }}
  AWS_SECRET_ACCESS_KEY: ${{ secrets.AWS_SECRET_ACCESS_KEY }}
For this part of the code to work, define the environment secrets that are required which is the values for the secret defined in the above github actions code.
Secrets are encrypted and can be securely stored in Github so that they can be used in your workflow without exposing sensitive information.
To do this, navigate to your Github repository for this task and click on the settings tab, then navigate to the secrets and variables tab in the left pane,

After that click on actions in the drop down menu from the secrets and variables tab, then click on the green button in the middle of the page, labelled "New repository secret"

This takes you to a new page to configure your secret environment variables used in your Github Actions workflow.

Using AWS_ACCESS_KEY_ID as the name, next, get the access key you got from AWS in step one, copy and paste into the Secret* box, and click on "Add secret", now repeat the same process for AWS_SECRET_ACCESS_KEY.
Configuring the job for the Github workflow to deploy the web server on an EC2 Instance
# configuring steps to be run, for terraform various commands
jobs:
  tf:
    runs-on: ubuntu-latest
    steps:
    - uses: actions/checkout@v3
    - uses: hashicorp/setup-terraform@v2
    - name: Terraform fmt
    id: fmt
    run: terraform fmt -check
    - name: Terraform Init
    id: init
    run: terraform init
    - name: Terraform Plan
    id: plan
    run: terraform plan
    - name: Terraform Apply
    id: apply
    run: terraform apply -auto-approve
Once you have defined your workflow, save the file and Github Actions will automatically start running the defined steps whenever the triggers are met(a push to the main branch). You can monitor the progress of your workflow in the "Actions" tab and view the logs to troubleshoot any issues that may arise.
With Github Actions configured, you now have an automated process for deploying web servers on AWS EC2 instances using Terraform, making it easier to manage your infrastructure and ensure consistent deployments across environments.
Note: Your final Github Actions code should look like this,
name: Terraform AWS

# setting up triggers
on:
  push:
    branches: main

# setting up the access key to aws-cli
env:
   AWS_ACCESS_KEY_ID: ${{ secrets.AWS_ACCESS_KEY_ID }}
   AWS_SECRET_ACCESS_KEY: ${{ secrets.AWS_SECRET_ACCESS_KEY }}

jobs:
  tf:
    runs-on: ubuntu-latest
    steps:
    - uses: actions/checkout@v3
    - uses: hashicorp/setup-terraform@v2
    - name: Terraform fmt
      id: fmt
      run: terraform fmt -check
    - name: Terraform Init
      id: init
      run: terraform init
    - name: Terraform Plan
      id: plan
      run: terraform plan
    - name: Terraform Apply
      id: apply
      run: terraform apply -auto-approve
III. Writing Terraform code
In this section I teach you how to write Terraform code to configure an EC2 instance and install a web server on it.
Writing Terraform code to configure the EC2 instance and install the web server:
To begin, create a main.tf file, where to define the resources that will be created. First, define the provider module in this case AWS provider, you can get it from the official terraform documentation.
terraform {
  required_providers {
    aws = {
      source  = "hashicorp/aws"
      version = "~> 4.0"
    }
  }
}

# Configure the AWS Provider
provider "aws" {
  region = "us-east-1"
}
Next, define the two ec2 instance, one for NGINX and the other one for Apache.
resource "aws_instance" "nginx" {
    ami = "ami-014d05e6b24240371"
    instance_type = "t2.micro"
    **user_data = file("nginx.sh")**
    tags = {
    Name  = "NGINX"
  }
}

resource "aws_instance" "apache" {
    ami = "ami-014d05e6b24240371"
    instance_type = "t2.micro"
    **user_data = file("apache.sh")**
    tags = {
        Name  = "APACHE"
    }
}
The resource block is used to define the type of resource you need terraform to provision for you in AWS, in this case aws_instance and the next label stands for an identifier, in case you need to use the resource in other parts of your code i.e "aws_instance.apache.instance_type*" or "aws_instance.nginx.ami"
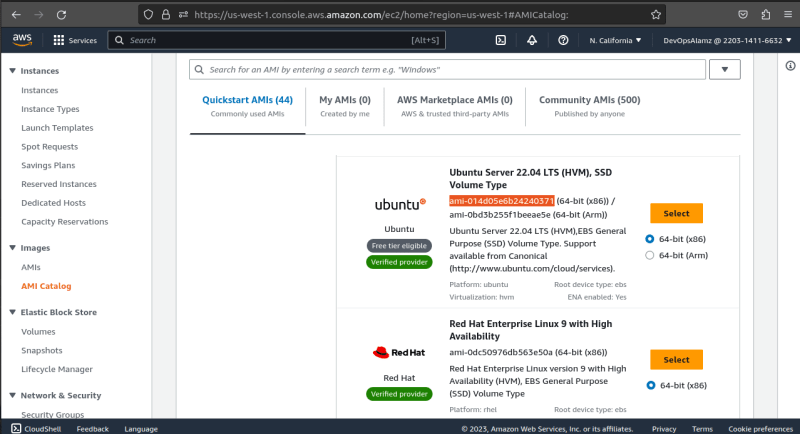
Next, to get the ami(amazon machine image) value for your main.tf instance resource configuration, navigate to EC2 dashboard on AWS and click on ami catalog under Images dropdown in the left pane, choose any ami id of your choice, copy and paste into your instance configuration, in this case I make use of an Ubuntu image which has a free tier.
instance_type is used to select the appropriate combination of CPU, memory and networking resource. The t2.micro instance type has an attached free tier, I recommend you use it. Learn more about instance type
user_data in the code is use to run a shell script that installs and configures nginx or apache. For this example, I created two files, apache.sh and nginx.sh with bash commands in the files to install both apache and nginx respectively.
Follow these steps to create your user data's file
Create a file with the name nginx.sh in your parent folder, copy and paste the below code.
#!/bin/bash

# install nginx
apt-get update
apt-get -y install nginx

# make sure nginx is started
service nginx start
Next, create another file with the name apache.sh in your parent folder, copy and paste the below code.
#!/bin/bash

# install apache
apt-get update
apt-get -y install apache2

# make sure apache is started
service apache2 start
Final note, your final main.tf file should look like this, you can also get access to the code here
terraform {
  required_providers {
    aws = {
        source = "hashicorp/aws"
        version = "~>4.0"
    }
  }
}

provider "aws" {
  region = "us-west-1"
}

resource "aws_instance" "nginx" {
    ami = "ami-014d05e6b24240371"
    instance_type = "t2.micro"
    user_data = file("nginx.sh")
    tags = {
    Name  = "NGINX"
  }
}

resource "aws_instance" "apache" {
    ami = "ami-014d05e6b24240371"
    instance_type = "t2.micro"
    user_data = file("apache.sh")
    tags = {
        Name  = "APACHE"
    }
}
With these resources defined, we can run "terraform init" to initialize our project, "terraform plan" to see what resources will be created, and "terraform apply" to create the resources on AWS.
The Github Actions Workflow created in section II contains the above mentioned commands, which will be triggered to run in succession when you git push to your repo's main branch.
Bonus: Using variables and modules to make the code more modular and reusable
As our infrastructure becomes more complex, it becomes more difficult to manage all the configuration options in a single file. To make the code more modular and reusable, we can use variables and modules.
Variables allow us to define values that can be passed into our Terraform code at runtime. We can define variables for the instance type, the key pair, and any other configurable settings.
variable "instance_type" {
  default = "t2.micro"
}

variable "key_pair" {
  default = "my-key-pair"
}
Modules, on the other hand, allow us to encapsulate groups of resources into reusable units that can be easily shared and reused across different Terraform projects. We can create a module for configuring an EC2 instance with a web server installed, including all of the necessary resources and configuration options.
module "web_server" {
  source = "./modules/web_server"

  instance_type = var.instance_type
  key_pair      = var.key_pair
}
In this example, we have created a module in the "modules/web_server" directory, which defines the resources and configuration options required for the web server. The module can be shared and reused across different Terraform projects, making it easier to manage and maintain the infrastructure.
In conclusion, writing Terraform code to configure an EC2 instance and install a web server is a powerful way to manage infrastructure in a declarative way. By using variables and modules, we can make our Terraform code more modular and reusable, allowing us to manage more complex infrastructure with ease.
That's it folks if you are interested in seeing more terraform task related to this you can check out my github .

Top comments (0)