![Cover image for From Zero To Hero: Front End Development Projects For Beginners[With Source Code]](https://media2.dev.to/dynamic/image/width=1000,height=420,fit=cover,gravity=auto,format=auto/https%3A%2F%2Fdev-to-uploads.s3.amazonaws.com%2Fuploads%2Farticles%2Fctyzm9ko1bw8x32orwch.jpg)
Welcome, fellow developers, to today's blog post where we will explore the world of simple web development projects that are ideal for beginners. Regardless of your age or technical background, these projects provide a playground for aspiring coders to grow their abilities and embark on a path to becoming a skilled programmer.
The Power of Building Front-End Projects:
Building projects is akin to playing the stock market. It requires an investment of time and effort, and while success is not guaranteed, the process serves as a valuable learning experience.
Building projects is a lot like embarking on a thrilling adventure. It requires dedication, effort, and a willingness to step outside of your comfort zone. However, the rewards that come from building front-end projects are immeasurable.
When you engage in building front-end projects, you are actively applying the knowledge you've acquired. By putting theory into practice, you solidify your understanding of concepts and develop problem-solving skills. Each project becomes an opportunity to explore new techniques, experiment with different approaches, and overcome challenges.
The beauty of front-end projects lies in their versatility. You have the freedom to choose projects that align with your interests, allowing you to create something meaningful and engaging.
Whether it's building a personal portfolio website, crafting a responsive landing page, or developing a dynamic JavaScript calculator, each project serves as a stepping stone on your journey to becoming a front-end development hero.
Building projects not only helps you refine your technical skills, but it also nurtures your creativity. As you tackle design decisions, implement interactive features, and polish the user experience, you gain a deeper appreciation for the artistry behind web development. It's an opportunity to showcase your unique style and leave a lasting impression on your audience.
Beginner Projects for front end Developers
Now, let's dive into the heart of the matter—the beginner projects that are both enjoyable and straightforward, suitable even for those with limited coding experience. These projects provide an opportunity to grasp essential front-end development concepts while making the learning process delightful.
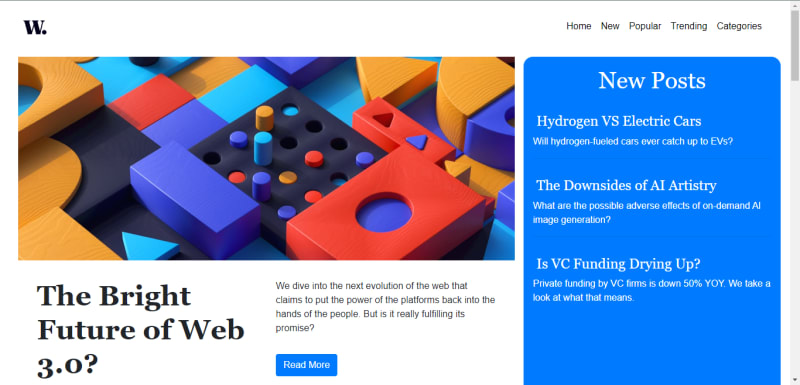
Project 1: Simple website
Prerequisites:
To build a simple website, you'll need the following prerequisites:
HTML: Understanding of HTML tags and structure to create the content and layout of the website.
CSS: Familiarity with CSS selectors, styles, and layout techniques to design and customize the website's appearance.
Basic Web Design Principles: Knowledge of fundamental web design principles, including visual hierarchy, typography, color theory, and user experience.
Description:
Building a simple website involves creating a digital presence to showcase information, products, or services in an accessible and user-friendly manner. Here's a breakdown of how you can approach building a simple website:
Planning and Content: Start by planning the purpose and goals of your website. Determine the target audience and define the content that you want to present to visitors. This could include text, images, videos, or other multimedia elements.
HTML Structure: Create the basic HTML structure for your website. Use HTML tags to define headings, paragraphs, lists, links, images, and other content elements. Structure the content using semantic HTML for better accessibility and search engine optimization.
CSS Styling: Apply CSS styles to enhance the visual appearance of your website. Use CSS selectors to target HTML elements and apply colors, fonts, spacing, and other visual properties. Create a cohesive design by considering typography, layout, and consistent styling across the website.
Layout and Navigation: Design the layout of your website to ensure a clear and intuitive user experience. Organize the content into logical sections and create a navigation menu to allow visitors to navigate between different pages or sections of your site. Consider using responsive design techniques to make your website mobile-friendly.
Interactive Elements: Enhance user engagement by incorporating interactive elements into your website. This can include contact forms, image sliders, buttons, accordions, or other interactive components that provide a dynamic and engaging experience for visitors.
Testing and Optimization: Test your website across different browsers and devices to ensure it displays correctly and functions properly. Optimize your website's performance by minimizing file sizes, optimizing images, and utilizing caching techniques. Test for accessibility to ensure your website is usable by people with disabilities.
Deployment and Domain: Choose a hosting provider and deploy your website to make it accessible on the internet. If you cannot afford to pay for a hosting plan, you can use vercel or netlify. They offer free hosting.
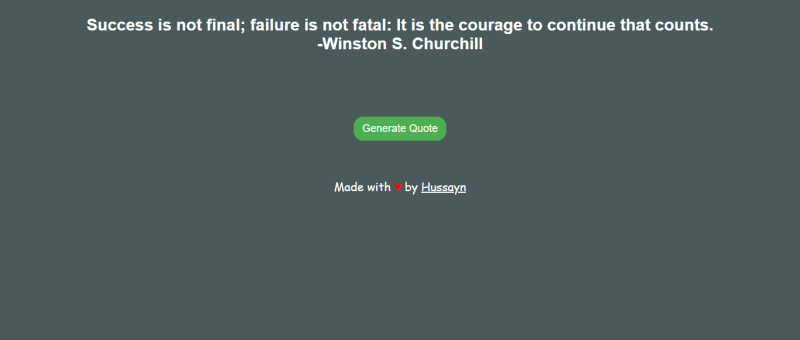
Project 2: Quote generator
Prerequisites:
Basic knowledge of HTML, CSS, and JavaScript.
Familiarity with HTML tags, CSS selectors, and JavaScript functions.
Understanding of DOM manipulation and event handling in JavaScript.
Text editor or Integrated Development Environment (IDE) for coding.
Web browser for testing and previewing the project.
Description:
The quote generator project involves creating a web application that displays random quotes to the user when a button is clicked. It's a great project for beginners to practice their HTML, CSS, and JavaScript skills while learning about event handling and dynamic content manipulation.
The project can be divided into the following steps:
HTML Structure: Begin by setting up the HTML structure. Create a container element to hold the quote and a button for generating new quotes. Add appropriate IDs or classes to the necessary elements for easy access using JavaScript.
CSS Styling: Apply CSS styling to make the quote generator visually appealing. Customize the font, colors, and layout to match your desired design. You can experiment with different CSS properties to achieve the desired look and feel.
JavaScript Functionality: Write JavaScript code to handle the button click event and generate random quotes. Define an array or object to store a collection of quotes. When the button is clicked, randomly select a quote from the collection and display it on the web page.
Dynamic Content Update: Use JavaScript to update the quote content dynamically. Access the necessary HTML elements using selectors or IDs and modify their text or
innerHTMLproperty with the selected quote.Optional: Additional Features: Once you have the basic functionality working, you can enhance the quote generator with additional features. For example, you can add a "Share" button to allow users to share quotes on social media, include animations for a more interactive experience, or provide the ability to filter quotes based on categories.
Throughout the project, test your code in a web browser to ensure everything is functioning as expected. You can also customize the project by adding your own styling or modifying the functionality to suit your preferences.
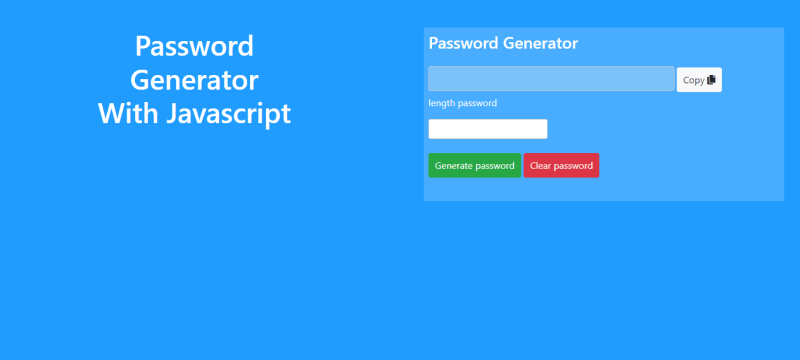
Project 3: Password Generator
Prerequisites :
To build a password generator, you should have a basic understanding of the following:
HTML: Knowledge of HTML is necessary to create the user interface elements such as input fields, buttons, and display areas.
CSS: Familiarity with CSS will enable you to style the user interface and make it visually appealing.
JavaScript: Proficiency in JavaScript is essential as it will be used to generate random passwords, handle user interactions, and manipulate the DOM to update the password display.
Description:
A password generator is a tool that creates random and secure passwords based on certain criteria. Here's a breakdown of how a password generator can be built:
HTML Structure: Start by creating the necessary HTML structure to display the password generator interface. This typically includes input fields for specifying password length, check boxes for selecting character types (e.g., uppercase letters, lowercase letters, numbers, symbols), a button to generate the password, and an area to display the generated password.
JavaScript Functionality:
Write a function that generates the password based on the user's specified criteria. This function will typically include the logic to randomly select characters from the desired character types and combine them to form the password.Handle user interactions, such as retrieving the selected options (password length and character types) from the HTML elements and passing them to the password generation function.
Update the DOM to display the generated password in the designated area.Randomization and Secure Passwords:
Utilize JavaScript's random number generation capabilities to ensure the password generated is random and secure.
Consider using built-in functions likeMath.random()and array manipulation methods to randomly select characters from the chosen character types.Optional Features:
Allow users to customize the password criteria further, such as setting a minimum requirement for each character type or excluding certain characters.Implement additional functionalities like a "Copy to Clipboard" button to make it easier for users to use the generated password.
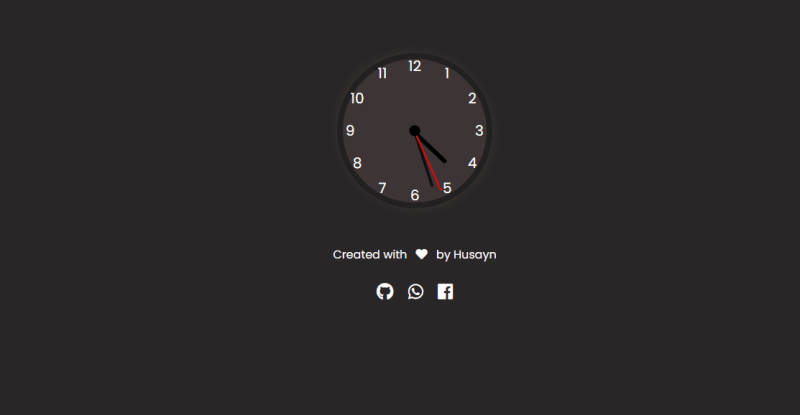
Project 4: Analog Clock
To build an analog clock, you'll need the following prerequisites:
Basic HTML: Familiarity with HTML tags and structure.
Basic CSS: Understanding of CSS selectors, positioning, and transformations.
Basic JavaScript: Knowledge of JavaScript functions, intervals, and DOM manipulation.
Description:
Building an analog clock involves creating a visual representation of the current time using HTML, CSS, and JavaScript. Here's a breakdown of how you can approach building an analog clock:HTML Structure: Start by creating the basic HTML structure for the clock. Typically, this would include a container element for the clock and nested elements for the clock face, hour hand, minute hand, and second hand.
CSS Styling: Apply CSS styles to position and style the clock elements. Use CSS properties like position, transform, and border-radius to create the circular clock face and hands. Adjust the size, colors, and styling to achieve the desired visual appearance.
JavaScript Logic: Write JavaScript code to update the position of the clock hands based on the current time. Use JavaScript's Date object to get the current time, and calculate the corresponding angles for the hour, minute, and second hands. Update the CSS transform property of each hand to rotate them accordingly.
Clock Animation: To make the clock continuously update and display the correct time, use JavaScript's setInterval() function to repeatedly call a function that updates the clock hands. By specifying an appropriate interval (e.g., every second), the clock will continuously update to reflect the current time.
Responsive Design: Consider making the analog clock responsive by using CSS media queries. Adjust the size and layout of the clock elements for different screen sizes to ensure it displays well on various devices.
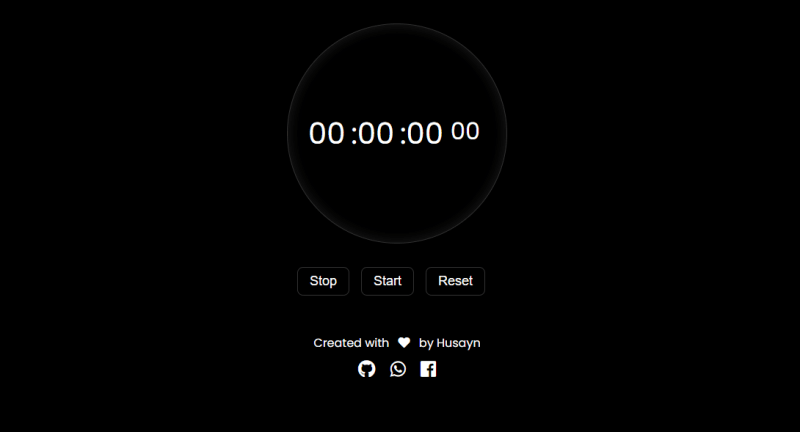
Project 5: Stopwatch
Prerequisites:
To build a stopwatch using JavaScript, you'll need the following prerequisites:
HTML: Understanding of HTML tags and structure to create the stopwatch display and UI elements.
CSS: Familiarity with CSS selectors, styles, and layout techniques to design and customize the stopwatch's appearance.
JavaScript: Knowledge of JavaScript functions, DOM manipulation, and event handling.
Description:
Building a stopwatch involves creating a functional timer that can measure elapsed time accurately. Here's a breakdown of how you can approach building a stopwatch using JavaScript:
HTML Structure: Create the HTML structure for your stopwatch. Use HTML tags to define the stopwatch display, control buttons, and other necessary elements. Structure the layout using appropriate HTML elements and classes.
CSS Styling: Apply CSS styles to enhance the visual appearance of your stopwatch. Use CSS to customize the colors, fonts, and layout of the stopwatch interface. Apply styles to the display area, control buttons, and other elements to create a visually appealing design.
JavaScript Logic: Write JavaScript code to handle the stopwatch's functionality. Implement functions to start, stop, and reset the stopwatch. Use JavaScript's
setInterval()andclearInterval()methods to measure elapsed time accurately and update the display accordingly.Button Interactivity: Add event listeners to the control buttons to capture user input. When the start button is clicked, start the stopwatch timer by invoking the appropriate functions. Similarly, clicking the stop button should pause the timer, and the reset button should reset the timer to zero.
Time Calculation: Use JavaScript's Date object or the
performance.now()method to measure elapsed time accurately. Calculate the time difference between the start and stop events and update the stopwatch display accordingly.Display Formatting: Format the stopwatch display to show the elapsed time in a user-friendly manner. Convert milliseconds to hours, minutes, seconds, and milliseconds as needed. Ensure that the display format is consistent and easy to read.
Responsive Design: Consider implementing responsive design techniques to ensure your stopwatch functions well on different screen sizes and devices. Use CSS media queries to adjust the layout and styling for optimal user experience.
Testing and Refinement: Test your stopwatch thoroughly, checking for accurate timekeeping and proper display. Debug any issues or errors that may arise during testing. Refine the design and functionality based on user feedback and testing results.
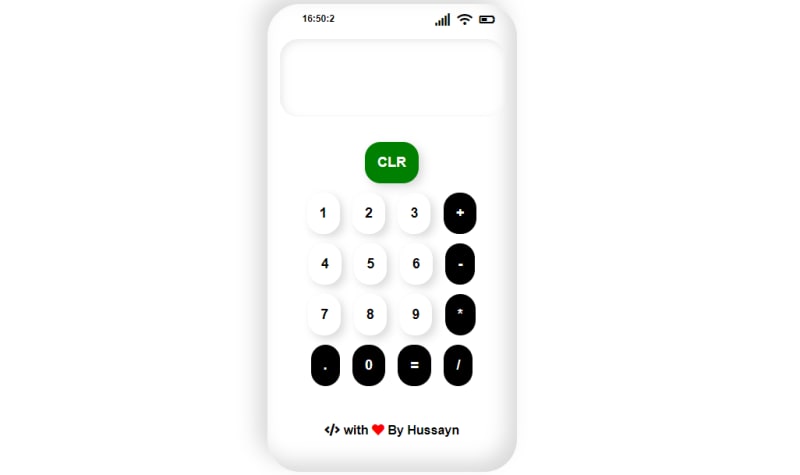
Project 6: Simple Javascript calculator
Prerequisites:
To build a simple JavaScript calculator, you'll need the following prerequisites:
HTML: Understanding of HTML tags and structure to create the calculator interface.
CSS: Familiarity with CSS selectors, styles, and layout techniques to design and customize the calculator's appearance.
JavaScript: Knowledge of JavaScript functions, DOM manipulation, and event handling.
Description:
Building a simple JavaScript calculator involves creating a functional calculator interface that can perform basic arithmetic operations. Here's a breakdown of how you can approach building a simple JavaScript calculator:
HTML Structure: Create the HTML structure for your calculator. Use HTML tags to define the calculator display, buttons, and other necessary elements. Structure the layout using appropriate HTML elements and classes.
CSS Styling: Apply CSS styles to enhance the visual appearance of your calculator. Use CSS to customize the colors, fonts, and layout of the calculator interface. Apply styles to the buttons, display area, and other elements to create an appealing design.
JavaScript Logic: Write JavaScript code to handle the calculator's functionality. Implement functions to perform arithmetic operations, handle user input, and update the display accordingly. Use JavaScript's addEventListener() method to handle button clicks and trigger the appropriate actions.
Button Interactivity: Add event listeners to the calculator buttons to capture user input. When a button is clicked, retrieve the button value and perform the corresponding operation or update the display accordingly. Use JavaScript to handle decimal numbers, clear the display, or evaluate the final result.
Responsive Design: Consider implementing responsive design techniques to ensure your calculator functions well on different screen sizes and devices. Use CSS media queries to adjust the layout and styling for optimal user experience.
Testing and Refinement: Test your calculator thoroughly, checking for accurate calculations and proper display. Debug any issues or errors that may arise during testing. Refine the design and functionality based on user feedback and testing results.
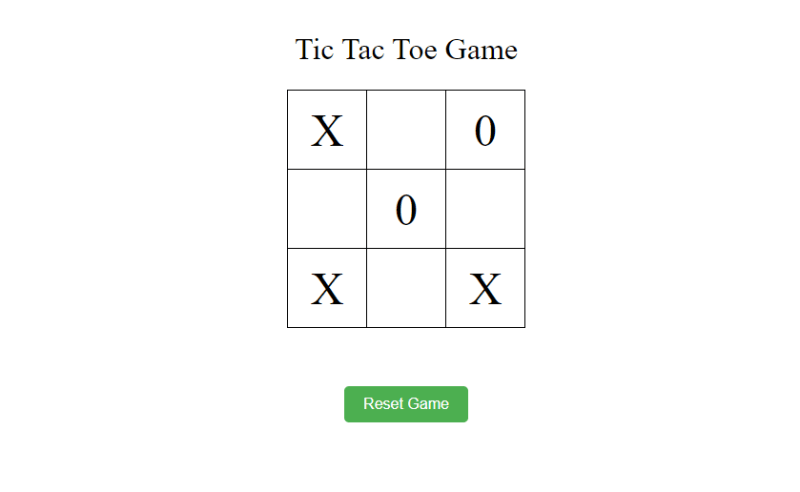
Project 7: Tic Tac Toe Game
Prerequisites:
To build a Tic Tac Toe game, you'll need the following prerequisites:
HTML: Familiarity with HTML tags and structure to create the game board and UI elements.
CSS: Understanding of CSS selectors, styles, and layout to visually design the game.
JavaScript: Knowledge of JavaScript functions, arrays, DOM manipulation, and event handling.
Description:
Building a Tic Tac Toe game involves creating a playable game board where two players take turns marking X and O symbols until one of them wins or the game ends in a draw. Here's a breakdown of how you can approach building a Tic Tac Toe game:
-
HTML Structure: Begin by creating the basic HTML structure for the game board. Use a combination of
elements or an HTML table to represent the grid of cells for the Tic Tac Toe board. CSS Styling: Apply CSS styles to visually design the game board and UI elements. Use CSS to set the dimensions of the cells, customize the appearance of X and O symbols, and style the game status display.
JavaScript Logic: Write JavaScript code to handle the game logic. Create data structures to represent the game board state, track player turns, and handle win conditions. Implement functions to update the board, check for a winning combination, and determine the game's outcome.
User Interaction: Add event listeners to the game cells to handle player moves. When a player clicks on an empty cell, update the board state, display the corresponding symbol, and check for a win or draw. Allow players to take turns until the game is won or ends in a draw.
Game Outcome Display: Implement a display mechanism to show the game outcome. Update the UI to inform players when someone wins, the game ends in a draw, or it's the next player's turn. Optionally, provide a restart button to allow players to play again.
Optional Enhancements: You can further enhance the game by adding features like player names, score tracking, a timer, or an AI opponent for single-player mode. These enhancements can make the game more engaging and customizable.
Conclusion
building front-end projects is an excellent way to enhance your coding skills and embark on a journey from zero to hero in the world of web development. Regardless of your technical background, beginner projects provide an opportunity to grasp essential concepts while enjoying the learning process.
We explored various beginner-friendly projects, such as a password generator, analog clock, tic-tac-toe game, and a simple website. These projects not only allow you to practice your coding skills but also serve as tangible proof of your progress as you create functional and visually appealing applications.
Remember, the path to becoming a skilled front-end developer requires practice and hands-on experience. The more you immerse yourself in building projects, the closer you get to achieving your goal. Don't be afraid to experiment, make mistakes, and learn from them. Every project you undertake adds to your knowledge and expertise.
With the right prerequisites in place, such as HTML, CSS, and JavaScript skills, you have a solid foundation to embark on these projects. By following the guidelines, planning your approach, and staying dedicated, you can build impressive projects that showcase your abilities.
So, what are you waiting for? Start your coding journey today with these beginner projects and let your creativity flourish. With each project, you'll gain confidence, problem-solving skills, and a deeper understanding of front-end development.
Remember, the path from zero to hero is about the dedication, passion, and willingness to learn. Embrace the power of building projects, and before you know it, you'll transform into a front-end development hero!
Happy coding!
My name is Hussaini Ahmed, I am a front end developer. I also write about front end languages, frameworks and latest technologies. I’d loved to hear your thought on this article. Feel free to drop a comment below or reach out to me via:

Top comments (0)