This article was originally written by Aestimo Kirina on the Honeybadger Developer Blog.
In this tutorial, you'll learn how to deploy a dockerized Ruby on Rails 7 app on Amazon's Elastic Cloud using Fargate. We will learn what Fargate is and how it makes the deployment of containerized applications relatively seamless.
After completing this tutorial, you'll know how to perform the following:
- Dockerize a simple Rails application.
- Push your code to Amazon's Elastic Container Repository (ECR).
- Setup a PostgreSQL database using Amazon's RDS service.
- Configure an Elastic Container cluster.
- Deploy your Rails app to production using Fargate.
Prerequisites
- An AWS account. If you don't have one, sign up here.
- AWS CLI, Docker, and Docker Compose installed on your development machine.
Dockerizing a Simple Rails App
We'll start by creating a simple Rails 7 app, which we'll use throughout this tutorial. You can grab the example app here or use your own to follow along.
Open the app in your favorite editor and create a
 in the root directory. Then, edit the file with the following:


```dockerfile
FROM ruby:3.1.2-slim-bullseye AS app

WORKDIR /app

RUN apt-get update \
  && apt-get install -y --no-install-recommends build-essential curl libpq-dev \
  && rm -rf /var/lib/apt/lists/* /usr/share/doc /usr/share/man \
  && apt-get clean \
  && useradd --create-home ruby \
  && chown ruby:ruby -R /app

USER ruby

COPY --chown=ruby:ruby bin/ ./bin
RUN chmod 0755 bin/*

ARG RAILS_ENV="production"
ENV RAILS_ENV="${RAILS_ENV}" \
    PATH="${PATH}:/home/ruby/.local/bin" \
    USER="ruby"

COPY --chown=ruby:ruby --from=assets /usr/local/bundle /usr/local/bundle
COPY --chown=ruby:ruby --from=assets /app/public /public
COPY --chown=ruby:ruby . .

ENTRYPOINT ["/app/bin/docker-entrypoint-web"]

EXPOSE 8000

CMD ["rails", "s"]
In a nutshell, the instructions we specify in the Dockerfile will define the environment in which our app will run.
Next, we'll use Docker compose to build everything into an image that can be deployed.
For the purposes of this article, we won’t go into the details of what each line is doing, as it would require an entirely separate tutorial. Instead, you can check out this one, which should give you a quick heads up.
With the Dockerfile completed, you can go on to the next step of orchestrating the image using Docker compose.
Using Docker compose, you can specify the structure of your app's container or multiple containers and how they communicate with each other, as well as databases and background jobs.
Again, we won't go too much into the details of Docker compose. For this tutorial, create a new file in the root of the app called
 with it's contents set to look like this:


```yaml
x-app: &default-app
  build:
    context: "."
    target: "app"
    args:
      - "RAILS_ENV=${RAILS_ENV:-production}"
      - "NODE_ENV=${NODE_ENV:-production}"
  depends_on:
    - "postgres"
    - "redis"
  env_file:
    - ".env"
  restart: "${DOCKER_RESTART_POLICY:-unless-stopped}"
  stop_grace_period: "3s"
  tty: true
  volumes:
    - "${DOCKER_WEB_VOLUME:-./public:/app/public}"

services:
  postgres:
    deploy:
      resources:
        limits:
          cpus: "${DOCKER_POSTGRES_CPUS:-0}"
          memory: "${DOCKER_POSTGRES_MEMORY:-0}"
    env_file:
      - ".env"
    image: "postgres:14.4-bullseye"
    restart: "${DOCKER_RESTART_POLICY:-unless-stopped}"
    stop_grace_period: "3s"
    volumes:
      - "postgres:/var/lib/postgresql/data"

  redis:
    deploy:
      resources:
        limits:
          cpus: "${DOCKER_REDIS_CPUS:-0}"
          memory: "${DOCKER_REDIS_MEMORY:-0}"
    env_file:
      - ".env"
    image: "redis:7.0.2-bullseye"
    restart: "${DOCKER_RESTART_POLICY:-unless-stopped}"
    stop_grace_period: "3s"
    volumes:
      - "redis:/data"

  web:
    <<: *default-app
    deploy:
      resources:
        limits:
          cpus: "${DOCKER_WEB_CPUS:-0}"
          memory: "${DOCKER_WEB_MEMORY:-0}"
    healthcheck:
      test: "${DOCKER_WEB_HEALTHCHECK_TEST:-curl localhost:8000/up}"
      interval: "60s"
      timeout: "3s"
      start_period: "5s"
      retries: 3
    ports:
      - "${DOCKER_WEB_PORT_FORWARD:-127.0.0.1:8000}:8000"

  worker:
    <<: *default-app
    command: "bundle exec sidekiq -C config/sidekiq.yml"
    entrypoint: []
    deploy:
      resources:
        limits:
          cpus: "${DOCKER_WORKER_CPUS:-0}"
          memory: "${DOCKER_WORKER_MEMORY:-0}"

  cable:
    <<: *default-app
    command: "puma -p 28080 cable/config.ru"
    entrypoint: []
    deploy:
      resources:
        limits:
          cpus: "${DOCKER_CABLE_CPUS:-0}"
          memory: "${DOCKER_CABLE_MEMORY:-0}"
    ports:
      - "${DOCKER_CABLE_PORT_FORWARD:-127.0.0.1:28080}:28080"

volumes:
  postgres: {}
  redis: {}
Using the
 file, we've defined an environment for our app, which includes the PostgreSQL database and Redis.

It is worth noting that, depending on the services your particular app will require, the contents of your Docker compose file will change.

Now, we're ready to spin up a database for our containerized app. Use the

 ```docker-compose run web rails db:setup```

 to set up the database and run migrations.

Then, run

 ```docker-compose up```

 to spin up the container and run the app on [localhost:8000](localhost:8000).

For the time being, we have successfully created a dockerized Rails app on our development machine.

Next, we’ll set things up on AWS, starting with pushing our app image to Amazon's Docker image registry, Elastic Container Registry (ECR).

First, however, we'll need an IAM user with proper access rights.

## Setting Up an IAM User with ECS Access

Log into your AWS console home (as a root user) and create a new IAM user with the following permissions:

-

 ```AmazonEC2ContainerRegistryFullAccess```


-

 ```AmazonECS_FullAccess```


In the security credentials tab, choose the type "Access key", as this will grant your newly created user a key/secret, which we'll use in the AWS CLI tool.

## Create an ECR Repo

Using our newly created CLI user, enter the command below to create a new container repo on the AWS ECR:


```bash
aws ecr create-repository --repository-name <username>/<repo-name>
This should return a response like the one shown below. Take particular note of the repo URL, as we'll use it in the upcoming steps.

Pushing a Docker Image to ECR
At this point, you have a new image repo on ECR. The next step is to get our locally built image onto ECR, which will involve the following:
- Building our image.
- Tagging our image.
- Authenticating to ECR.
- Pushing the image to ECR.
Building an Image
We want to ensure that we are using the latest version of our built app image. Run the command below to generate one:
docker build -t production .
Tagging an Image
Tagging our image ensures that we push to the correct repo URL at all times. Additionally, since using ECR requires that we are authenticated at all times, run the command below to do so:
docker login -u AWS -p $(aws ecr get-login-password --region <YOUR AWS REGION>) XXXXXXX.dkr.ecr.us-east-1.amazonaws.com
This will result in a
Login succeeded
message:

Docker Push to ECR
With that, push your Docker image to the ECR repo:
docker push XXXXX.dkr.ecr.us-east-1.amazonaws.com/<REPO NAME>
If successful, the command results in something like the following:

If you log into your AWS console, under ECR repositories, you should see your newly pushed image listed:

We have now successfully pushed a Docker image to the ECR service. What’s next?
Setting Up a PostgreSQL Database on AWS RDS
Since our app will likely use a database, this step involves setting up a PostgreSQL database on AWSs RDS service.
First, log into your AWS console and head over to the RDS dashboard. From there, click on the
DB instances
link:

Then, create a PostgreSQL database, making note of the following settings:

We make the database public so that we're able to run migrations from our development machine. All the other highlighted settings are default, but you can edit them as needed.
After creating your database, you should see it listed in your RDS database list:

We are getting ready to deploy our image, but first, I’ll provide a brief introduction to ECS and Fargate.
Introducing Amazon's Elastic Container Service (ECS) and Fargate
Amazon’s Elastic Container Service AWS is a fully managed service that allows you to deploy, manage, and scale containerized applications on Amazon's cloud infrastructure.
Fargate is Amazon's serverless compute engine that lets you run application containers (like the one we built in the first part of this tutorial) without worrying too much about the underlying server infrastructure.
By combining both ECS and Fargate, you get the benefit of deploying and scaling your app containers on Amazon's proven infrastructure without the headache of manually provisioning servers or managing them.
Deploying a Container with ECS Fargate
Before deploying our container, let's get familiar with the major components that make up the deploy process:
- ECS clusters: Simply put, these are grouped resources, usually services and tasks. Once a cluster is configured, you can deploy containers on it using task definitions.
- Task definitions: Task definitions are where you specify the resources required for a single or multiple Docker containers. These resources include how much memory a container will use, networking and security groups, and so forth.
- Tasks: A task is an instance where these container definitions are specified.
Additionally, here’s a high-level overview of what we'll need to set up to get our containerized app running:
- Create a task definition.
- Create a cluster where our task definitions will run.
- Run a task on the cluster we setup.
Next, we’ll get started with creating a task definition.
Creating a Task Definition
Go to the ECS dashboard and click on the task definitions link on the left-side menu:

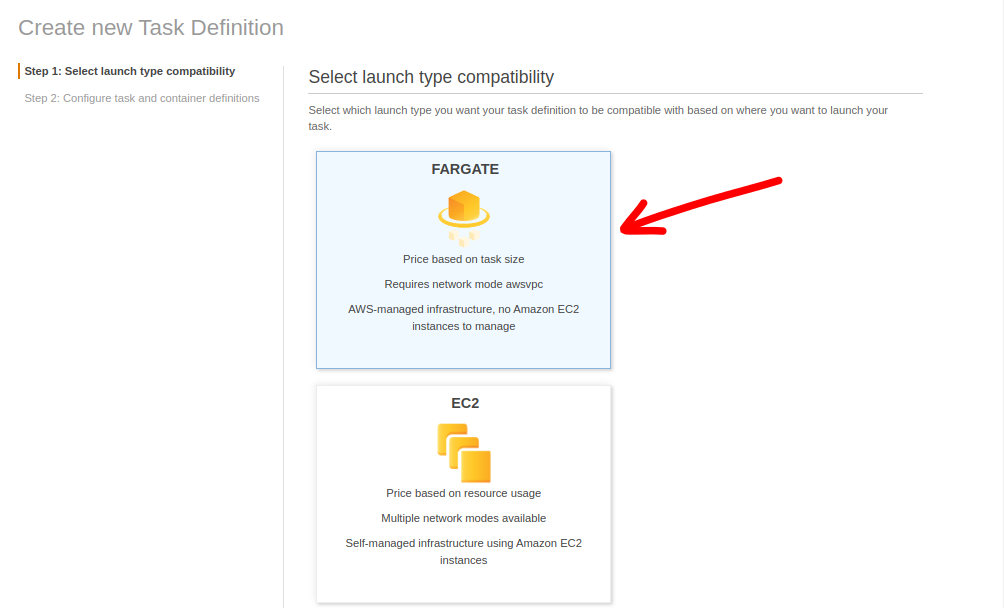
In the window that opens, click on
Create new Task Definition
. Then, select the
deployment option and hit "Next".
This should bring you to the task definition page, where you can define your task:
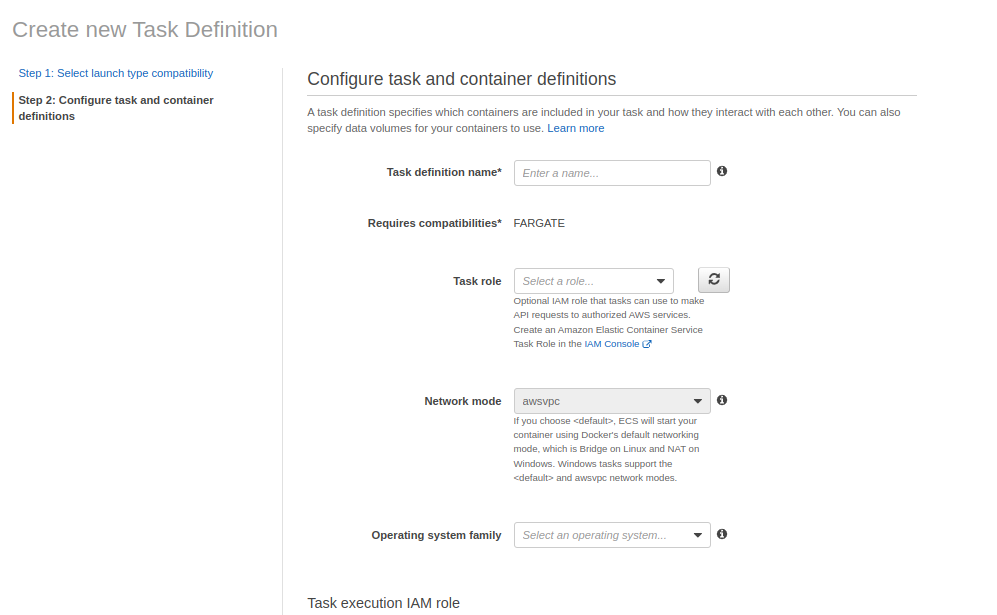
Here, and for the purposes of keeping our tutorial relatively simple, we'll stick to defaults as much as possible. To begin with, set the "Task Definition Name" to something relevant. In our case, we'll use "Web", as this task definition defines the services that will run our "web worker".
Next, we'll set up the "Task Memory" and "Task CPU" as "0.5GB" and "0.25vCPU", respectively.
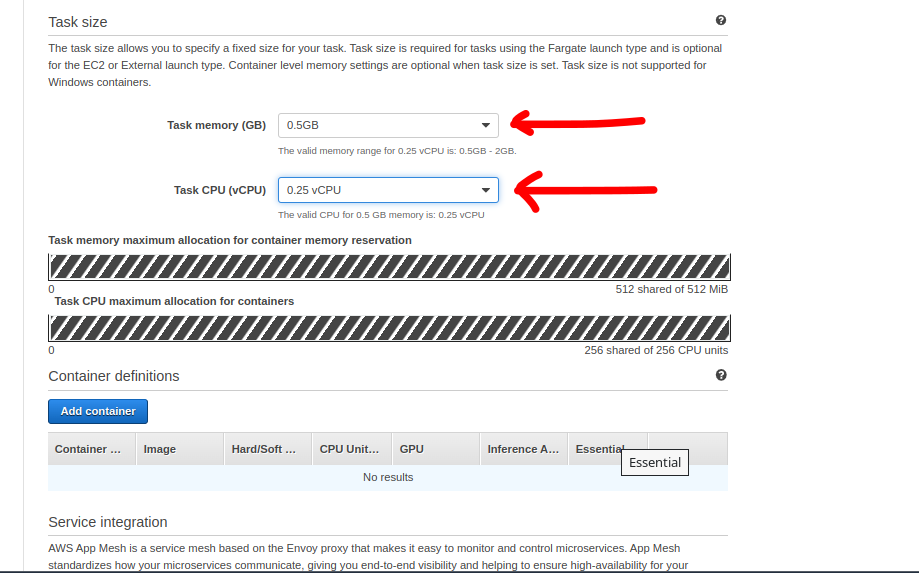
With that done, it's time to add a container. Clicking on the
```Add Container```
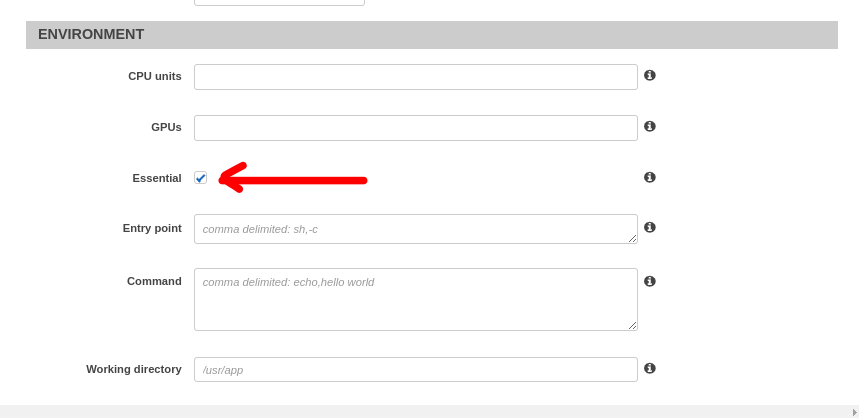
button opens up a modal with a bunch of fields. Let's go through the ones that matter for the purposes of our tutorial:
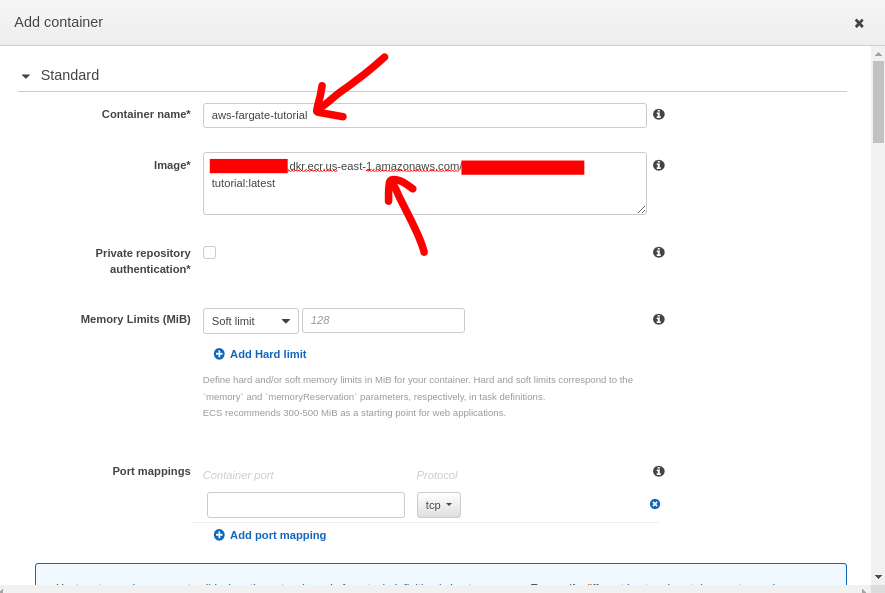
Here, we are defining our container with a container name and setting the image URI, which is the Docker image we pushed to ECR earlier. Ensure that you add the tag name you chose when you pushed it; in our case, note the ":latest" tag added to the end of the URI definition.
In the "Advanced container configuration" section, under "Environment", double-check that the "Essential" option is selected.
Next, we’ll cover the environment variables. The screenshot below shows a typical setup (yours could vary depending on the type of app you are deploying):
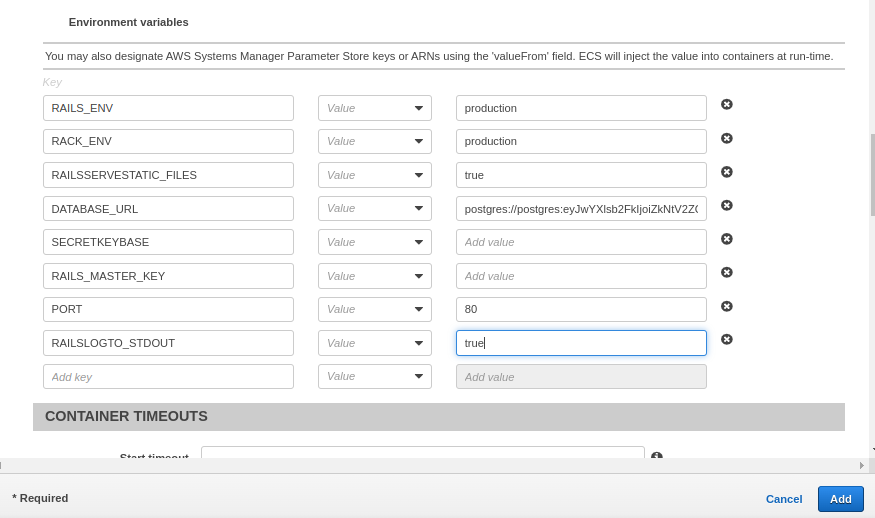
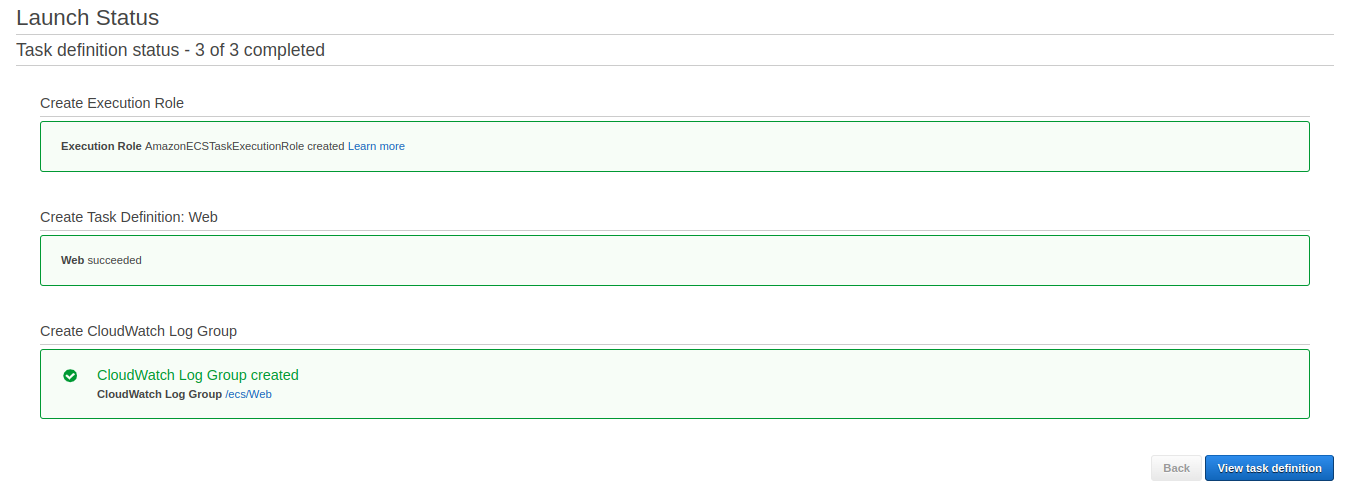
With your environment variables added, click on "Add" to add your container to the Task Definition, and then "Create" at the bottom of the Task Definition page to create it. Afterward, you'll see a screen showing that the task definition was created successfully.
With our task definition created, let's work on creating our first cluster.
## Creating a Cluster
On the ECS dashboard, select
```Clusters```
under "Amazon ECS" (not to be confused with the "Clusters" under "Amazon EKS", which are for running Kubernetes containers).
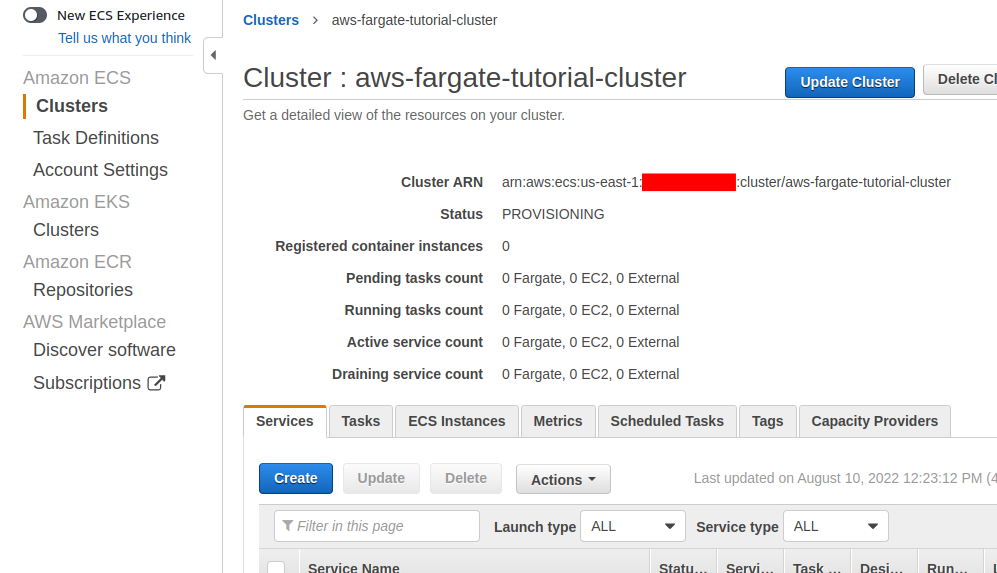
In the window that opens, select the "Networking only" option since this is the one that works with the Fargate deployment service and click on "Next".
Enter a name for your cluster and leave the "Create VPC" option unchecked, and then click on "Create". You should then see a similar screen as the one shown below (when you click on "View Cluster"):
## Running a Task and Viewing the Rails App
On the ECS dashboard, click on the
```Task Definitions```
, which will take you to a page containing all your task definitions.
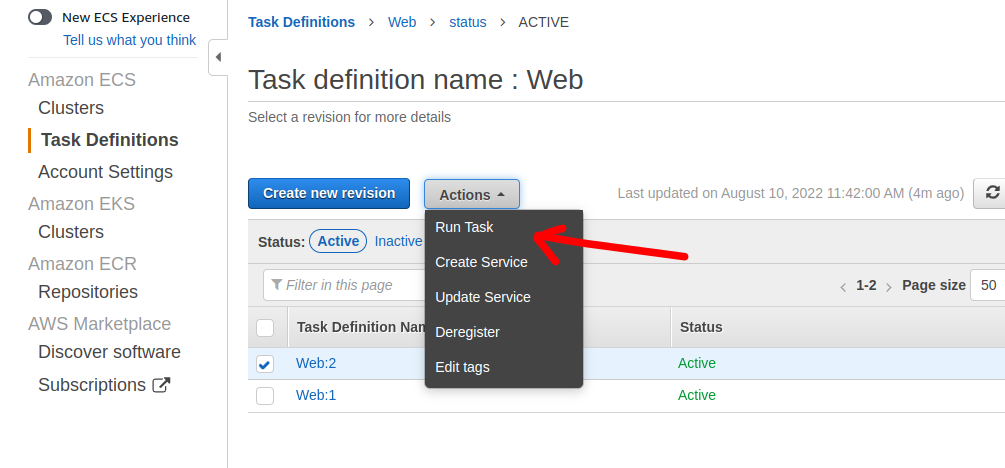
Select your newly created task definition, and under the "Actions" drop-down button, select "Run Task":
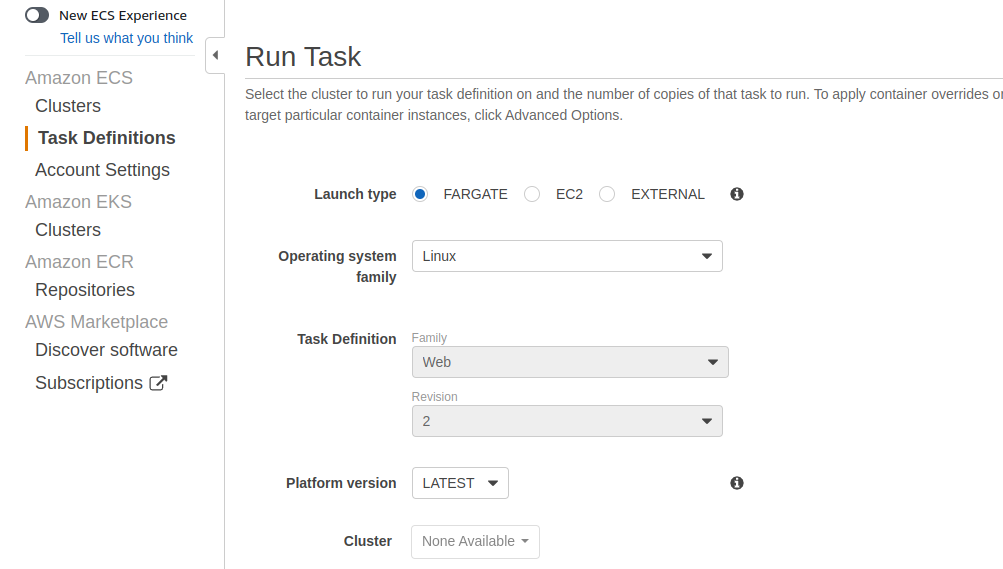
Another window opens up, where you'll need to define the cluster to run your task (according to the task definition you specified).
The general options we input for our containerized Rails app are as follows (see screenshots below):
- Launch type: "Fargate"
- Operating system family: "Linux"
- Number of tasks (to run): 1
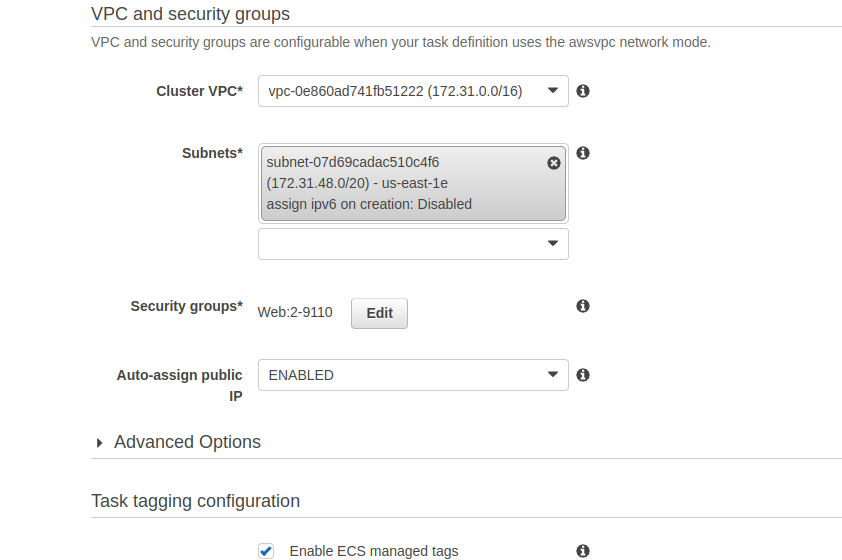
Then, for "VPC and Security groups", select the available default VPC, and for the subnet, select one that's available in your default region.
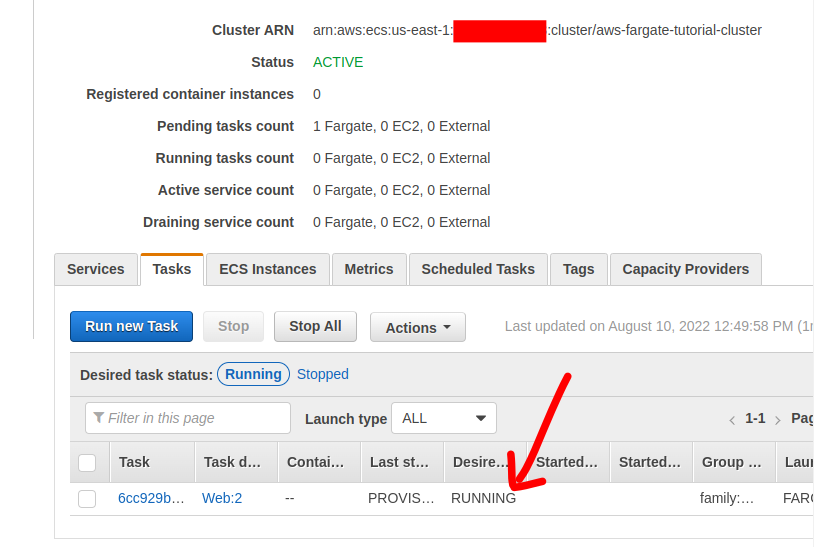
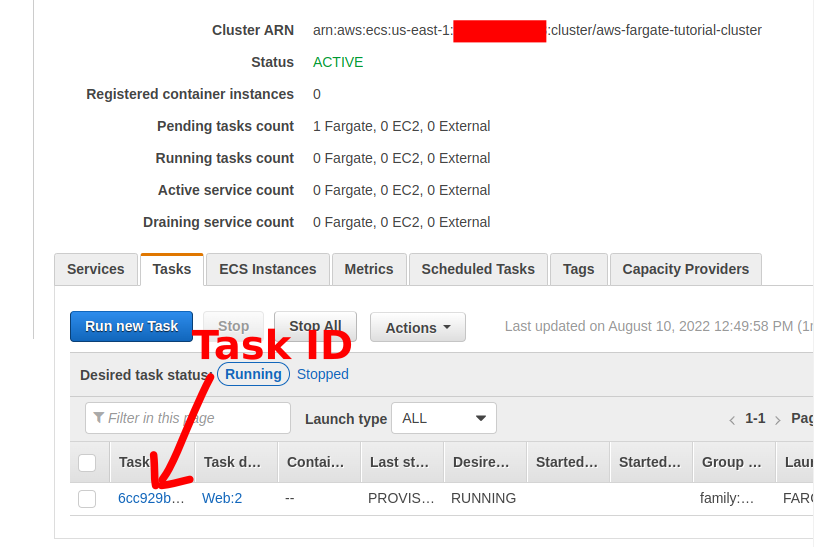
Now, hit "Run Task" to run the task. If you are successful, you should see a screen like the one below:
## Viewing the App
With our Task running, click on the Task ID on the Task view:
On the window that opens, scroll down to the Networking section and click on "ENI Id" link:
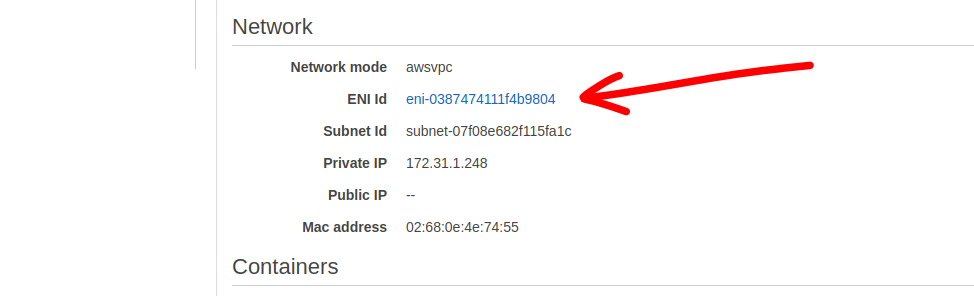
This will bring you to a page similar to the one below:
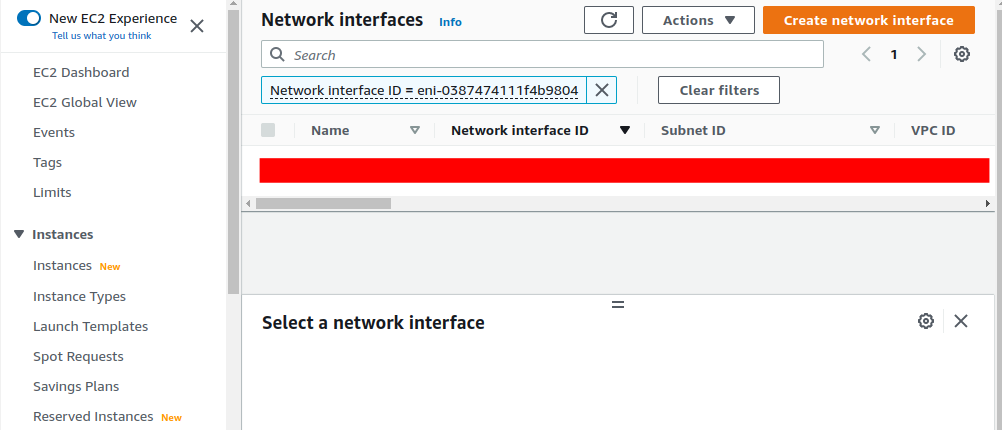
Then, on the "IPv4 Public IP" column, you should see an IP address where your app is now available.
## Conclusion
Using AWS ECS and Fargate is just one of the deployment methods available to Rails developers. When implemented correctly, this method allows you to scale your app deployment to hundreds, even thousands of containers without worrying too much about the server infrastructure. The downside is that there's a lot of configurations to do.

Top comments (1)
Seems you need to fix the parts of the post that are markdown style instead of readable text.