As promised in the previous post, today I will show you how you can host the font that Subreply CSS used (which is Route 159) locally for your project, and use them with Subreply.
Step 1: Download the font
Go to the website of Route 159, then click on the Download button.
After that, the zip file containing the fonts should start installing.
Step 2: Extract the font
After the installation was done, go to the folder containing the font, then unzip the zip file.
If you are using the terminal, use the command unzip <filename>, e.g. unzip route159_110.zip.
If you are using Windows, you can read this article from Microsoft.
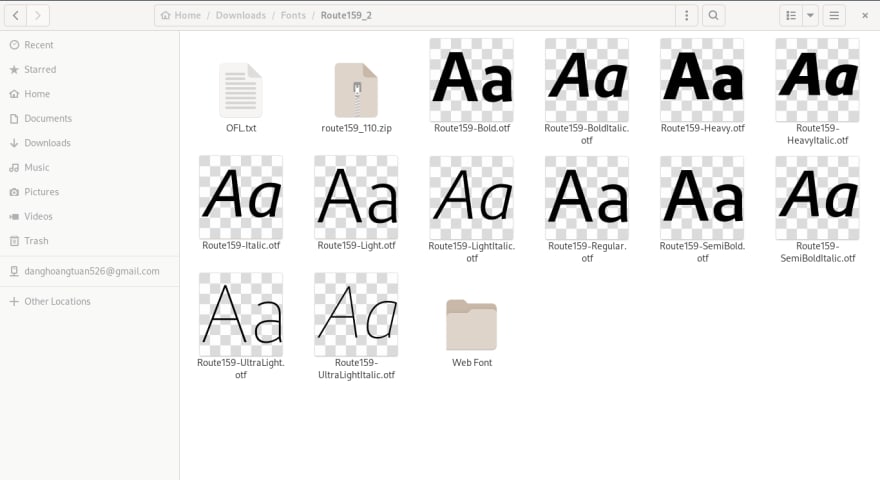
After unzipping, your fonts folder should look like this:
Step 3: Move the fonts file to your project
After extracted all the fonts, we need to move them into your project.
Go to the directory Web Fonts, then:
- If you are using the terminal, move the file
Route159-Bold.woffandRoute159-Regular.woffto your project.
mv Route159-Bold.woff <your-project>
mv Route159-Regular.woff <your-project>
- If you are using Windows, open your project's folder in another window, then drag the file
Route159-Bold.woffandRoute159-Regular.wofffrom the fonts folder to your project's folder.
Step 4: Modify the CSS
Finally, we need to directly modify the CSS, so that it will work with our local fonts.
First, opening the CSS file containing Subreply CSS, using your favorite editor.
Then, using the Find and Replace feature of your editor, replace the following text with their corresponded text:
-
https://files.catbox.moe/gt6un3.wofftoRoute159-Regular.woff -
https://files.catbox.moe/outwck.wofftoRoute159-Bold.woff
Save the file, and your fonts should start working!
Discuss on HN | Tweet this post |
Have questions or feedback? Email me
If you feel like the screenshot is from 2010 or something, then it's because I don't do image editing that well. This is my very first times using Krita and GIMP, so the quality isn't that good :)


Top comments (0)