In this tutorial, we’ll explore installation and configuration of Hyper-V Server 2019 operating system. You’ll see how to create a virtual machine, recover data from a Hyper-V Server physical disk, from a virtual machine drive, and how to convert a virtual dynamic hard disk into a fixed-size one.

Hyper-V Server 2019 is a free operating system by Microsoft for hardware virtualization that lets you create and run virtual machines, each of them working as a full-featured computer with its own operating system and programs.
With Hyper-V, you can create as many virtual machines as you want, and have them running various operating systems, and do it on a physical Windows server. Hyper-V’s hardware resources and computing power let you isolate the guest operating system of the virtual machine from the server’s operating system which guarantees its uninterrupted work.
There are two versions of Hyper-V:
Hyper-V Server – an autonomous server that only contains a Windows hypervisor (Hyper-V).
And Windows Server with Hyper-V – an autonomous computer controlled by Windows Server operating system, where Hyper-V is enabled.
Now I’ll show you how to configure an autonomous Hyper-V Server containing only a Windows hypervisor.
Installing Hyper-V Server 2019

An ISO image of Hyper-V Server 2019 can be downloaded from the Microsoft official website. To download the image, log in to your account, and the ISO download link will become active. For the download to start, fill in these fields.

I recommend choosing the English version as it will make the configuration process easier, help you avoid errors, and let you fix possible errors more quickly.

When the download is complete, you need to create a bootable drive, or boot from this image in any other way possible.
YouTube:
The installation process is typical and looks like the installation of Windows 10 – just follow the wizard’s directions. There are hardly any peculiarities in installing Hyper-V.
YouTube:
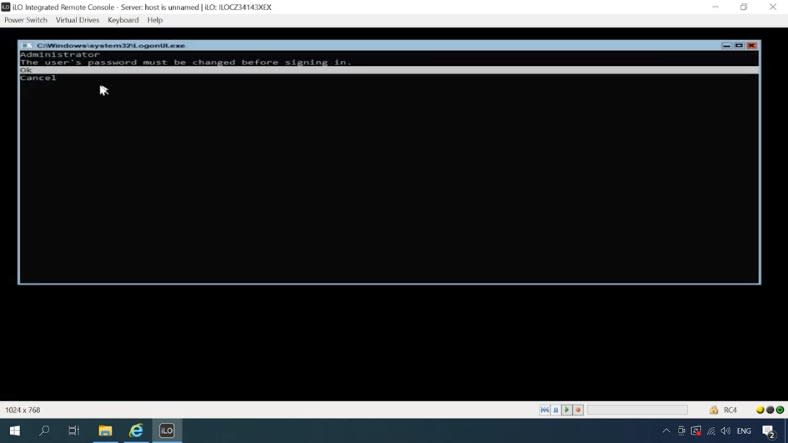
When the process is over, the operating system will ask you to change the administrator’s password. As you enter it, the hypervisor console appears.
Hyper-V Server doesn’t have the Windows graphical interface we have all got used to. Many settings will require using the Command Prompt.

Finding your way through Hyper-V Server settings
To change the operating system settings, you have two windows to work in, sconfig.cmd and the standard Command Prompt.
Initial configuration can be performed with the management console.
The first item on this menu lets you connect a server to the domain or workgroup.
Now change the server name – choose a name that is both short and informative, because you’ll be using it often during the configuration process. Agree to restart.

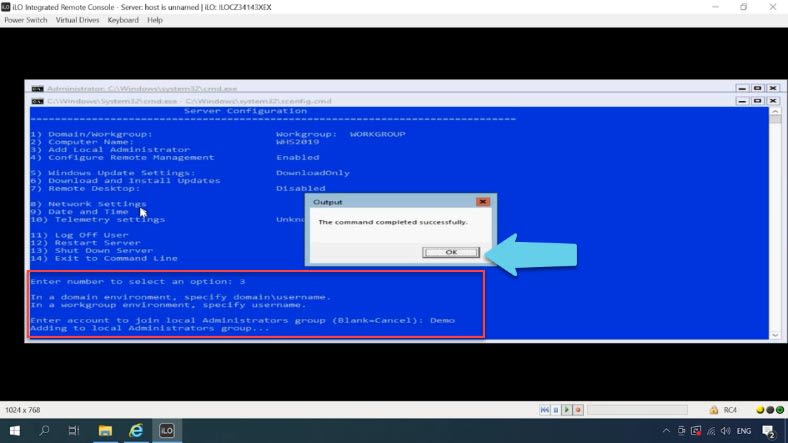
The next item lets you add one more administrator. Give the name, and then the password.
Another important thing to configure is to enable remote access to this computer. When you enable this option, you’ll be able to control your server remotely with Server Manager, MMC and PowerShell consoles, connect to it with RDP, check its availability with ping, and so on…

The fifth item is Windows Update settings.
After that, you can install available updates.
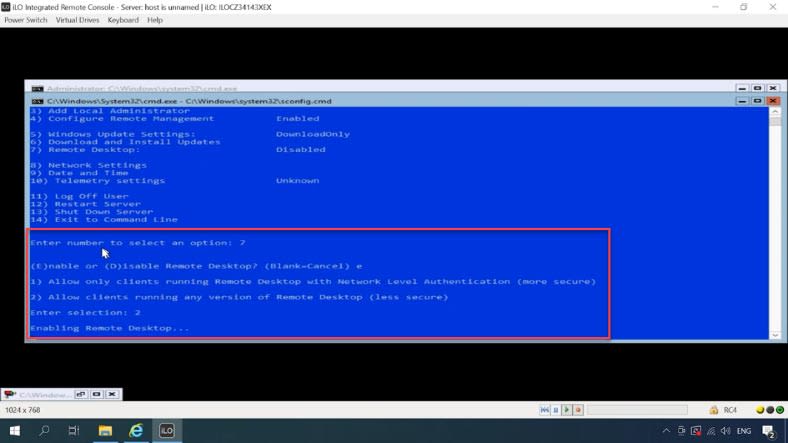
There is one more important thing – enable RDP access. Type E to enable it, and 2 for all clients.
The next item is network settings. To select a specific adapter, type its index – in my case, it is 3. Now press 1, set a static IP address (by pressing S), enter IP address, subnet mask and default gateway. Then 2 – set DNS servers. When this configuration is over, type 4 to return to the main menu.

Set the date and time.
The last one is telemetry settings. Hyper-V doesn’t let you disable it, so select the mode you prefer. I choose the first option, Security.

That’s all about primary configuration, now let’s move on to connection settings.
Configure connection to Hyper-V
To manage a server with Hyper-V Manager, you’ll need a computer with Windows 10.
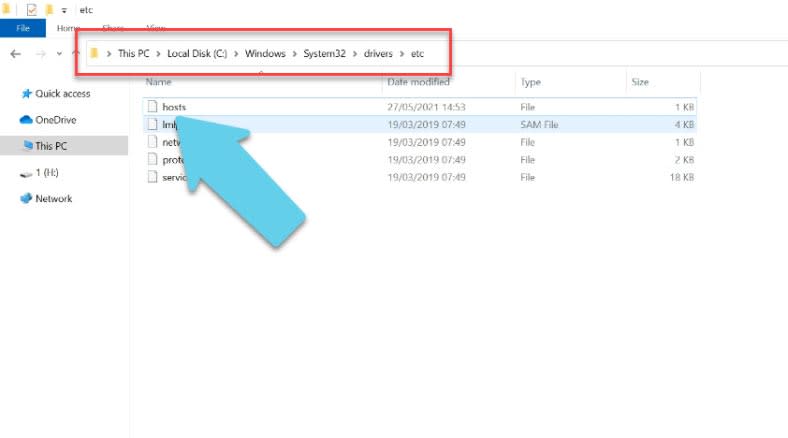
To establish a connection, you should set the host name for the server on the client computer. Find and edit the file “hosts” on the Windows 10 computer. Add the IP address, press Space, type the name of the Hyper-V server. This is how it looks like:
192.168.1.111 WHS2019
The account on the client computer should differ from the Hyper-V administrator account. Now you need to save your account data which is used to connect to the hypervisor. Launch the Command Prompt as administrator on the client computer and type this command:
cmdkey /add:server name /user:administrator name /pass:administrator’s password

In my case, I type this:
cmdkey /add:WHS2019 /user:Administrator /pass:123456
It gives the server name, administrator name, and password.
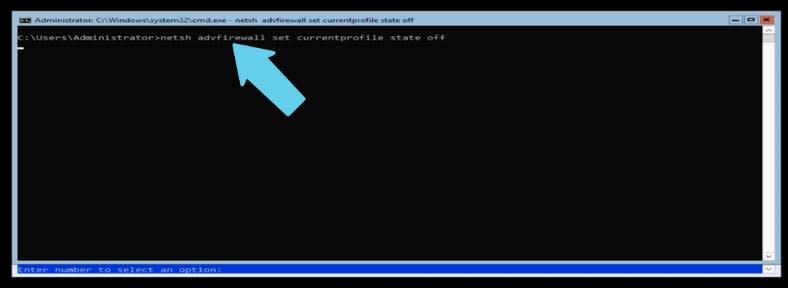
Configuring firewall in Hyper-V Server
By default, a firewall is enabled for the hypervisor to block any external connections. You should either disable it completely by running the following command:
netsh advfirewall set currentprofile state off
Or add several permissions for remote management. Here are some commands to be typed in PowerShell. You can run this tool from the Command Prompt.
Type - powershell
powershell
And then run this:
Set-NetFirewallRule -DisplayGroup 'Windows Management Instrumentation (WMI)' -Enabled true -PassThru
Set-NetFirewallRule -DisplayGroup 'Remote Event Log Management' -Enabled true -PassThru
Set-NetFirewallRule -DisplayGroup 'Remote Volume Management' -Enabled true -PassThru

Now use the “ping” command to check the server availability by its name. Launch the Command Prompt as administrator on the client computer and type “ping” followed by the server name:
Ping WHS2019

The server can be pinged all right, so let’s move on.
Start PowerShell as administrator and run this command:
winrm quickconfig
Type “y” to agree. This way, we have just configured the winrm service to run automatically and enabled remote management rules in the firewall.

Now you need to add the Hyper-V server to the list of trusted hosts with this command:
Set-Item WSMan:\localhost\Client\TrustedHosts -Value "WHS2019"
The last element is the server name.

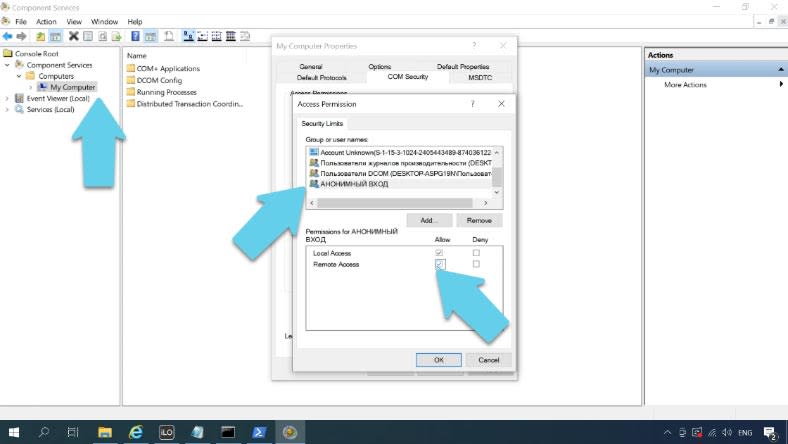
The next step is to set permissions for the Anonymous Logon group. To do it, you have to start Component Services by running the command dcomcnfg in the Command Prompt.
dcomcnfg
Go to Component Services – Computers – My Computer. Right-click on My Computer and open Properties, jump to the tab COM Security.
Click Edit Limits in the Access Permissions section, scroll down and set remote access permission for the group Anonymous Logon - OK.
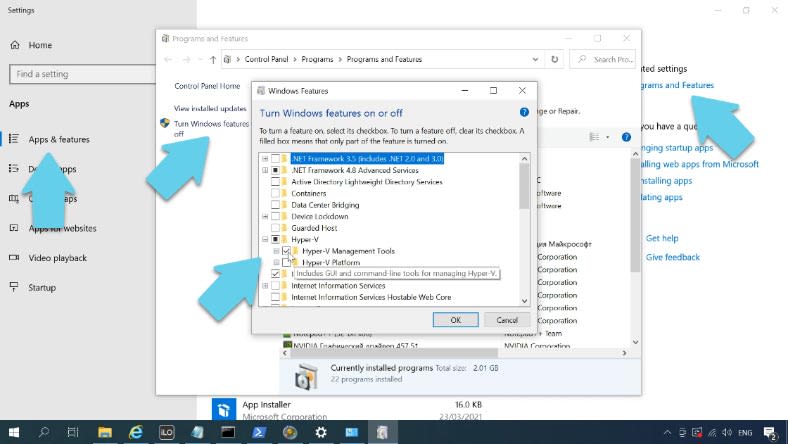
Installing Hyper-V Manager to a Windows 10 computer. Right-click on Start – Apps and Features – Programs and Features – Turn Windows features on or off. Find Hyper-V on the list, unfold it and check the box next to Hyper-V Management Tools - click OK.
Wait until the installation is complete, and then connect to the remote server .
Open Start – Windows Administrative Tools – Hyper-V Manager – Connect to Server. In this field, type the Hyper-V server name.

If you configured everything properly, you’ll be able to connect to the server and manage it.
Now that Hyper-V Server is installed, and the primary configuration for your connection is complete, the final step is to create a virtual machine.
YouTube:
How to recover data from a Hyper-V Server and virtual machine
When the operating system is damaged, the Hyper-V server’s hard disk is formatted accidentally, or the virtual machine is out of order, you can still read and extract the required information from the disk if you use a specialized tool - Hetman Partition Recovery.
Remove the hard disk from the Hyper-V server and connect it to a Windows computer. Download, install and run the program, open the disk and start the scan.

If the Hyper-V operating system has crashed, you still have good chances to recover virtual machine files from this drive. By default, they are stored in this directory:
С:\Users\Public\Documents\Hyper-V\Virtual hard disks
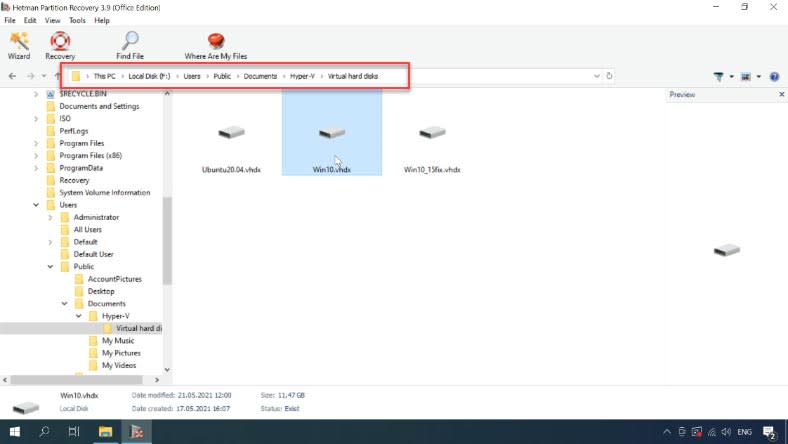
Select the files you want to recover, click Recovery select where you want to save them, and click Recovery again. When the recovery operation is complete, the files will be placed into the specified directory.

fter that, you’ll be able to connect a virtual machine and boot it.
How to convert a dynamic virtual hard disk into a fixed-size one
When a virtual machine is created by the hypervisor, it receives a virtual hard disk which is dynamic by its type. Due to certain peculiarities of the file system and permanent defragmentation of such disks, deleted files are soon erased, so recovering data from images of such disks often ends in a failure. However, you can change the disk type in the virtual machine settings of your Hyper-V Manager.

Select a virtual machine and open its Settings - in the window that opens, look to the left, select the hard disk, then look at the right side of the window, click Edit.

Select Convert and click Next, and don’t change the disk format. At the next step, select disk type as Fixed size – Next.

In the process of conversion, the program will not change the main file of the virtual disk - instead, it will save its copy, but with the fixed size. Give the file name and click Next, and then hit Finish.

Wait until the virtual disk is converted.
Now let’s check if we managed to change the disk type. Click “Inspect” and you can see that the disk type has changed to fixed-size.

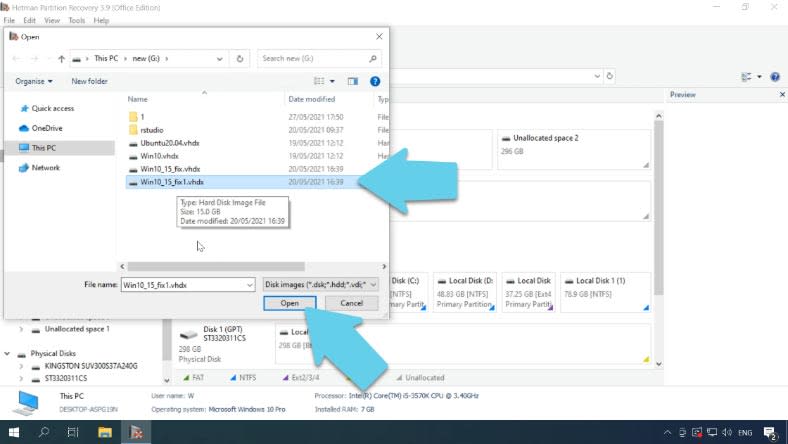
How to recover data from a virtual disk image file
Now upload this file into our program. Open the tab Tools – Mount Disk, specify the path to the fixed-size virtual disk file and click “Open.” After that, it will appear in the Drive Manager.
All you have to do now is to scan it, select the necessary files and recover them.
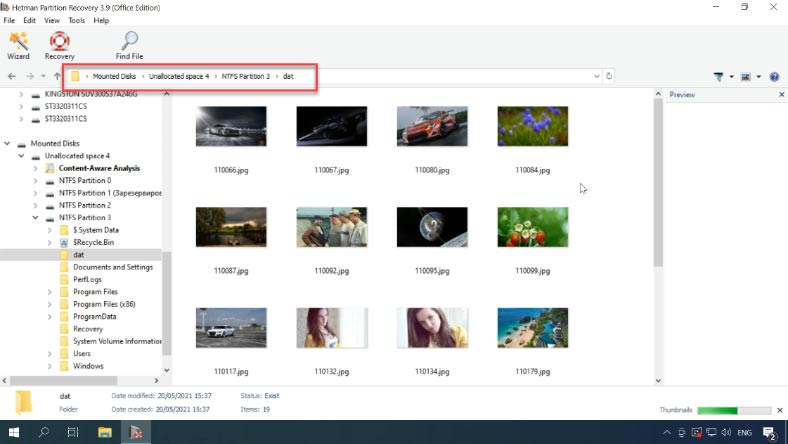
You will find the recovered files in the directory you have chosen.


Top comments (0)