
Read this article to find out how to setup a RAID 5 array at home, what important things to consider when choosing computer parts for a RAID system, how to build a computer and configure a RAID array.
All modern motherboards come equipped with an integrated RAID controller, and top models may have several such controllers on board. That’s a different question, though, if such integrated controllers in consumer-class motherboards are ever used by an average user. Anyway, some motherboards do give a chance to setup a RAID array right inside your home PC.
Below are brief recommendations on building a RAID array on a home computer and a practical tutorial on assembling a PC for RAID.
YouTube:
PC parts
First of all, you need to decide on the purposes for which you want to build a RAID system on your computer, and the RAD type you are going to use.
Check our dedicated article on RAID types, their architecture and how they work.
When you decide on the RAID type, choose a motherboard supporting such arrays and having a sufficient number of SATA ports to work with the required number of disks.

For our needs, we decided to build a configuration for RAID 5. Here is the list of hardware we selected for this purpose:
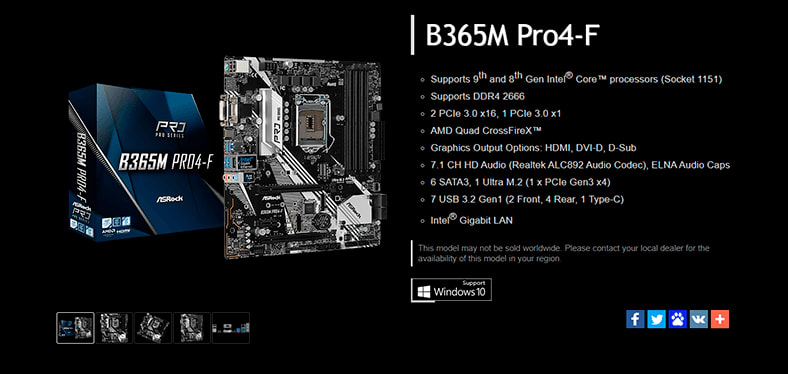
- ASRock B365M Pro4-F motherboard with RAID 0, 1, 5, 10 support and six SATA ports for hard disks;
- A spacious Cooler Master K380 case with several slots for HDDs;
- i5-9400F, a 9th generation Intel processor;
- One 16 GB (2400 MHz) system memory module by Kingston;
- NVidia GeForce GTX 1060 graphics card.
Assembling a PC
Now that we have got all the parts, let’s start building the computer.
Central processor
The first step is to install the processor and the system memory onto the motherboard.
It’s not that difficult at all – just find out how to place the CPU into the socket. If you are building a computer for the first time, never try to push or force the processor into the socket if it doesn’t fit – it never helps, but you can bend the pins or end up with a damaged processor. If you position the processor into the socket properly, it will fit into its place easily.
On the processor, there is a triangular mark in the corner, and a similar mark on the socket of your motherboard. Position the processor in such a way that the marks coincide.

Also, on the edges of the processor there are small notches that are meant to fit into the corresponding elements on the socket.

Install the processor and fix it with the latch.
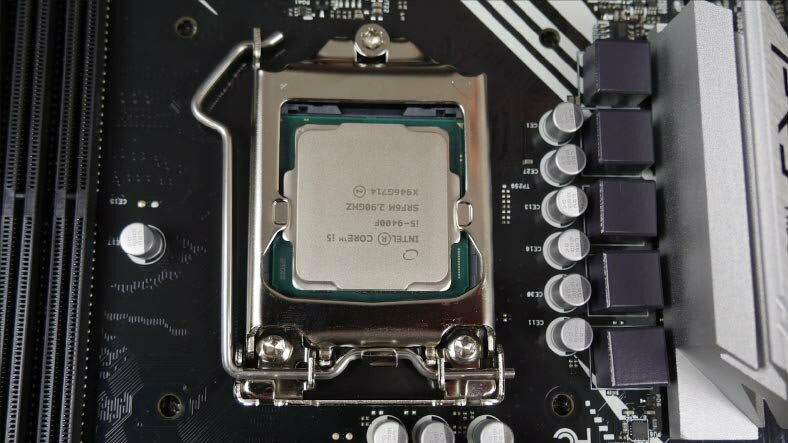
All right, the CPU is now in its proper place.
Installing the CPU cooler
The next step is applying the thermal paste and installing the processor’s cooler. In my case, the stock cooler comes with the thermal paste on it, so I skip the paste part and just install the cooler.

Push the locking pins through the holes in the motherboard and secure them by turning.
All coolers always come with an installation manual, so read it carefully before you start, and there won’t be any problems with installing the cooler.

The final step is to connect the cooler to the motherboard. The plug at the end of the cable coming from the fan should be inserted into the connector marked as CPU_FAN. The actual location of the connector depends on the particular motherboard model, but the marking is always the same.

Installing system memory
Now insert the system memory into the memory slot and put the motherboard aside.
To install the RAM modules, open the retention clips and put the module into the slot.
Bear in mind, that system memory modules should be inserted only in a certain position. If the module won’t fit into the slot, just try turning the module the other side. Inserting the modules doesn’t need much physical pressure so don’t force the module if it won’t fit.

The motherboard may also have special marking and numbers for slots. If you have two RAM modules, place them into slots 1 and 2. If you have a single module, put it into slot 1.

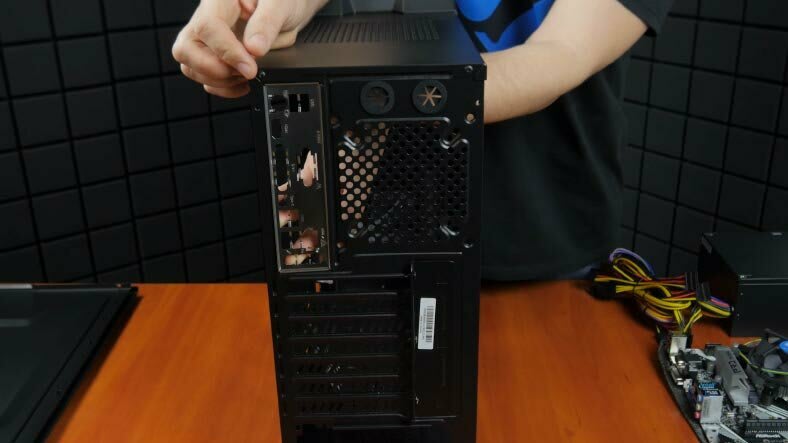
Put the motherboard aside and grab the case. Now we are going to install the power supply unit and do a bit of cable management.
The case and power supply unit
Install the PSU into the designated place inside the case and secure it with the fastening screws which come supplied with the unit.

Lay the cables behind the side panel on which the motherboard will be mounted. Push the cables through the openings: motherboard power – into the upper hole, and the rest of the cables – into the lower hole.

Check the motherboard packaging box for a metal backplate, also known as IO shield. Insert it in the rear of your case according to the position of the motherboard. Do it from the inside of the case and push slightly until it clicks into place.
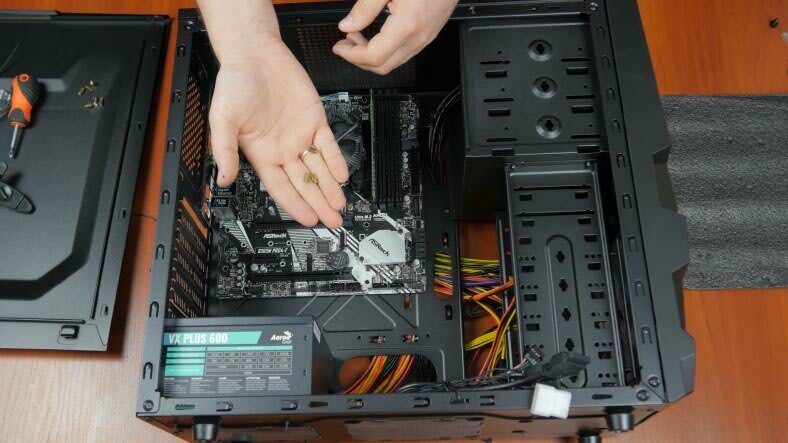
Installing the motherboard into the case
Then have a look at how your motherboard fits into the case to find out where you should prepare additional mounting points. Usually these elements (also called standoff screws) come with the computer case.


Top comments (0)