Hello web developers!👋
Ever thought of where you can host your small scale full stack application completely for free? You heard it right! There are many services out there that supports developers by providing a free tier to their service. In this post, I'll be guiding you through the process of hosting it your application on these platforms.
Note: I won't be going through how to build the frontend and backend. I'll only be showing you how to host your application
Table of Contents:
Frontend
Since Next.js is popular for web development, I'll be using Next.js to demonstrate the deployment on Vercel. Vercel also supports hosting for CRA but it supports best for Next.js since this framework is created by the Vercel team.
- Create a repository on GitHub for your frontend app.
- Log into your Vercel account and click on
Add new > Project
- You should see something like this. Click on
Continue with GitHub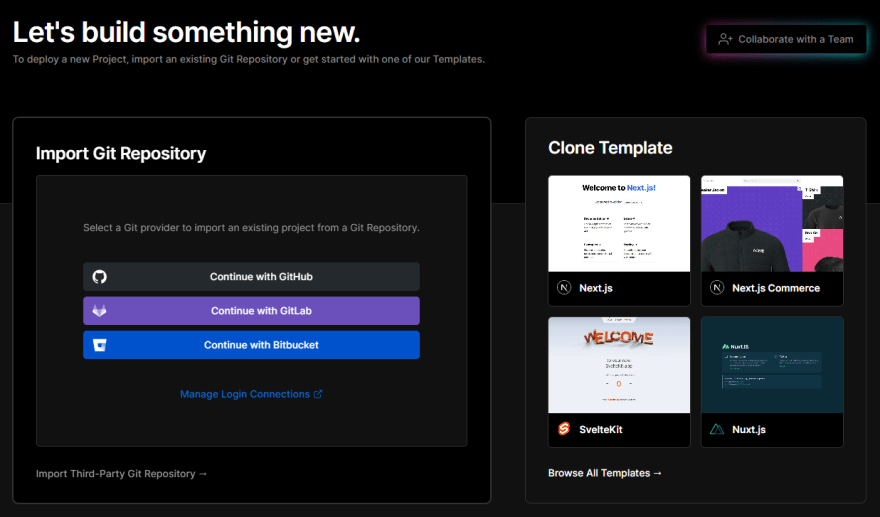
- Find your project and click on
importthen clickDeploy. Note: If your frontend application is inside afrontendfolder, make sure to changeRoot Directoryto./frontend. This will tell Vercel where to find your frontend application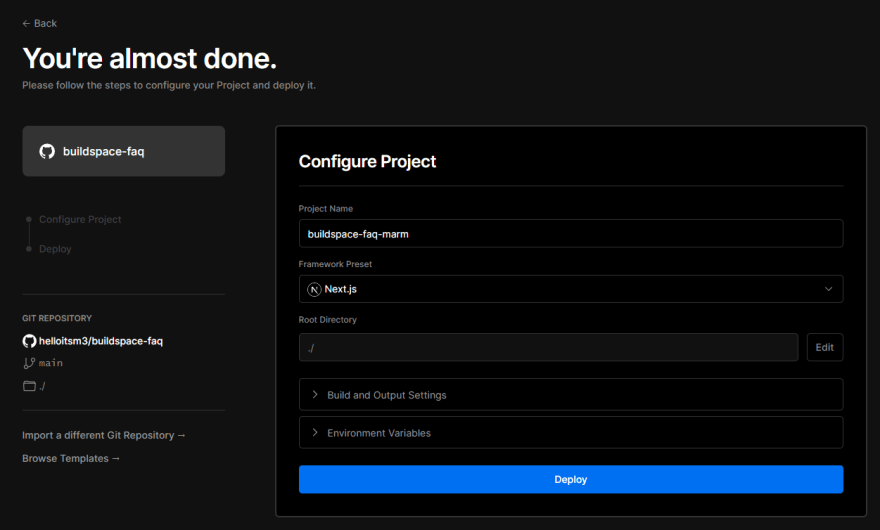
- That's it! You've successfully deployed your Next.js application on Vercel 🥳
Backend
I'll assume that you are using ExpressJS for your backend server. The reason why we are using a separate server is because Vercel only allows your serverless function to run for up to 10 seconds in your Next.js app. If you requests manages to run within 10 seconds then you're free to use Vercel's serverless function but for most cases, you'll need to use ExpressJS as your requests will usually take more than 10 seconds to receive a response.
- Create a repository on GitHub for your backend server. Note: If you don't want to create a new repository for your server, you can just host it together with your frontend repository. Just create a folder named
backendand place your ExpressJS files in it. - Visit Render to host your server. Your dashboard should look like this:

- You can select
New > Web Service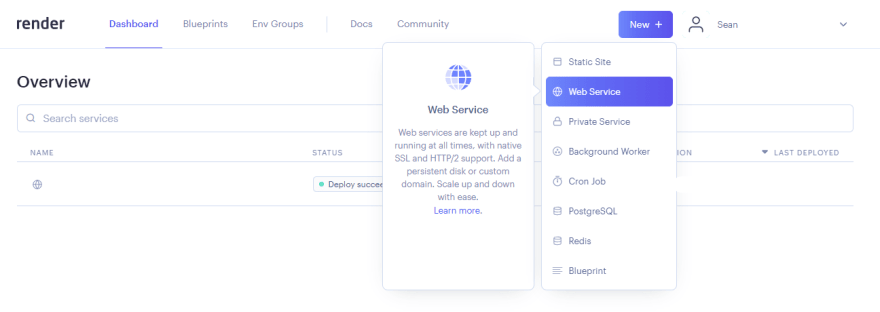
- Your repository should appear. Select
Connectand it should automatically connect to your repository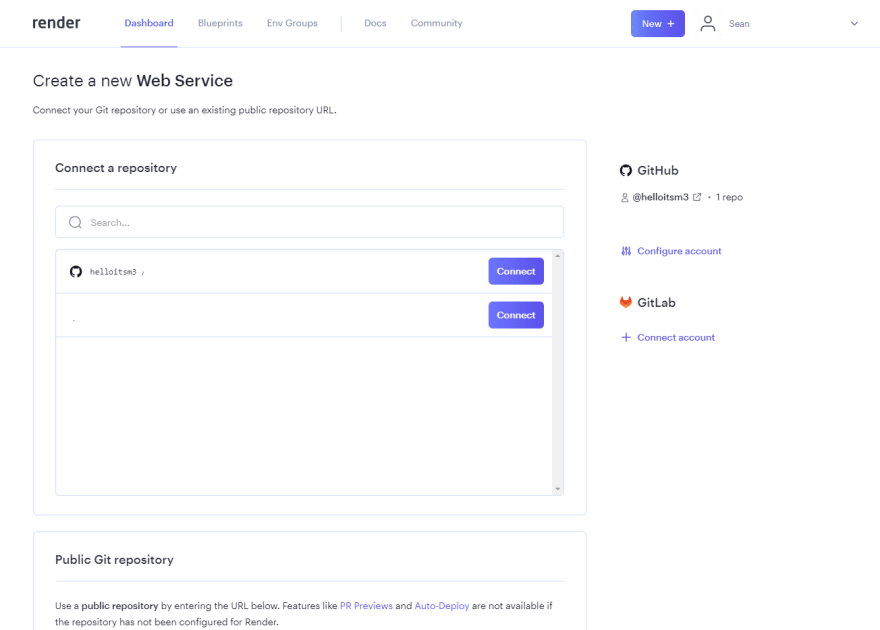
- Fill out all the necessary details. Make sure your
root directoryfollows the name of the folder that your backend app is in. For mine, it's inbackendfolder.
- Scroll all the way down and click on
Create Web Service. - That's it. You've successfully deployed your backend server on Render
MongoDB
NoSQL database seems to be very popular and MongoDB is the go-to for this. If you are looking to run your MongoDB instance for free, you should check out MongoDB Atlas.
- Create your account and verify it
- Once you've done it, you should be re-directed to the dashboard here
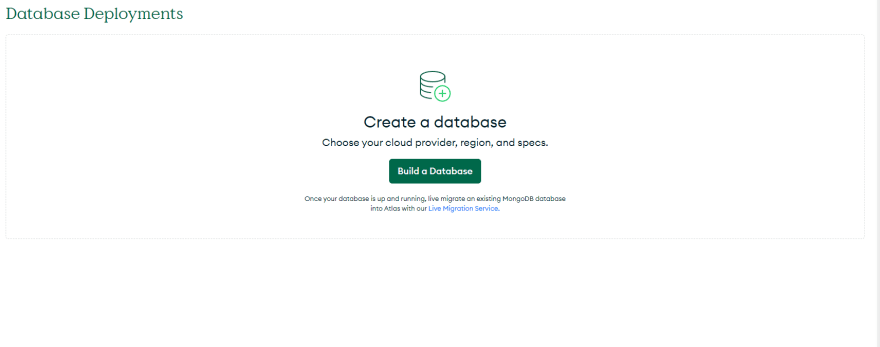
- Click on
Create Databaseand select the free tier
- Select your configuration and click
Create cluster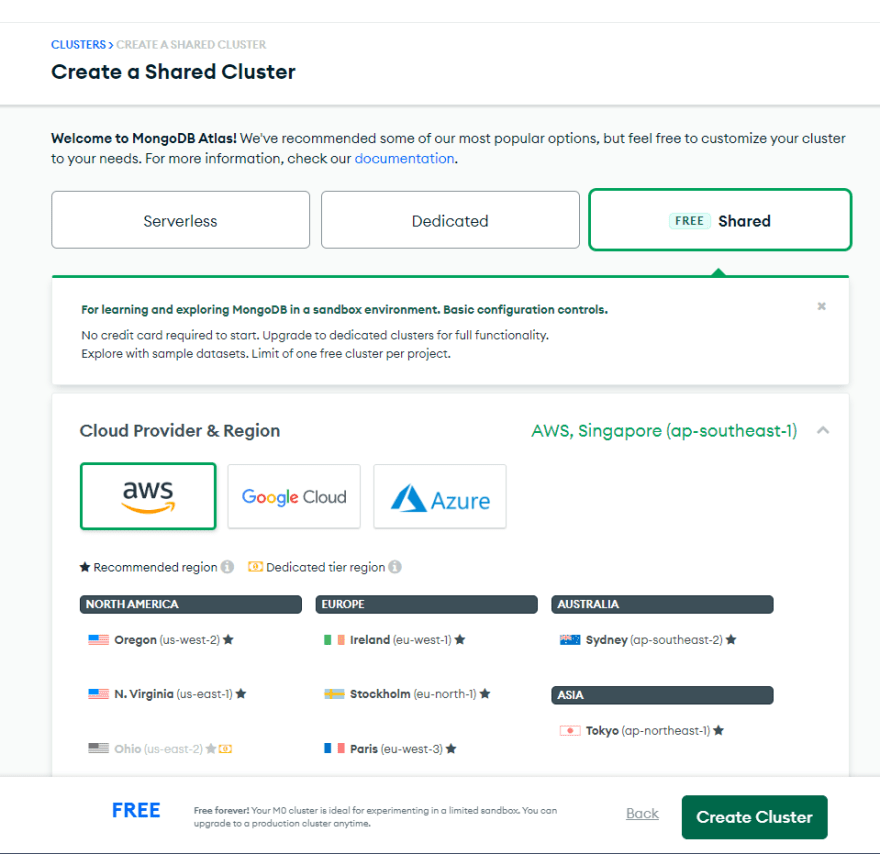
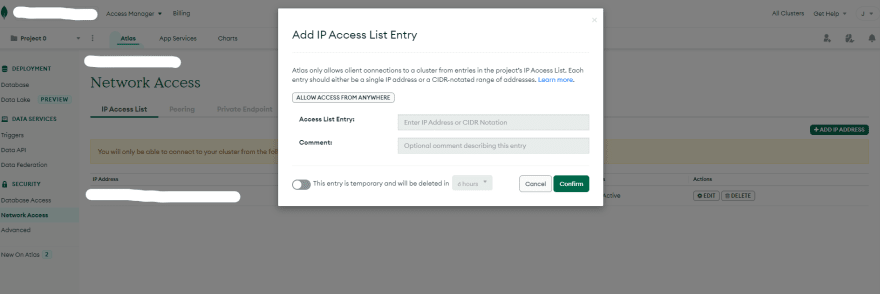
- Create your user and your IP address then click
Finish and Close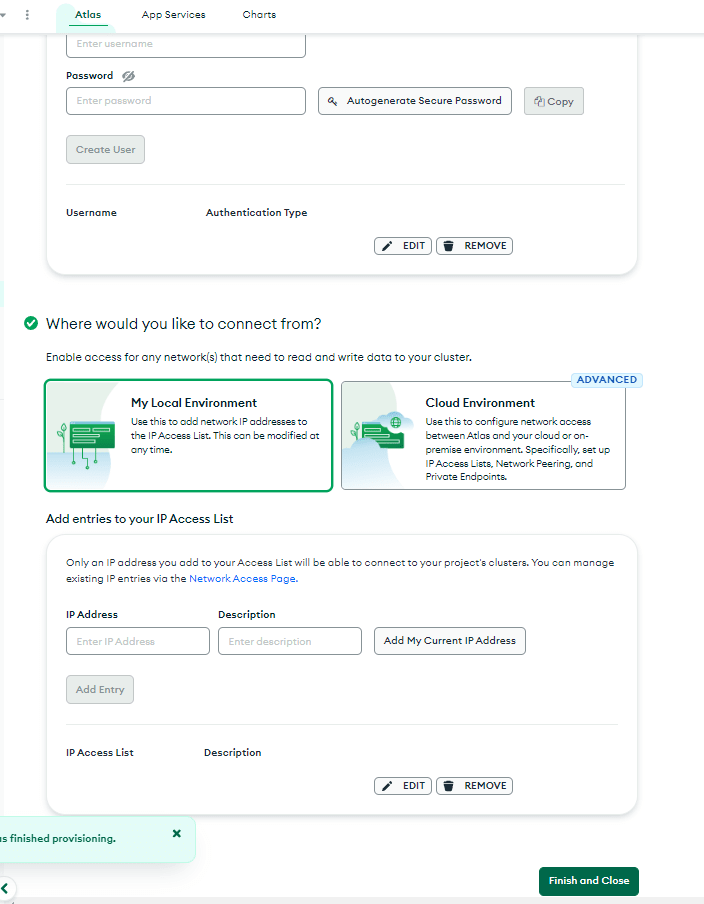
- That's it. You've successfully created your MongoDB instance.
- Now all you need to do is click on
Connectand it should guide you on how to connect to your database instance.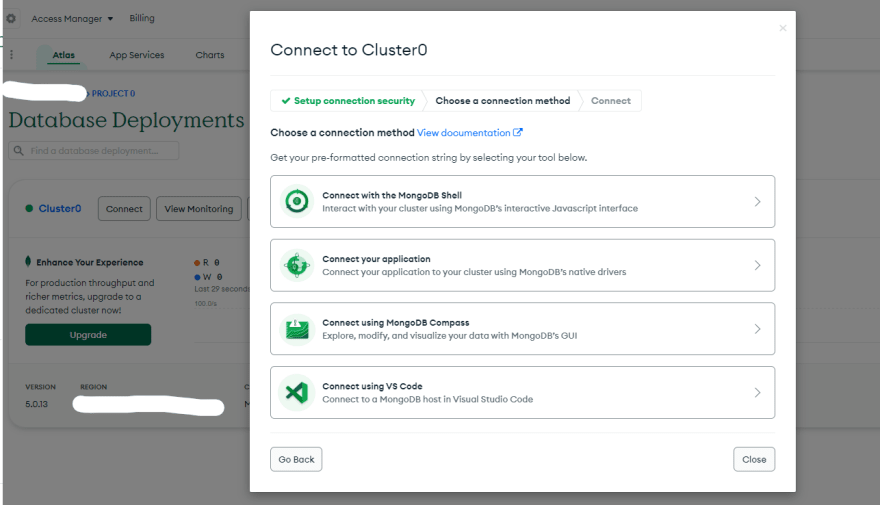
Note: Since you're hosting your server on render.com, you need to configure your network access so that your server can connect to your database when you host it online.
I hope that you like this short write up and continue building your MVP on these free platforms 🥳


Top comments (0)