
In this tutorial, we’ll be expanding on a previous tutorial we completed where we integrated a Hasura project with another low-code tool, Draftbit. In this continuation, we’ll be building out a website presence for our application using Bubble. Bubble has an expansive community offering support and plugins for almost any use case. We will build on the REST integration we created in the previous tutorial and now include an additional endpoint that allows us to upload content to Hasura.

The Hasura features we’ll use
Previously, we used Hasura’s ability to create a REST endpoint for a saved GraphQL query in the Hasura console. We’ll re-use this functionality and add the Pipedream serverless endpoint from our API to upload images and persist them to Hasura. You can read more about that in the original tutorial.
The interface
We’ll continue the trend of minimum viable interfaces with this series and present just enough UI to functionally display the images, tags, and a file upload interface.
The Tutorial
Prerequisites:
- Familiarity with our base tutorial.
- A working, accessible Hasura project (not running on localhost) with existing data.
- A Bubble account.
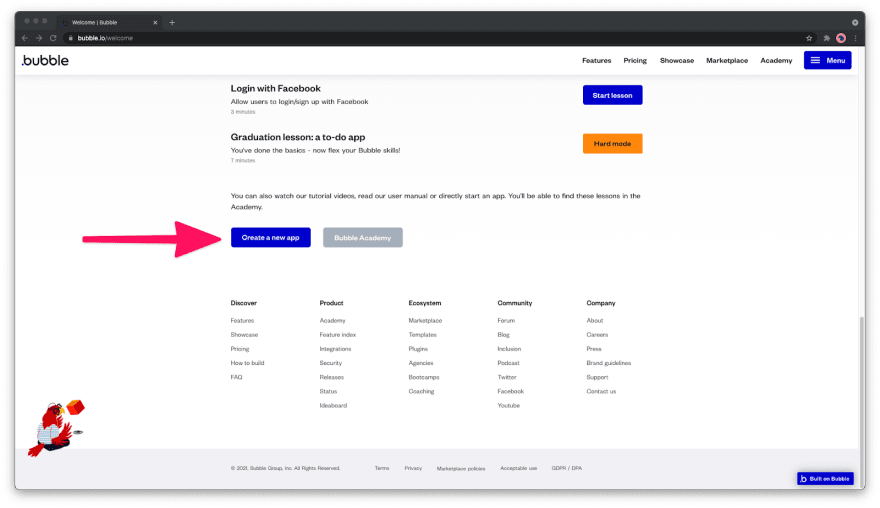
Scroll to the bottom of the page from the welcome screen, pass the onboarding tutorials, and click “Create a New App.”
Fill in the default information for your application.

To keep our UI lean, we will choose “Start with a blank page.”

After that, press “Let’s get started.”
You’ll be asked what you want the title of the page to be (what displays in the tab across the top), what the default language of the page will be, and what you want the favicon to be.
The next two questions are the most important, you can skip adding the payment plugin, but we’ll want to add the “API Connector” plugin in the question following that.
You’ll be presented with a marketplace where you can install the plugin you want; we’ll choose the one created by Bubble themselves.
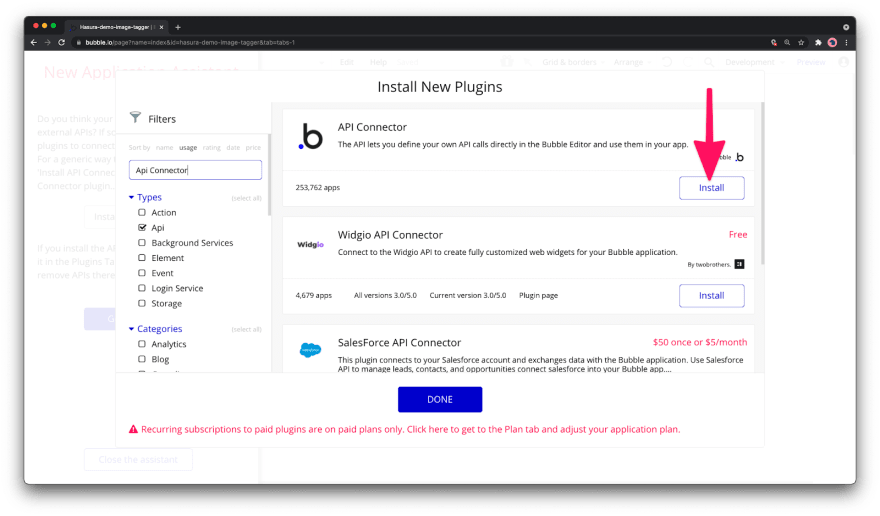
Install, then press “Done.”
From here, you can choose to take the application tour or simply close the assistant. For this tutorial, we’ll go straight to editing the application.
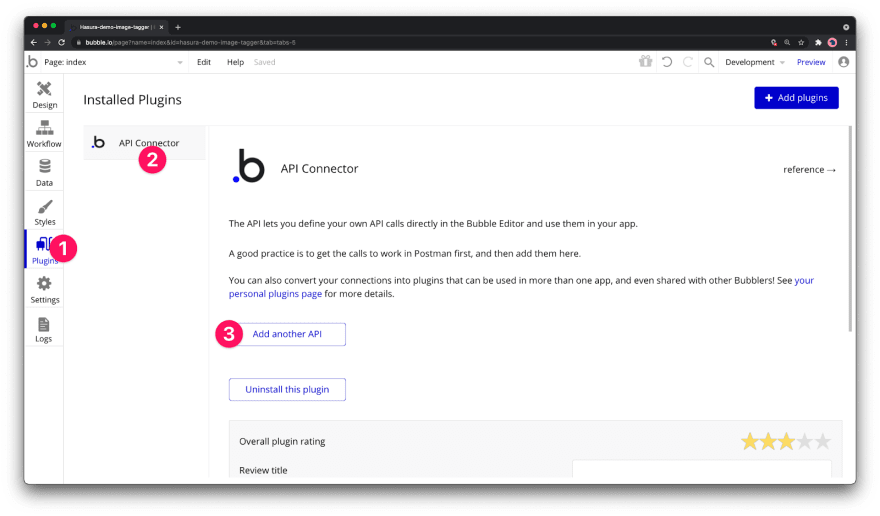
Once we are viewing the empty screen, we will navigate to our Plugin tab on the left sidebar of the application, choose the API plugin, and press “Add another API.”
We’ll provide the default connection parameters for the API call, including a generic x-hasura-admin-secret for now. Note: Best practice would be to incorporate a user-auth flow to protect the interactions on this page.
The individual call details are obscured behind the “expand” button pointed out in the screenshot.

At this point, we can map the parameters to our saved REST endpoints. Next, we will define a Get List call, ensuring that this will be used as “data” on the page and that the response is JSON.
Initialize the call to ensure that it works.

Bubble provides a helper utility to map the response types from our server to use them with appropriate components and utilities when building our interface.
Here we’ll define that our created_at field is a date and that our image_url is an image.

While in our plugin details, we’ll define the “Get Single” API call as well, this time using Bubble’s “[]” annotation to indicate where the URL parameterization should occur.

And as before, we’ll map the response types for Date and Image where applicable.

One last adaption to our API is to add a Date/Time header to our API calls which will allow us to bust Bubble’s cache proxy for requests to the server.

As before, make sure to leave the “Private” option unchecked, which allows us to define this dynamically at the time of calling.
We’ll return to the Design tab with the APIs defined and add a “Repeating Group” container to the page.

We’ll need to identify the data source and the type of content the repeating blocks expect to see. We’ll start with the data source, choose “Get data from an external API,” and then choose the Hasura - Get List” API call. From the secondary menu.
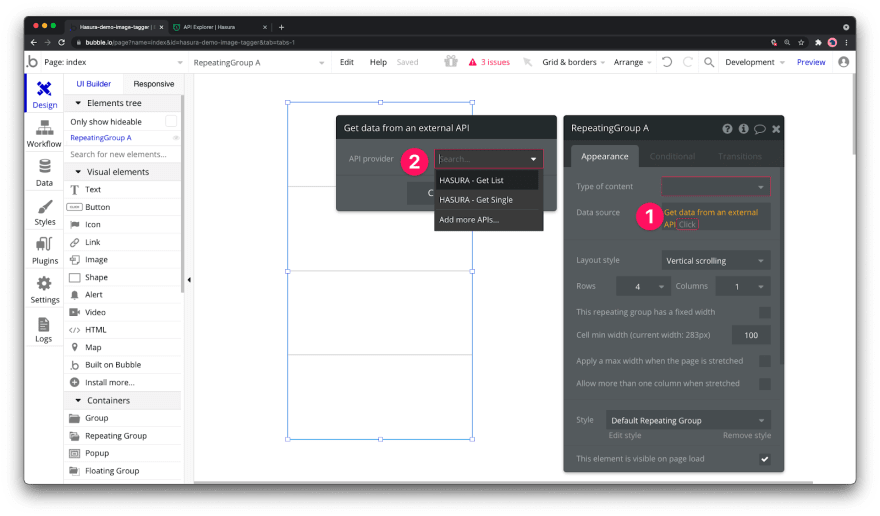
From there, we’ll choose the “Get List upload” response type from the “Type of content” dropdown.

Draw a Text component into the first grid of the repeating list; this will prompt the appearance panel to show. Next, click inside the “...edit me…” text area, which will show the “insert dynamic data” window.
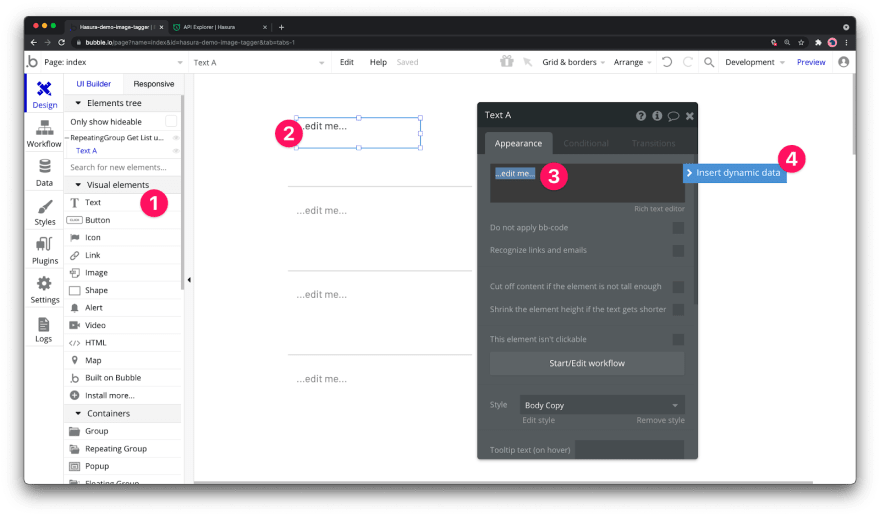
Bubble will present a unique but intuitive property accessor interface where you select a natural language parse of the values you are trying to view. For example, the resulting string will be the “Current cell’s Get List upload’s image name.”

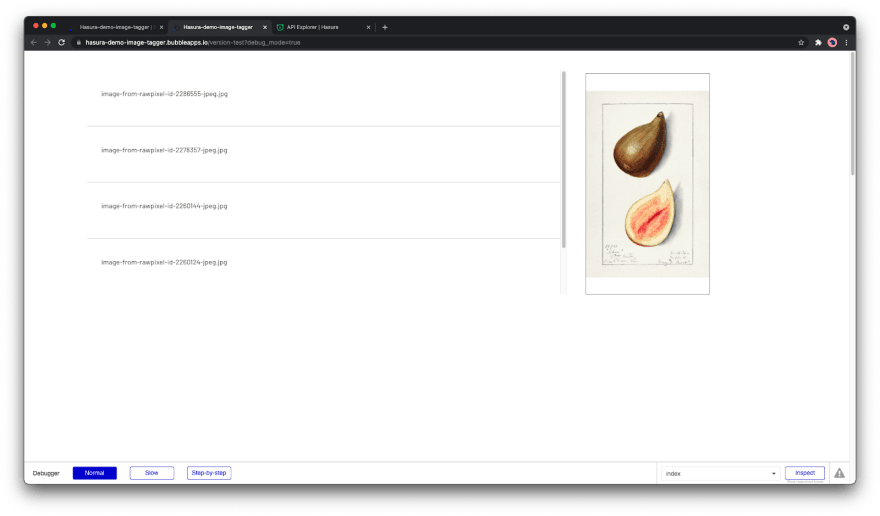
Let’s preview our results.

It’s working! We are iterating content in Bubble from Hasura.

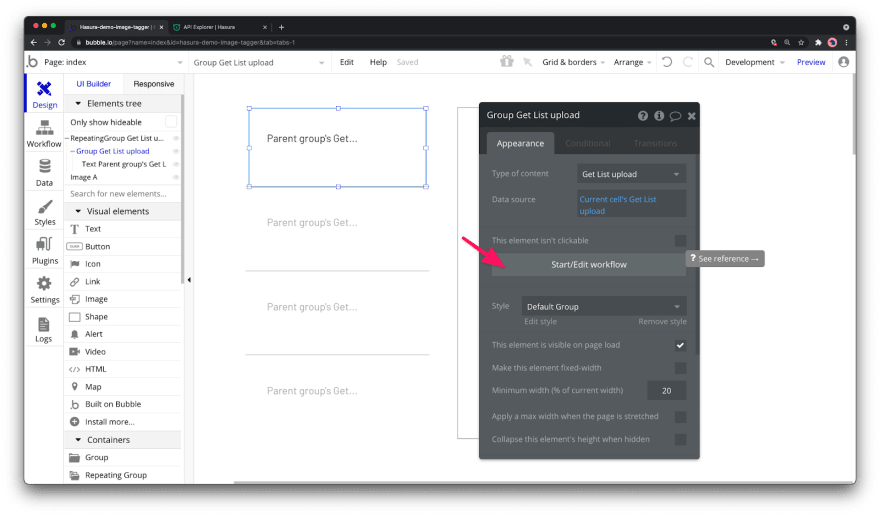
Let’s replumb the component structure to put a top-level group in our repeating field, behaving as a click target for our next bit of UI. First, remove the text box, then add a group container to the component repeat field. With that in place, define its data source as we did previously with the text box, then add a child text box which will receive the final state of props.

Let’s add an image component to the page to view the URL of the clicked-on list item. I’ve added a border under Appearance to help visually track its place in the UI for now.

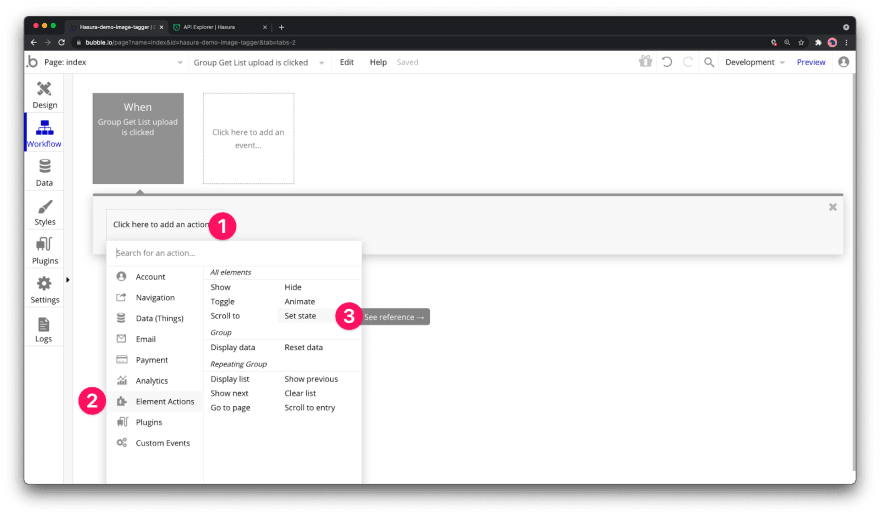
Now we need to create a workflow to handle click events on the group we added previously.
We will tell the workflow to set the state on an element on our page.
In this case, we are setting a custom state called “Image URL” on “Image A” to the value of the current cell’s image URL property.
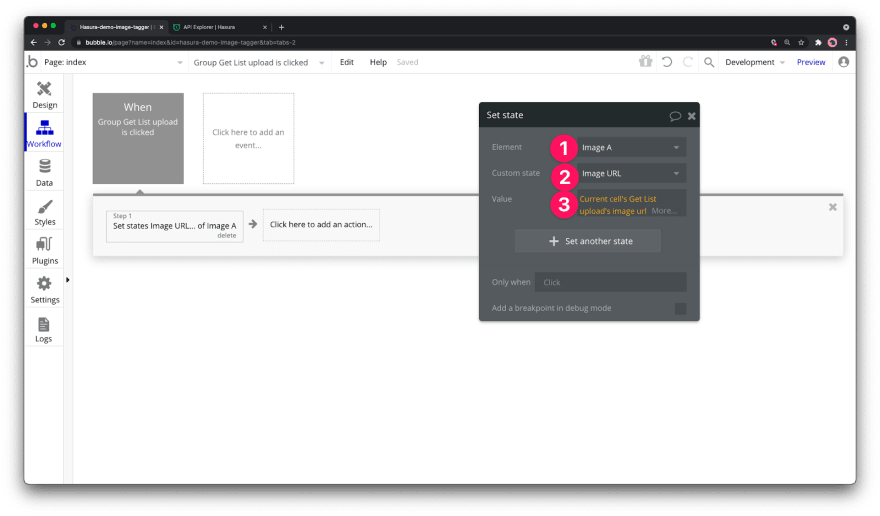
In our Image A component, we will tell the image to be the value of that new Image URL state property.

Let’s test this behavior.
That works!
Let’s try to show the tags associated with this image.
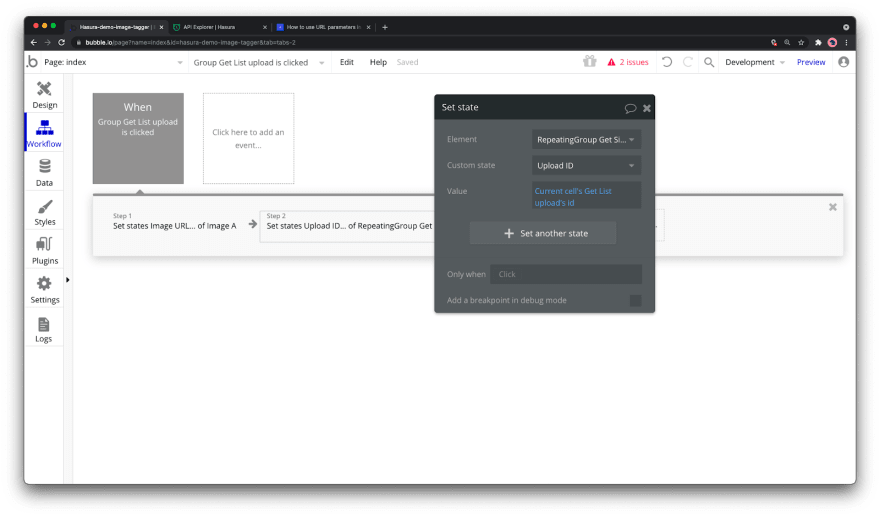
We will add another repeater list next to the image component. Then, we’ll add another “set state” flow to assign the ID of the selected item as “Upload ID” on the internal state of the new repeater field. The result should look like this.

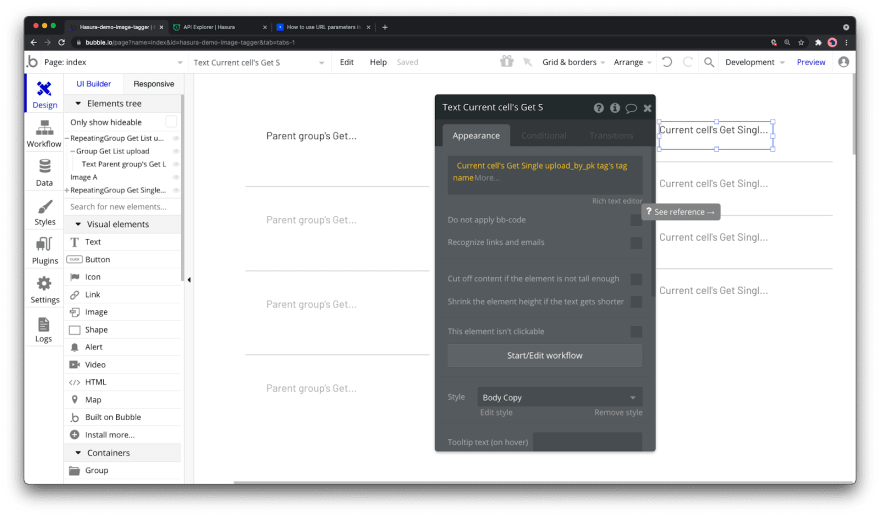
Adding another text box to this repeat, we can drill down to the tag name property being passed in from our API call.
If we preview this gain, we can see that it works, if not in need of a loading state!
To upload an image, we need to define another API call. We handle binary data through an external service that stores the file for this particular application, then calls Hasura to persist the data to our backend. You can read more about that architecture here.
We need to call a different API and define that this endpoint will receive a field parameter identified as a dynamic entry when we call the API. To allow this parameter to be called later, we need to indicate that this is not a private field.

With that in place, we need to create a custom upload workflow trigger to handle a manual API call based on arbitrary events.

Now we need to create a trigger for this workflow from our UI. We’ll use the “Upload image” component, and I’ve opted to place mine inside of a popup. The implementation details are less critical on which UI primitive to use. Note: Ideally, you’d use a file picker and send this to our API; as it stands, the UI components from Bubble automatically persist these files to a storage bucket, so we are in effect doubling our storage. An alternative in the meantime would be to write a custom form handler using the HTML block. To show the workflow architecture, I’ve opted to stick with the default components for now.

I’ve layered an image preview and an image select. We’ll be hiding the image select and reveal the image previewer on a successful response from our API.
Back in our workflow editor, we’ll define a listener for property changes on this image upload component, which will trigger our custom API call.
This is how that looks in the editor.

When the upload is done, we’ll trigger our follow-up request using the returned Upload ID to request our “Get Single” API endpoint, which will also return our tags once the backend processing is completed.

The custom event is defined to set the state of our Tags list once data returns.

The last component we need to include is a polling API call that will run at a fixed interval (5 seconds) that will only make an API request once the Upload ID is present, the total list of returned tags is 0, and the popup is open.
We introduce the third check because we need to create our tag count check in a round-about way to get around a minor bug in the platform. We will only show the tag list if the count is greater than zero, which offers predictable behavior; we then proxy this truthy condition in our API poll to check if the tag list is visible. The problem arises when the popup is dismissed and the checklist is hidden once more, returning its “hidden state” back to true. Our third conditional is the popup open, mitigates this limitation. No code often requires some edge-case thinking where convenience features may be fighting against a presupposed mental pattern.

The steps triggered by this event will now introduce our cache-busting Date header.

Workflow Summary
The workflow logic can be challenging to follow; here is an outline of what is happening behind the scenes.
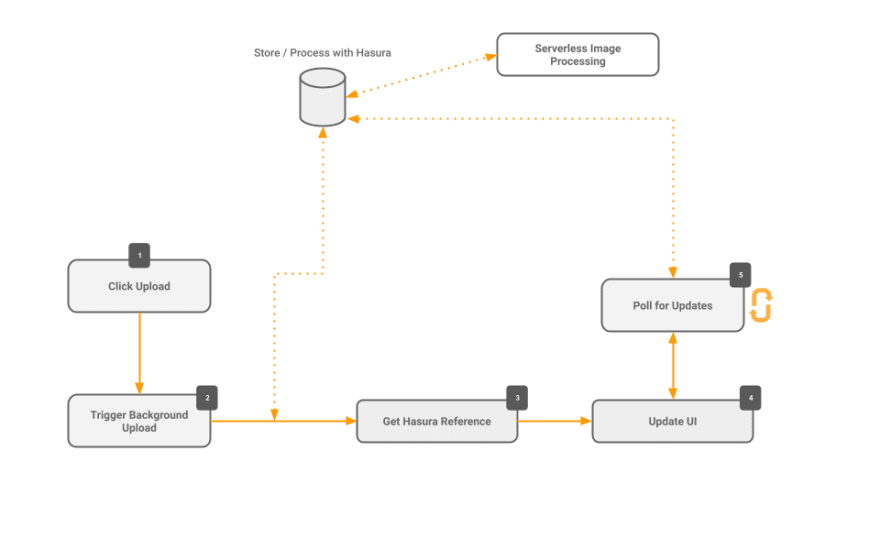
On page load, we fetch content from Hasura with the images. When we select one of them, we make another request for the tags of that image.
When we upload an image, we persist that image to storage, save its reference to Hasura, and return that to the client. Once that round trip is complete, we request the tags for that image and display them in the UI.
How Hasura Cloud helps
Debugging serverless workflows like this can be difficult as we are waiting for asynchronous behaviors to execute in the background. Fortunately, Hasura Cloud has a monitoring solution that allows us to see which APIs are being called, what data was passed in, and how well they are performing.

Functionality like this gives us complete observability of our low-code stack to see what’s happening in our front-end and the backing data layer.
Closing
We’ve consumed an AI-powered image tagging service without writing any custom code, persisted our objects to storage, and navigated the content. Best of all, tools such as Bubble allow a wider range of architects to analyze the business use-case of a customer and implement a functional and effective solution without a lot of front-end specific knowledge.
Low-code will continue to be a mainstay as we see the continual offloading of business logic and corporate IP handled at an abstracted data layer and thinner and more agile front-ends simply consuming these serverless behaviors.


Top comments (0)