
Sign in into your Azure Portal then click on "Virtual Machine"

To start this project you must have an existing Virtual machine. If you need help creating a Windows 11 VM using Azure Click Here for an in-depth tutorial on how to create one.
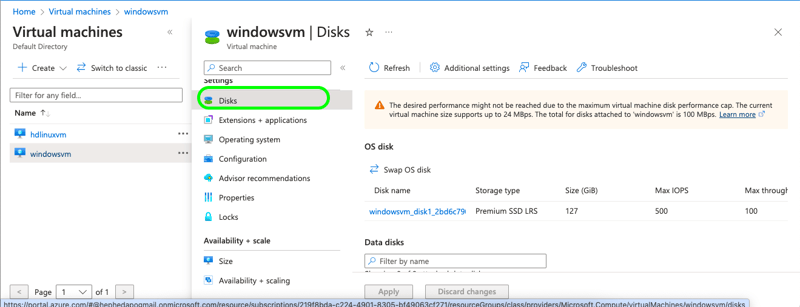
Now that you have a VM , click on the VM which you want to create a data disk for.

On the next side tab , scroll up to settings and click on Disks. Now click on Create and Attach a new Disk

Follow the next prompt to input your preferred Data disk name, Storage type, Storage Size and other relevant entities as required by you.

Click on Apply
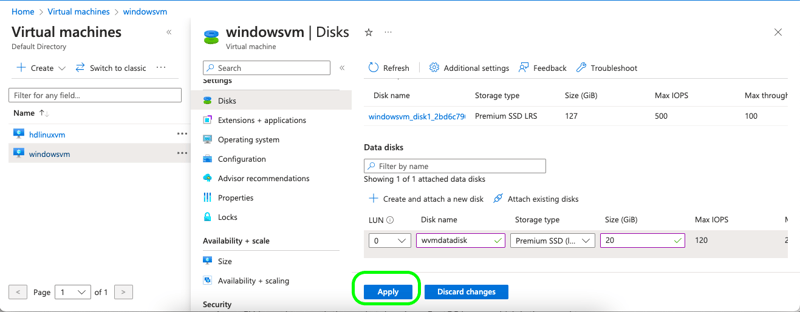
Now wait until you get a confirmation that your data disk has been successfully created attached to your VM and listed under the data disk panel.

To confirm if this data disk is in fact created, attached and working with the VM . Look for and click on connect on the left menu . Then go ahead and download RDP file
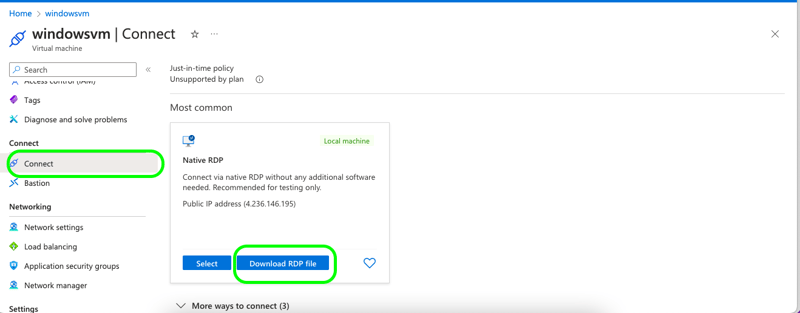
Double click to open the downloaded file, input your user account information (Username and Password), then click continue twice until your windows VM pops up.

Having created and attached the data disk , it’s important to know that this disk is not yet allocated until it is being fully initialized onto This PC.

To initialize the date disk for full use. Click on the windows icon on your VM, then type Disk management into the search bar at the top . Then click on “Create and format hard disk partitions”

Click Okay on the next pop up menu and then click on the unallocated disk2 to select it . Now right click on the unallocated disk and select New Simple Volume.


Click continue on the wizard until you get to finish , click finish to complete the initialization of your data disk . Close the disk management tab, open windows explorer, then "This PC" . There you will find your new data disk labelled as "New Volume (:F)".

Congratulations , you have successfully created , attached and initialized a new data disk to an existing Windows 11 Virtual Machine.


Top comments (0)