
Marketing campaigns are competitive strategies that leading e-commerce platforms use to promote products through television, radio, print, and online media. They are designed with different goals, including raising awareness of a new product, increasing existing product sales, or even reducing the impact of negative news.
In this post, we will learn how to use Appwrite’s real-time capability to trigger an in-app e-commerce campaign in Flutter.
Prerequisites
To fully grasp the concepts presented in this tutorial, the following are required:
- Basic understanding of Dart and Flutter
- Flutter SDK installed
- Xcode with a developer account (for Mac users)
- Either IOS Simulator, Android Studio, or Chrome web browser to run our application
- Docker installation
- An Appwrite instance; check out this article on how to set up an instance locally or one-click install on DigitalOcean or Gitpod
Getting started
In this post, we will focus on implementations only. It is assumed that the project UI has already been set up.
To get started, we need to clone the project by navigating to the desired directory and running the command below:
git clone https://github.com/Mr-Malomz/real_time_comm && cd real_time_comm
The complete source code is also available on the dev branch of the same repository.
Running the project
First, we need to install the project dependencies by running the command below:
flutter pub get
Then, run the project using the command below:
flutter run
The command above will run the application on the selected device.

The application screen consists of a promo campaign and a list of products.
Creating a new Appwrite project
To create a new project, start the Appwrite instance and navigate to the specified hostname and port http://localhost:80. Next, we need to log into our account or create an account if we don’t have one.

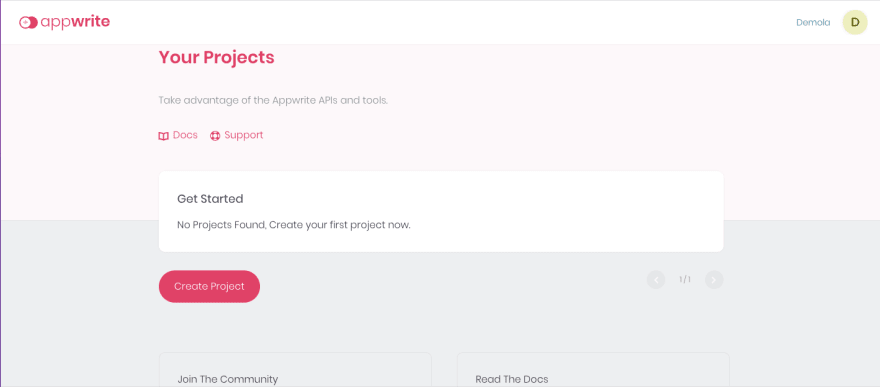
On the console, click the Create Project button, input real_time_comm as the name, and click Create.

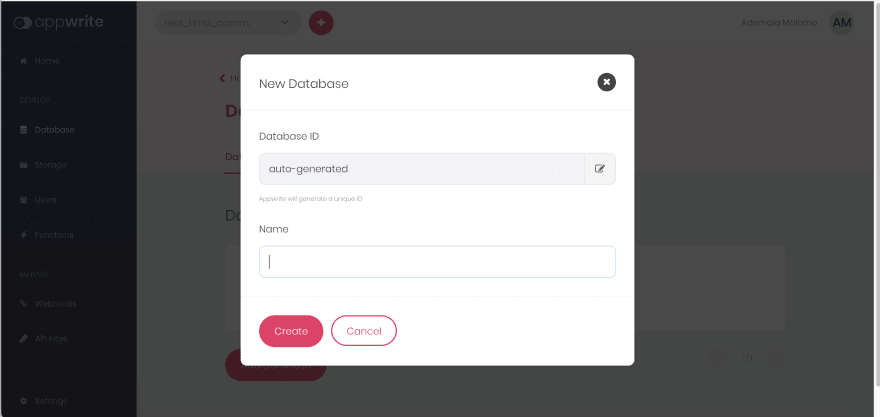
Next, we need to create a database to save running campaign promos. Navigate to the Database tab, click Add Database, input promos as the database name, and click Create.

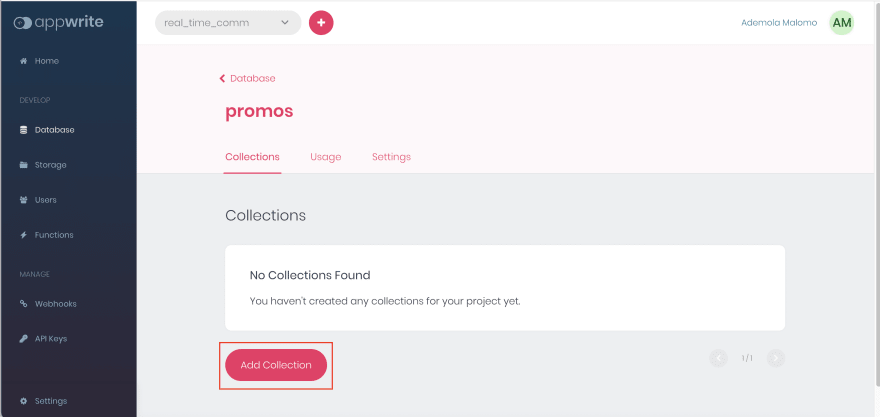
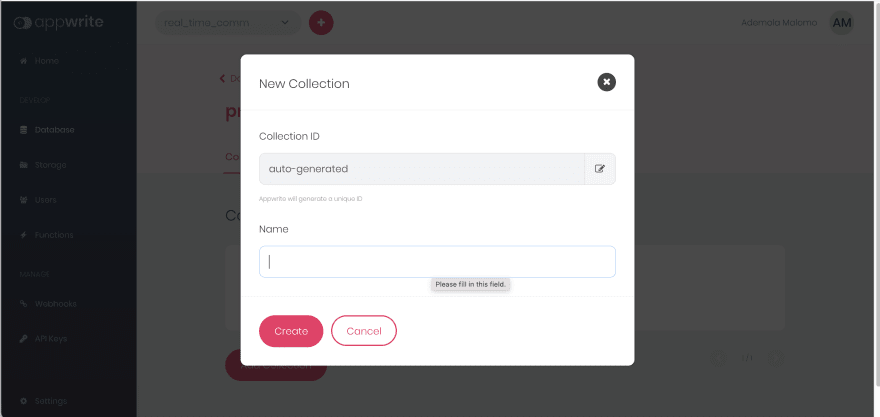
With that done, we need to create a collection for grouping our stocks. Click Add Collection, input promo_list as the collection name, and click on Create.
Appwrite offers an advanced yet flexible way of managing access for users, teams, or roles to specific resources. We will modify the permission role:all to enable access from any application. Then click on Update to save changes.

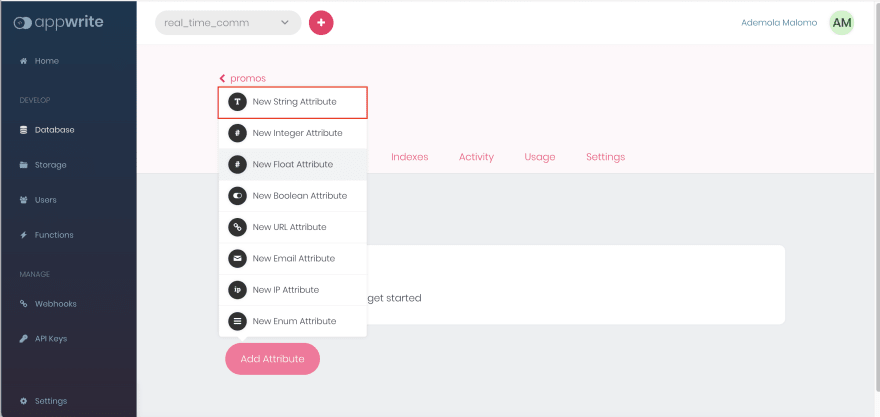
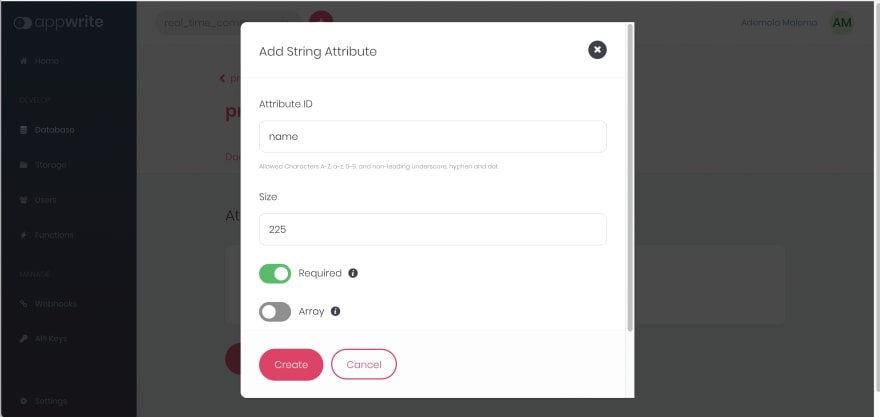
Add attributes
Attributes are fields that our database will possess. Navigate to the Attributes tab, click on Add Attributes, and then add a New String Attribute and a size of 225 for name and a New Boolean Attribute for status fields, respectively. Finally, mark as required and click on Create.
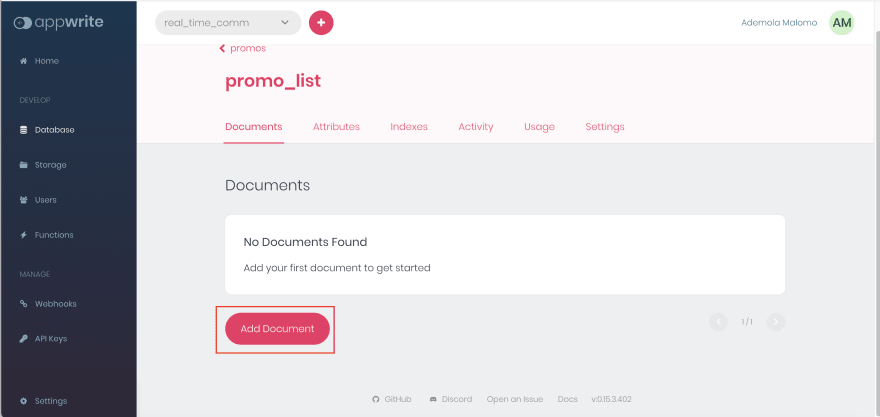
Add sample data
Next, we can add sample data by navigating to the Documents tab, clicking on Add Document, inputting the required fields, and clicking on Create.
| name | status |
|---|---|
| 30% discount | false (toggled off) |

Connecting Appwrite to Flutter
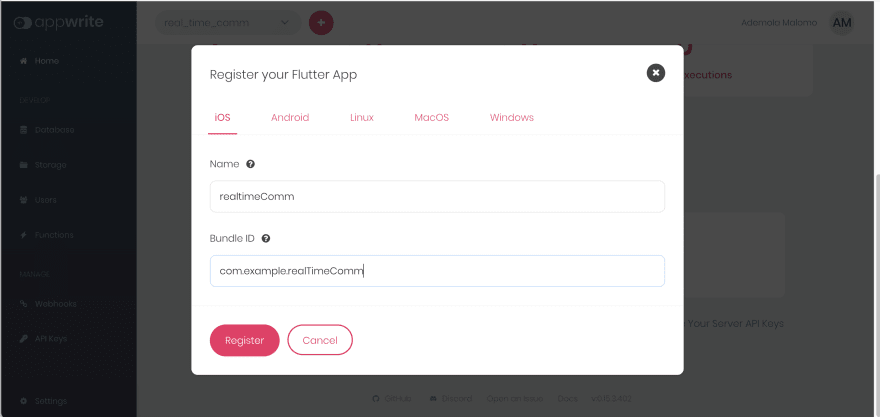
To add support for our Flutter app, navigate to the Home menu, click on the Add Platform button, and select New Flutter App.


Depending on the device on which we are running our Flutter application, we can modify it as shown below.
iOS
To obtain our Bundle ID, we can navigate using the path below:
ios > Runner.xcodeproj > project.pbxproj
Open the project.pbxproj file and search for PRODUCT_BUNDLE_IDENTIFIER.
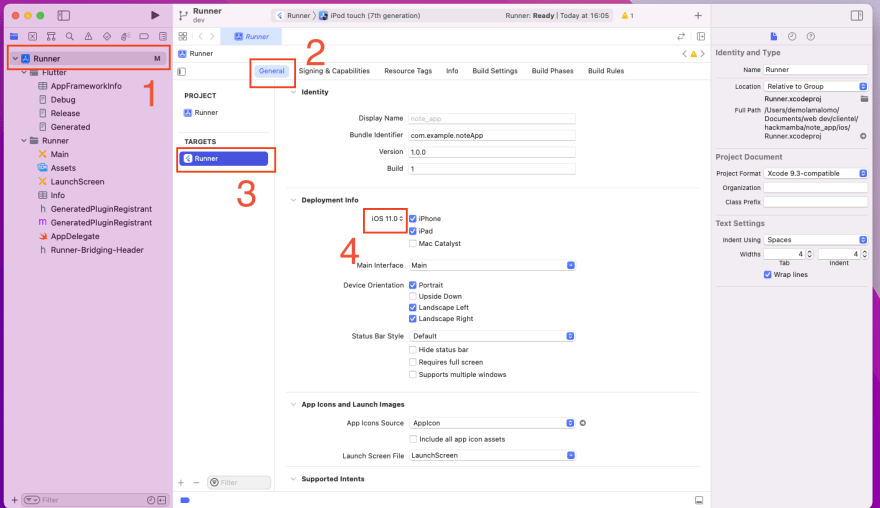
Next, open the project directory on Xcode, open the Runner.xcworkspace folder in the app's iOS folder, select the Runner project in the Xcode project navigator, select the Runner target in the main menu sidebar, and then select iOS 11 in the deployment info’s target.
Android
To get our package name, we can navigate to an XML file using the path below:
android > app > src > debug > AndroidManifest.xml
Open the AndroidManifest.xml file and copy the package value.

Next, we need to modify the AndroidManifext.xml as shown below:
<manifest xmlns:android="http://schemas.android.com/apk/res/android"
    package="com.example.real_time_comm">
    <uses-permission android:name="android.permission.INTERNET"/>
    <application ...>
    <activity android:name="com.linusu.flutter_web_auth.CallbackActivity" android:exported="true">
      <intent-filter android:label="flutter_web_auth">
        <action android:name="android.intent.action.VIEW" />
        <category android:name="android.intent.category.DEFAULT" />
        <category android:name="android.intent.category.BROWSABLE" />
        <data android:scheme="appwrite-callback-[PROJECT_ID]" />
      </intent-filter>
    </activity>
  </application>
</manifest>
We also need to replace the highlighted [PROJECT_ID] with our actual Appwrite project ID.

Then, navigate to the lib directory and create a utils.dart file, and add the snippet below:
class AppConstant {
  final String databaseId = "REPLACE WITH DATABASE ID";
  final String projectId = "REPLACE WITH PROJECT ID";
  final String endpoint = "REPLACE WITH ENDPOINT";
  final String collectionId = "REPLACE WITH COLLECTION ID";
}
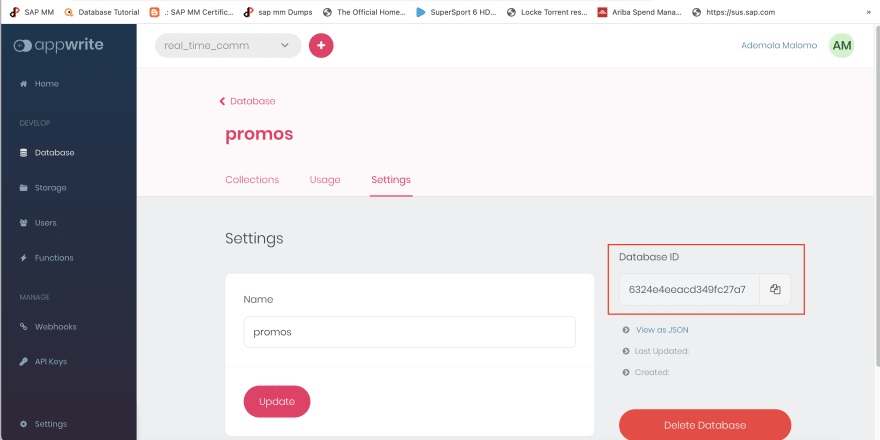
Next, navigate to the Database menu, click on the promos database, click on the Settings tab, and copy the Database ID.
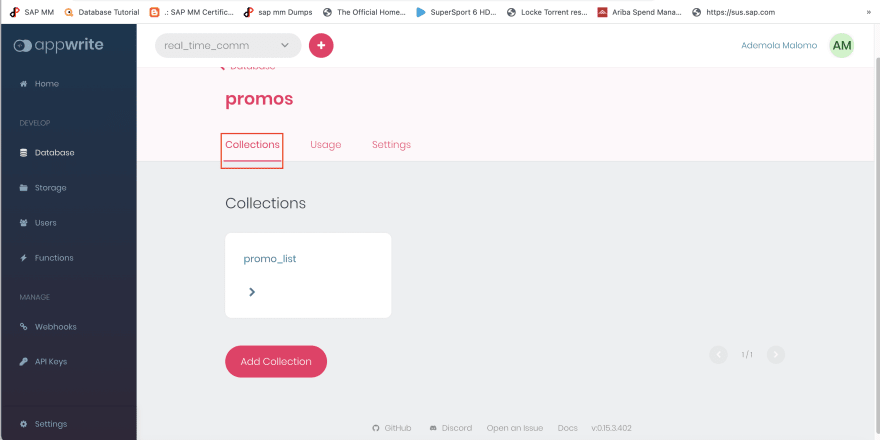
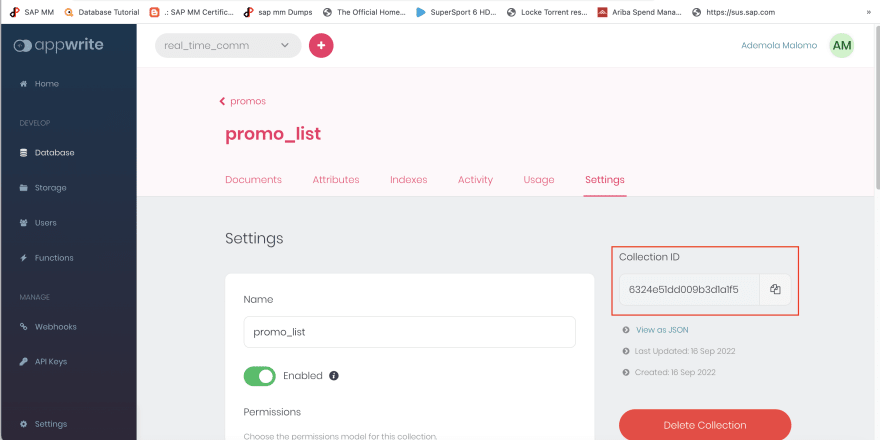
Switch to the Collections tab, click on the promo_list collection, click on the Settings tab, and copy the Collection ID.
Navigate to the Settings menu to copy the Project ID and API Endpoint.

For the endpoint property, we need to modify it to work with our system's local network address. We can adjust accordingly:
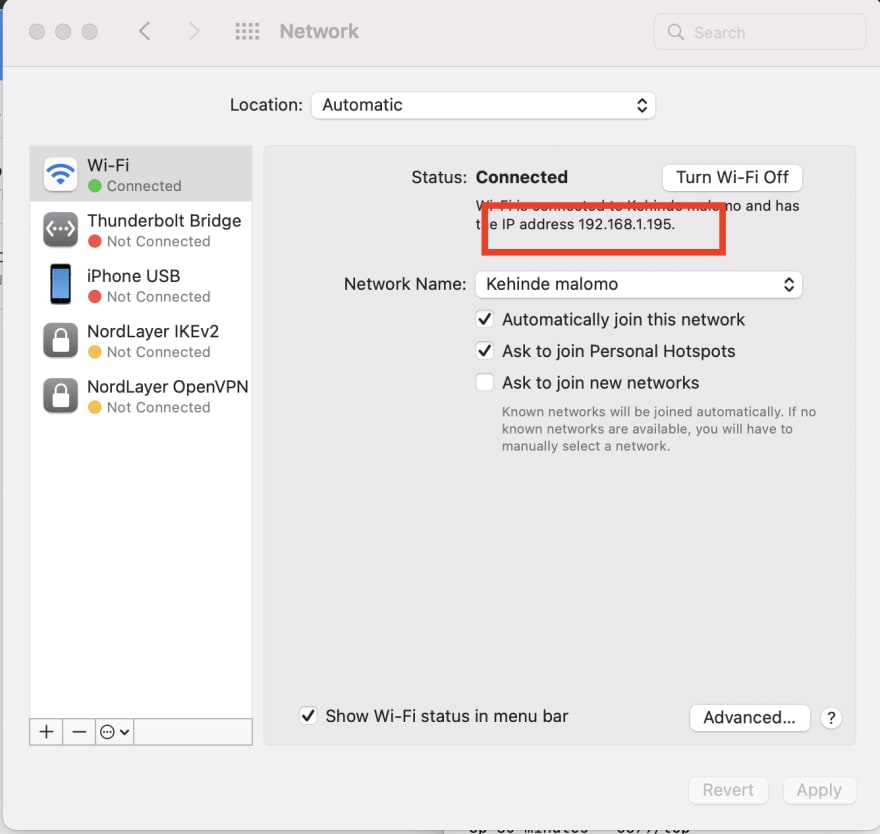
iOS
Navigate to the Network section, copy the IP address, and modify it as shown below:
class AppConstant {
  final String databaseId = "REPLACE WITH DATABASE ID";
  final String projectId = "REPLACE WITH PROJECT ID";
  final String endpoint = "http://192.168.1.195/v1";
  final String collectionId = "REPLACE WITH COLLECTION ID";
}
Android
We can connect our Android emulator to the system’s IP using the 10.0.2.2 IP address.
class AppConstant {
  final String databaseId = "REPLACE WITH DATABASE ID";
  final String projectId = "REPLACE WITH PROJECT ID";
  final String endpoint = "http://10.0.2.2/v1";
  final String collectionId = "REPLACE WITH COLLECTION ID";
}
Building the real-time in-app campaign
To get started, we need to create a model to convert the response sent from Appwrite to a Dart object. The model will also cater to JSON serialization. To do this, add the snippet below in the same utils.dart file:
class AppConstant {
  //code goes here
}

class Promo {
  String? $id;
  String name;
  bool status;

  Promo({required this.name, required this.status});

  factory Promo.fromJson(Map<dynamic, dynamic> json) {
    return Promo(
      name: json['name'],
      status: json['status'],
    );
  }

  Map<dynamic, dynamic> toJson() {
    return {'name': name, 'status': status};
  }
}
The snippet above does the following:
- Creates a
Promoclass with required properties - Adds a constructor with unrequired and required parameters
- Creates a
fromJsonandtoJsonmethod for JSON serialization
Next, we need to create a service file to separate the application core logic from the UI. To do this, create a promo_service.dart file inside the lib directory and add the snippet below:
import 'package:appwrite/appwrite.dart';
import 'package:real_time_comm/utils.dart';

class PromoService {
  Client client = Client();
  Databases? db;

  PromoService() {
    _init();
  }

  //initialize the application
  _init() async {
    client
        .setEndpoint(AppConstant().endpoint)
        .setProject(AppConstant().projectId);

    db = Databases(client, databaseId: AppConstant().databaseId);

    //get current session
    Account account = Account(client);
    try {
      await account.get();
    } on AppwriteException catch (e) {
      if (e.code == 401) {
        account
            .createAnonymousSession()
            .then((value) => value)
            .catchError((e) => e);
      }
    }
  }

  Future<List<Promo>> getPromos() async {
    try {
      var data =
          await db?.listDocuments(collectionId: AppConstant().collectionId);
      var promoList =
          data?.documents.map((promo) => Promo.fromJson(promo.data)).toList();
      return promoList!;
    } catch (e) {
      throw Exception('Error getting list of promos');
    }
  }
}
The snippet above does the following:
- Imports the required dependencies
- Creates a
PromoServiceclass withclient,dbproperties to connect to Appwrite instance, and the database - Creates an
_initmethod that configures the Appwrite using the properties and also conditionally creates an anonymous user to access the Appwrite database - Creates a
getPromosmethod that uses the configured database’slistDocumentsfunction to get a list of promos and converts the returned JSON to a list using thePromo.fromJsonmethod
Consuming the service
With that done, we can start using the service to perform the required operation. To get started, we need to open the home.dart file in the same lib directory and update it by doing the following.
First, we need to import the required dependencies and methods to perform real-time functionality.
//remaining import goes here
import 'package:real_time_comm/utils.dart'; //add
import 'package:appwrite/appwrite.dart'; //add
import 'package:real_time_comm/promo_service.dart'; //add

class Home extends StatefulWidget {
  const Home({Key? key}) : super(key: key);
  @override
  State<Home> createState() => _HomeState();
}

class _HomeState extends State<Home> {
  List<Promo>? promos;
  bool _isLoading = false;
  bool _isError = false;

  @override
  void initState() {
    super.initState();
    _getPromoList();
    _subscribe();
  }

  _getPromoList() async {
    setState(() {
      _isLoading = true;
    });
    PromoService().getPromos().then((value) {
      setState(() {
        promos = value;
        _isLoading = false;
      });
    }).catchError((e) {
      setState(() {
        _isLoading = false;
        _isError = true;
      });
    });
  }

  _subscribe() {
    final realtime = Realtime(PromoService().client);
    final subscription = realtime.subscribe(['documents']);
    //listening to stream we can listen to
    subscription.stream.listen((e) {
      if (e.payload.isNotEmpty) {
        if (e.events.contains('databases.*.collections.*.documents.*.update')) {
          setState(() {
            promos!
                .map((element) => element.status = e.payload['status'])
                .toList();
          });
        }
      }
    });
  }

  List<Product> products = [
    //promo list code goes here
  ]

  @override
  Widget build(BuildContext context) {
    //widget goes here
  }
}
The snippet above does the following:
- Imports the required dependencies
-
Lines 13-15: Create the
promos,_isLoading, and_isErrorproperties to manage the application state -
Lines 17-38: Create a
_getPromoListmethod to get the list of promos using thePromoService().getPromosservice, set states accordingly, and use theinitStatemethod to call the_getPromoListand_subscibemethod when the object is inserted into the tree -
Lines 40-55: Create a
_subscribemethod for managing real-time functionality in the app. The method also does the following:- Creates a
realtimeandsubscriptionvariable that subscribes to the Appwrite event by subscribing to thedocumentsavailable - Uses the
subscriptionvariable to listen to the returned stream and check that it is not empty - Checks whether the returned event is an update action and updates the document based on the payload returned
- Creates a
Lastly, we need to modify the UI to conditionally show the campaign promo card based on the real-time data coming from Appwrite.
//import goes here

class Home extends StatefulWidget {
  const Home({Key? key}) : super(key: key);
  @override
  State<Home> createState() => _HomeState();
}

class _HomeState extends State<Home> {
  List<Promo>? promos;
  bool _isLoading = false;
  bool _isError = false;

  @override
  void initState() {
    super.initState();
    _getPromoList();
    _subscribe();
  }

  _getPromoList() async {
    //code goes here
  }

  _subscribe() {
    //code goes here
  }

  List<Product> products = [
    //promo list code goes here
  ]

  @override
  Widget build(BuildContext context) {
    return Scaffold(
      backgroundColor: const Color(0xffE8EBF3),
      appBar: AppBar(
        title: const Text("E-commerce Product List"),
        backgroundColor: const Color(0xff1C4ED8),
      ),
      body: _isLoading
          ? const Center(child: CircularProgressIndicator())
          : _isError
              ? const Center(
                  child: Text(
                    'Error loading promos',
                    style: TextStyle(
                      color: Colors.red,
                      fontWeight: FontWeight.bold,
                    ),
                  ),
                )
              : Column(
                  children: [
                    promos![0].status ? const PromoCard() : const SizedBox(),
                    ListView.builder(
                      shrinkWrap: true,
                      itemCount: products.length,
                      itemBuilder: (context, index) {
                        return ProductCard(
                            name: products[index].name,
                            totalSold: products[index].totalSold,
                            price: products[index].price,
                            imgURL: products[index].imgURL);
                      },
                    ),
                  ],
                ),
    );
  }
}
With that done, we restart the application using the code editor or run the command below:
flutter run
Upon running the project, we should see our application subscribed to events from Appwrite.


https://media.giphy.com/media/C6SFslyT2Ho9xsDJTr/giphy.gif
Conclusion
This post discussed how to use Appwrite’s real-time capability to trigger an in-app e-commerce campaign in Flutter. The Appwrite platform ships intuitive UI and well-documented APIs that developers can leverage to perform real-time functionality or build a custom application that non-technical users can use to trigger and customize campaigns.
These resources might be helpful:

Oldest comments (0)