
In a world where over 4.5 billion people access the internet daily, it has become an integral part of our lives because it affects our social interactions in so many ways. One is the increase in the number of people making purchases online. To create online stores, business owners have turned to online platforms like Shopify. These factors have led to an increase in the importance of online sales in our economy. E-retail sales have surpassed 5.7 trillion dollars globally, and this number is only likely to rise in the upcoming years.
In this article, you will learn how to integrate Xata and Cloudinary to Nextjs to build an E-commerce storefront, the presentation layer of an online store that communicates with online customers. Nextjs is a React framework used to create the user interface. Cloudinary is a robust media API used to manage media files, and Xata is a serverless database that stores users' data.
Prerequisite
- Npm
- Node
- Git
- Basic knowledge of Reactjs and Nextjs
Getting started
The entire source code for this application is publicly accessible on GitHub. You can clone it locally to your computer. This article will concentrate on how we will be utilizing Xata and Cloudinary in the project.
Cloudinary is a powerful media API for websites and mobile apps alike. Developers and marketers can effectively create, manage, and deploy their digital experiences using any browser, device, or bandwidth, thanks to Cloudinary. The architecture of Cloudinary was designed from the ground up to withstand enormous loads and manage essentially infinite amounts of assets and consumption.
After you clone it, you must add a Xata API key, Cloudinary cloud name, and the upload preset in an .env file at its root if you want to execute it locally.
Upload presets can be defined as a collection of activities that would occur upon uploading a resource. These activities could include applying an add-on capability, performing a transformation, or altering a resource's access control, among many other possibilities.
To clone the application, run the following command on the terminal.
git clone https://github.com/HarcourtHamsa/Frontier.git
Create a .env file in the root directory and paste your Xata api key
XATA_API_KEY=<your Api key>
CLOUD_NAME=<your cloudinary cloud name>
UPLOAD_PRESET=<your cloudinary upload preset>
Start the project
npm run dev
Adding Xata CLI
Xata is a serverless database with robust search and analytics. It is comparable to a serverless relational database, a search engine, and an analytics engine, all hidden behind a uniform API.
It is advisable to use the SDK when adding Xata to the project; We can use the SDK in many JavaScript runtimes, including Node.js, Deno, Electron, etc.
To install Xata, run the command:
npm i -g @xata.io/cli
Next, we have to authenticate Xata with the command
xata auth login
With the stated command, you can either paste in an existing API key or create a new one by opening a browser.
Also, you will need to configure the application with the command below:
xata init
The command above will start a brief survey that will assist us in setting up our project. Answer the questions, and use code generation.
Now that Xata is set up in the project, you can query data with the utmost security and efficiency.
Creating Xata API
To add an API key, you'll go to your account settings, where you can add an API key. There you will be required to submit a name to generate a key. Because your key will only be shown to you once before becoming inaccessible for security reasons, ensure you copy it to a secure area. You can invalidate and create a new key if you misplace this one.
Setting up a Cloudinary account
Visit the website to sign up for a free account, then set up your Cloudinary account. You can sign up using GitHub, Gmail, or your email address.
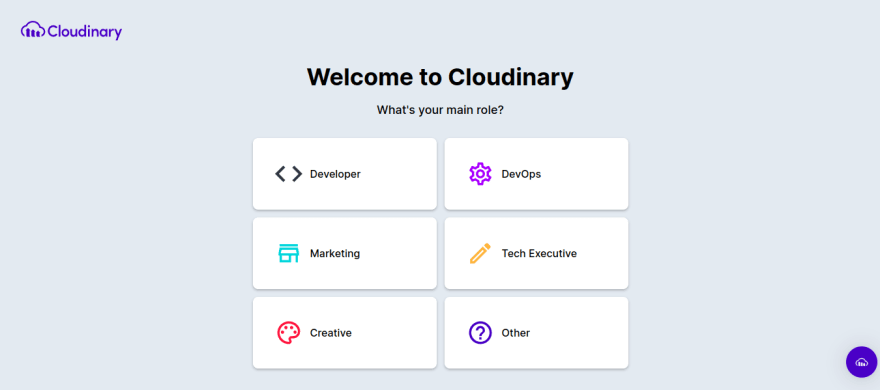
After signing up, you will be required to choose a role. In this case, you should select Developer and click continue.
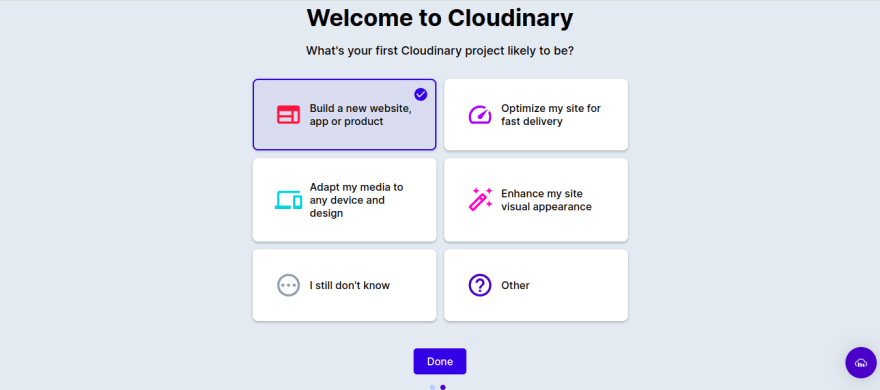
Next, you will be asked to select what your project is most likely to be. Select the first option and click Done.
Navigate to your dashboard. The dashboard contains the account details, which is the most critical area of the project.

By default, Cloudinary assigns a random cloud name which you can edit to a name of your choice. To edit your cloud name, click on settings (the clog icon at the top left corner) and scroll to the bottom of the page as seen below:

Enter the cloud name of your choice and click Save.
Next, you need to set your upload preset. Still on your settings page, at the top of the page, click on Upload and scroll down to the section below.
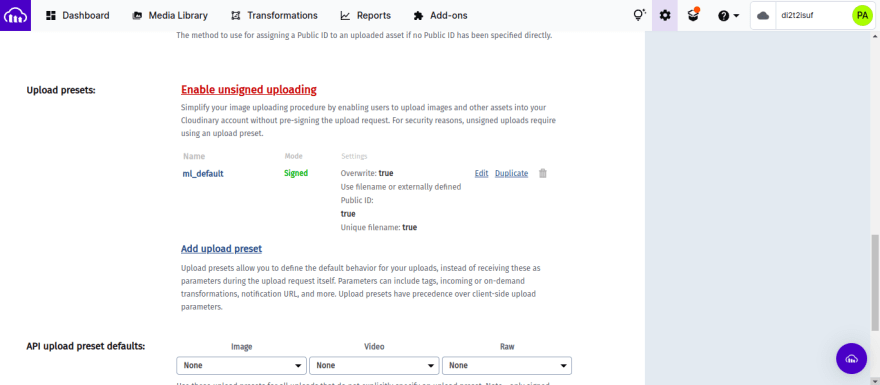
Click on Add upload preset.
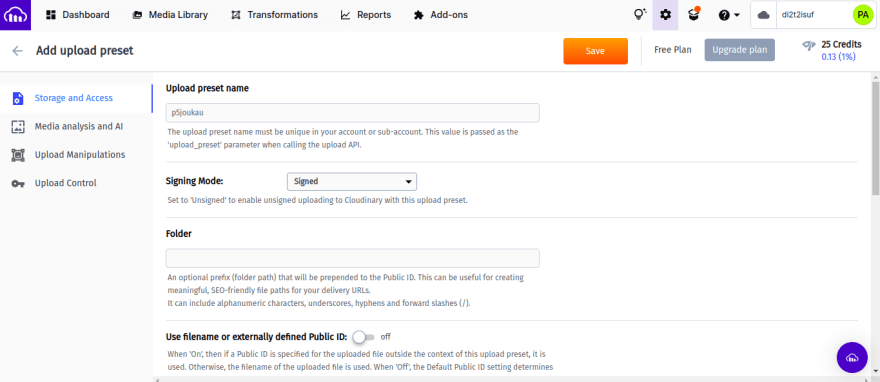
Input your desired preset name, set the Signing mode to Unsigned, and click Save.
Next, you will set up your Xata account.
Setting up the Xata account
Visit the website to register for free. You will see the Add a database card after signing up, where you will create your database.
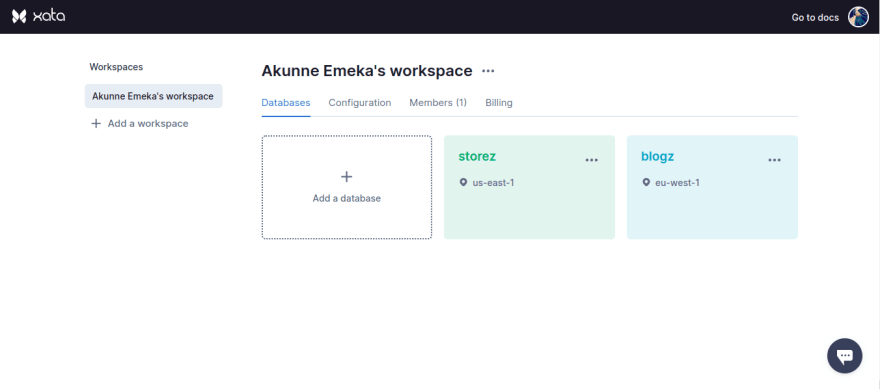
Click on the card, input your database name and click Create. A new card with your database name will appear next to the Add a database card.
Next, you need to create a table. Select your new database to navigate a page like the one below.
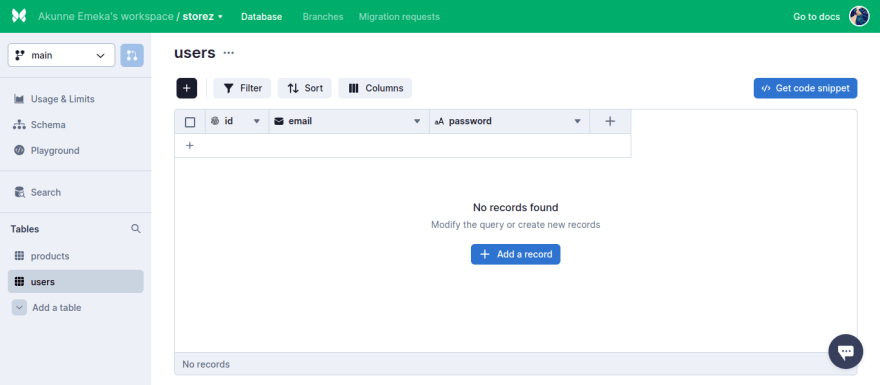
Click on Add a table in the sidebar below and insert your table name. You can also populate your table by clicking the Add a record button and filling in the desired details.
For this project, you will need three tables; Users, Stores, and Products.
The Users table should have the following columns:
- id: The user's unique id auto-generated by xata
- first_name: The user's first name
- last_name: The user's last name
- email: The user's email
- password: The user's password
- username: The user's display name
The Products table should have the following columns:
- id: Xata auto-generated id
- name: Name of product
- price: Price of the product
- description: Short description of the product
- image_url: Image URL gotten from Cloudinary
- store_id: The store id
Finally, the Store table should contain the following:
- id: Xata auto-generated id
- name: Store name
- owners_id: User id
Congratulations! You have completed the basic setup for Cloudinary and Xata. Next, you will insert and query data with Nextjs to Cloudinary and Xata.
Xata and Nextjs
Signing up users
Go to /pages/api/auth/register.ts
import { NextApiRequest, NextApiResponse } from "next";
import nc from "next-connect";
import { getXataClient } from "../../../utils/xata.codegen";


const xata = getXataClient();
const handler = nc().post(async (req: NextApiRequest, res: NextApiResponse) => {
  const record = await xata.db.Users.filter({
    email: req.body.email
  }).getMany();
  if (record.length !== 0) {
    res.status(403);
    res.end();
    return;
  } else {
    console.log(req.body)
    const user = await xata.db.Users.create({
      ...req.body,
    });
    return res.status(200).json({ data: user });
  }
});
export default handler;
The above code performs authentication for users when they try to sign up. First, the Users table is queried from the database and then filtered based on the email gotten from the client side. The result will be an array that is passed to the record variable.
Then we check if the record contains any data using record.length. If true, we parse a 403 error code and end the process. If false, we proceed to create a new user.
Log in users
Go to /pages/api/auth/login.ts.
import { NextApiRequest, NextApiResponse } from "next";
import nc from "next-connect";
import Router from "next/router";
import { getXataClient } from "../../../utils/xata.codegen";

const xata = getXataClient();
const handler = nc().post(async (req: NextApiRequest, res: NextApiResponse) => {
  const record = await xata.db.Users.filter({
    email: req.body.email,
  }).getMany();

  if (!record) {
    return res.status(401).json({ message: "Invalid email/password" });
  } else if (record[0].password !== req.body.password) {
    return res.status(401).json({ message: "Invalid email/password" });
  } else {
    return res.status(200).json({ data: record });
  }
});
export default handler;
Like the sign-up page, the Users table is also queried and filtered for the login page. If no data is found, an error message is passed. If a record is found, we parse the data.
Create a store
/pages/api/store/index.ts
import { NextApiRequest, NextApiResponse } from "next";
import nc from "next-connect";
import { getXataClient } from "../../../utils/xata.codegen";
import { decode } from "jsonwebtoken";
const xata = getXataClient();
const handler = nc().post(async (req: NextApiRequest, res: NextApiResponse) => {
  const { name }: { name: string } = req.body;
  const jwt = req.cookies.frontier__jwt;
  const decodedData = decode(jwt);
  const accessToken = decodedData["0"].id;

  const record = await xata.db.Store.create({
    owners_id: accessToken,
    name: name,
  });
  if (!accessToken && record) {
    res.end();
    return;
  }
  res.status(200).json({
    data: record,
  });
});
export default handler;
To create a store, the above code retrieves the user's (owner) id encoded with JSON web token (JWT) and passes it along with the desired store name.
Fetch user store
/pages/api/products/index.ts
import { NextApiRequest, NextApiResponse } from "next";
import nc from "next-connect";
import { getXataClient } from "../../../utils/xata.codegen";
const xata = getXataClient();
import { decode } from "jsonwebtoken";
const handler = nc().get(async (req: NextApiRequest, res: NextApiResponse) => {
  const jwt = req.cookies.frontier__jwt;
  const decodedData = decode(jwt);
  const accessToken = decodedData["0"].id;
  const record = await xata.db.Store.filter({
    owners_id: accessToken,
  }).getMany();
  if (!record) {
    res.end();
    return;
  }
  res.status(200).json({
    data: record,
  });
});
export default handler;
The code above filters the Store table by the user's id and returns every store owned by the user.
Post a product
/pages/api/store/index.ts
import { NextApiRequest, NextApiResponse } from "next";
import nc from "next-connect";
import { getXataClient } from "../../../utils/xata.codegen";
const xata = getXataClient();
const handler = nc().post(async (req: NextApiRequest, res: NextApiResponse) => {
  console.log(req.body);
  const product = xata.db.Products.create({ ...req.body });
  console.log(product);
  return res.status(200).json({ data: product });
});
export default handler;
To create a product, the above code passes the information sent from the client form.
Fetch user product
/pages/api/stores/index.ts
import { NextApiRequest, NextApiResponse } from "next";
import nc from "next-connect";
import { getXataClient } from "../../../utils/xata.codegen";
const xata = getXataClient();
const handler = nc().post(async (req: NextApiRequest, res: NextApiResponse) => {
  const { storeID } = req.body;
  const record = await xata.db.Products.filter({
    store_id: storeID,
  }).getMany();
  if (!record) {
    res.end();
    return;
  }
  res.status(200).json({
    data: record,
  });
});
export default handler;
The code above filters the Product table based on the store's id and returns every product owned by the store.
Cloudinary and Nextjs
Uploading file to Cloudinary
/pages/app/products/new/index.ts
The above code aids in passing the image file to Cloudinary. The handleFileChange() function sets the file state with the image file from the input field. After filling in other fields, the submit button calls the handleSubmit() function when clicked. The formData is used to construct a set of key/value pairs representing the required field for uploading media to Cloudinary.
Then a POST request is made, passing the cloudinary_url, along with the formData. The response is parsed, and the URL for the image is set to state image_url. Next, all the information from the form is passed to the server side using the product() function, where they are inserted into the Product table.
Wrapping up
In this article, you learned how to set up and use Cloudinary to upload and store media files and Xata to query data from your Nextjs project. You also learned how to configure Xata on your project using the CLI. Remember the project is available and accessible on GitHub.
Project Demo

You can check out the live application to get a feel for how the application works.
Project Contributors
Akunne Pascal
Harcourt Hamsa


Top comments (0)