
This article was originally posted on Hackmamba.
Authentication has become one of the most important attributes of large multi-user websites. Applications require authentication to collect and verify a user’s information before granting access.
What we will be building
This article discusses authenticating, collecting, and displaying a piece of user information with Clerk’s open-source authentication provider.
GitHub URL
https://github.com/Iheanacho-ai/clerk-authenticatin
Prerequisites
This article requires the following:
- A basic understanding of CSS, JavaScript, and React.js
- A Clerk account, create a free account here
Setting up our Next.js app
Next.js is an open-source React framework that enables us to build server-side rendered static web applications.
To create our Next.js app, we navigate to our preferred directory and run the terminal command below:
    npx create-next-app@latest
    # or
    yarn create next-app
After creating our app, we change the directory to the project and start a development server with:
    cd <name of our project>
    npm run dev
To see our app, we go to http://localhost:3000.
Installing Tailwind CSS
Tailwind CSS is a "utility-first" CSS framework that allows us to create user interfaces for web applications rapidly.
To install Tailwind CSS in our project, we run these terminal commands.
    npm install -D tailwindcss postcss autoprefixer
    npx tailwindcss init -p
These commands create two files in the root directory of our project, tailwind.config.js, and postcss.config.js.
In our tailwind.config.js, we add the paths to all our template files with the code below.
    module.exports = {
      content: [
        "./pages/**/*.{js,ts,jsx,tsx}",
        "./components/**/*.{js,ts,jsx,tsx}",
      ],
      theme: {
        extend: {},
      },
      plugins: [],
    }
Next, we add the tailwind directives in our styles/global.css file.
    @tailwind base;
    @tailwind components;
    @tailwind utilities;
Creating a new Clerk Application
Clerk is an open-source user management tool that offers developers an easy solution to authentication.
To handle authentication with Clerk, we need to create an application on our Clerk Dashboard. To create an application, we go to our Clerk dashboard, click on Add application, and give our application a name.
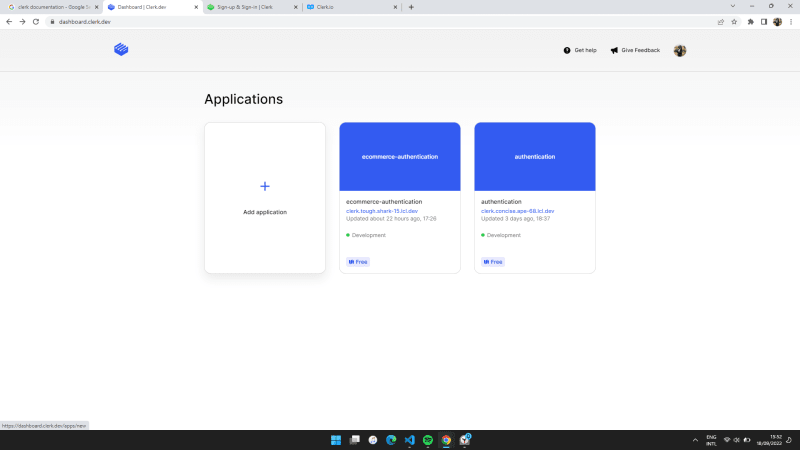
Here is how the dashboard of the newly created application looks.

To understand more about the available authentication settings, check out the Clerk Docs.
We click on the API Keys tab on the left side of the application’s dashboard.

Now, copy the Frontend API Key, Backend API Key, and JWT verification key, which we need to initialize Clerk’s SDK.
Next, we create a .env.local file in our Next.js application’s root directory to initialize the Clerk SDK.
Paste the keys we copied in the .env.local file.
    # Replace frontend api key, with the frontend api key you copied
    NEXT_PUBLIC_CLERK_FRONTEND_API= frontend api key

    # Replace backend api key, with the backend api key you copied
    CLERK_API_KEY= backend api keys

    # Replace jwt verification key, with the jwt verification key you copied
    CLERK_JWT_KEY= jwt verification key
Installing Clerk
After creating our application on our dashboard, we install Clerk in our Next.js application. To install Clerk, we run these terminal commands.
    # Navigate to our application's root directory
    cd <project name>

    # Install the clerk/nextjs package
    npm install @clerk/nextjs
In our _app.js file, we wrap our application with the <ClerkProvider/> component to get access to Clerk properties.
    import '../styles/globals.css'
    import { ClerkProvider } from '@clerk/nextjs';

    function MyApp({ Component, pageProps }) {
      return (
        <ClerkProvider {...pageProps} >
          <Component {...pageProps} />
        </ClerkProvider>
      );
    }

    export default MyApp;
Creating our E-commerce website
In our index.js file, we create the user interface of our e-commerce website with the code below.
https://gist.github.com/Iheanacho-ai/0f041b4035b66f80601128c80dbb1f01
In the GitHub gist above, we define an array of objects containing information on all our e-commerce website's products. Next, we loop through the array and render the products in our application.
Here is how our e-commerce application looks.

Handling Authentication with Clerk.
After creating our e-commerce application, we only want to restrict application access to signed-in users.
Protecting routes with redirect
To efficiently restrict page access, Clerk makes use of components called Control Components. In this article, we will use three Control Components.
-
<SignedIn/>: Renders its children only when a user is signed in -
<SignedOut/>: Renders its children only when there's no active user -
<RedirectToSignIn/>: Triggers a redirect to the sign-in page
In our _app.js, we protect our pages from unsigned users with this piece of code below:
    import '../styles/globals.css'
    import { ClerkProvider, SignedIn, SignedOut, RedirectToSignIn } from '@clerk/nextjs';
    import { useRouter } from 'next/router';

    const publicPages = [];

    function MyApp({ Component, pageProps }) {
      // Get the pathname
      const { pathname } = useRouter();
      // Check if the current route matches a public page
      const isPublicPage = publicPages.includes(pathname);
      // If the current route is listed as public, render it directly
      // Otherwise, use Clerk to require authentication
      return (
        <ClerkProvider>
          {isPublicPage ? (
            <Component {...pageProps} />
          ) : (
            <>
              <SignedIn>
                <Component {...pageProps} />
              </SignedIn>
              <SignedOut>
                <RedirectToSignIn />
              </SignedOut>
            </>
          )}
        </ClerkProvider>
      );
    }
    export default MyApp;
In the code block above, we do the following:
- Import the
ClerkProvider,SignedIn,SignedOut, andRedirectToSignIncomponents from the clerk/nextjs package - Specify what routes we want to be available to unsigned users in the
publicPagesarray. In this case, thepublicPagesarray is empty, which means we do not want any page to be available to unsigned users - Collect the current route a user tries to access and check if the route is in the
publicPagesarray. We then update theisPublicPagevariable depending on if the route is in thepublicPagesarray - Render the page content if the
isPublicPageis true - Redirect the user to sign into the application if
isPublicPageis false
Here is how our application looks to an unsigned user.

Displaying and Signing out a User
Clerk allows us to use a component called <UserButton/> to display and sign out users. The <UserButton/> component is a button that displays a user’s information and allows a user to sign out from our application.
In our index.jsx file, we import the <UserButton/> component.
import { UserButton } from "@clerk/clerk-react";
Next, we place the button in our header div.
    <div className="header">
       <h2 className="text-4xl font-normal leading-normal mt-0 mb-2 text-gray-800">Welcome!</h2>
       <UserButton/>
    </div>
Here is how our looks.

With this, we have created our application.

Conclusion
This article discussed using the Clerk auth0 services to handle authentication to an e-commerce website. After authenticating users, we signed in, displayed the signed-in user information, and finally signed the users out.
Resources
The resources below may be helpful:

Top comments (0)