
Databases. You love them, you need them, but let's face it... you've already mastered working with them. There's only so much fun to be had in the business of opening database connections, pulling rows, and putting them back where they came from. Wouldn't it be great if we could skip the boring stuff and work with data?
Pandas and SQLAlchemy are a mach made in Python heaven. They're individually amongst Python's most frequently used libraries. Together they're greater than the sum of their parts, thanks to Pandas' built-in SQLAlchemy integration.
Create a SQLAlchemy Connection
As you might imagine, the first two libraries we need to install are Pandas and SQLAlchemy. We need to install a database connector as our third and final library, but the library you need depends on the type of database you'll be connecting to. If you're connecting to MySQL I recommend installing PyMySQL ( pip install pymysql ). If you're connecting to Postgres, go with Psycopg2 ( pip install psycopg2 ). The only time we'll use either of these libraries is when we establish a database connection with SQLAlchemy.
SQLAlchemy URIs
A URI (or connection string), is simply a string containing the information needed to connect to something like a database. Here's an example:
postgres+psycopg2://myuser:mypassword@hackersdb.example.com:5432/mydatabase
The first part of our string is postgres+psycop2, which is a combination of our target database type and our connector. If you're connecting to MySQL, replace this with mysql+pymysql. In case the rest of the URI isn't self-explanatory, here's a breakdown of each piece of this string:
[DB_FLAVOR]+[DB_PYTHON_LIBRARY]://[USERNAME]:[PASSWORD]@[DB_HOST]:[PORT]/[DB_NAME]
SQLAlchemy Engines
An "engine" is an object used to connect to databases using the information in our URI. Once we create an engine, downloading and uploading data is as simple as passing this object to Pandas:
from os import environ
from sqlalchemy import create_engine

db_uri = environ.get('SQLALCHEMY_DATABASE_URI')
self.engine = create_engine(db_uri, echo=True)
Besides accepting a URI, create_engine() can accept a few optional kwargs as well. I've decided to set echo=True, which will log every query our SQL database executes to the terminal. If your database requires SSL, you may need to utilize the connect_args parameter to pass a certificate.
Believe it or not, we're already done dealing with database setup! From here forward we're able to pull or upload data into Pandas via easy one-liners.
Create a SQL Table From a DataFrame
For our first trick, let's create a SQL table from data in a CSV. I downloaded a CSV containing NYC job data which I'll be using to demonstrate:
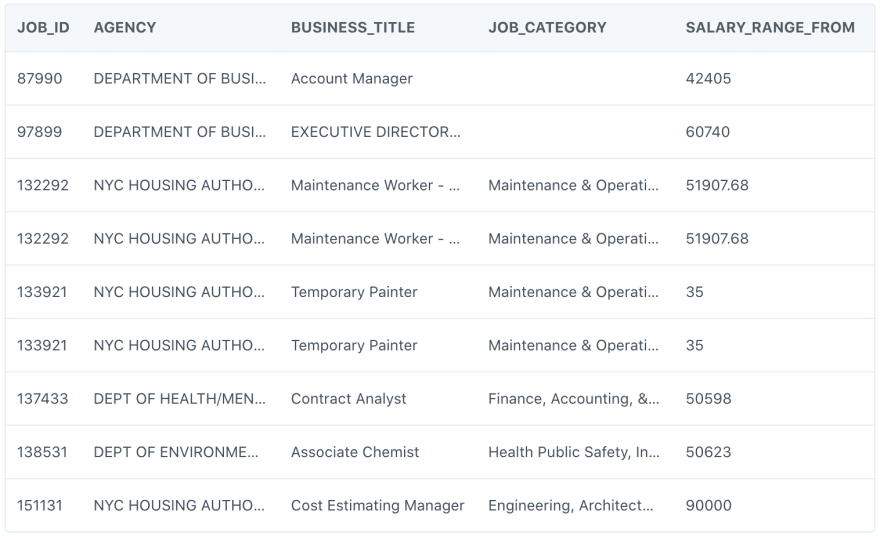
We're going to create a DataFrame from this CSV, as we've done a million times before:
import pandas as pd


jobs_df = pd.read_csv('data/nyc-jobs.csv')
We now have a DataFrame ready to be saved as a SQL table! We can accomplish this with a single method built in to all DataFrames called to_sql(). As the name suggests, to_sql() allows us to upload our DataFrame to a SQL database as a SQL table. Let's see it in action:
from sqlalchemy.types import Integer, Text, String, DateTime

...

table_name = 'nyc_jobs'

jobs_df.to_sql(
    table_name,
    engine,
    if_exists='replace',
    index=False,
    chunksize=500,
    dtype={
        "job_id": Integer,
        "agency": Text,
        "business_title": Text,
        "job_category": Text,
        "salary_range_from": Integer,
        "salary_range_to": Integer,
        "salary_frequency": String(50),
        "work_location": Text,
        "division/work_unit": Text,
        "job_description": Text,
        "posting_date": DateTime,
        "posting_updated": DateTime
    }
)
There's quite a bit happening here! to_sql() attempts to create a table with the name nyc_jobs in the database associated with engine. These two positional arguments are technically the only required parameters we need to pass, but it's a very good idea to take advantage of Pandas' ability to be more specific in table creation:
-
if_exists: This argument specifies what to do in the situation where a database table with the name nyc_jobs already exists in the database. By default, Pandas will throw an error, which isn't very useful unless we only care about creating this table the first time. Passing replace to this argument will drop the existing table and replace it with the data & data types associated with the current DataFrame. append will keep the existing table the same, but append all rows in the DataFrame to the existing table. -
schema: Accepts the name of the Postgres schema to save your table in. -
index: When True , the resulting table will honor your DataFrame's index to create a column with the appropriate key in your database. -
chunksize: Passing a number to this parameter will attempt to upload your data as a stream of "chunks" n rows at a time, as opposed to all at once. Passing a chunksize is useful for particularly large datasets which may be at risk of interruption during upload. -
dtype: Passing a Python dictionary to dtype lets us explicitly set the datatypes of each column in our database, where each key is the column name and each value is the data type (I highly recommend doing this). You'll notice we import various data types from sqlalchemy.types , which we then associate with each column's name. If the target SQL table doesn't exist yet, passing these datatypes will ensure that each SQL column is created with the appropriate data constraint, as opposed to each column rendered simply as "text." If a target SQL table does exist, these data types must match the types of the existing table, or you'll receive a SQL error during the upload.
Since we set SQLAlchemy's echo parameter to True, I'm able to see exactly what my database does with this DataFrame:
2020-06-11 23:49:21,082 INFO sqlalchemy.engine.base.Engine SHOW VARIABLES LIKE 'sql_mode'
2020-06-11 23:49:21,082 INFO sqlalchemy.engine.base.Engine {}
2020-06-11 23:49:21,396 INFO sqlalchemy.engine.base.Engine SHOW VARIABLES LIKE 'lower_case_table_names'
2020-06-11 23:49:21,396 INFO sqlalchemy.engine.base.Engine {}
2020-06-11 23:49:21,432 INFO sqlalchemy.engine.base.Engine SELECT DATABASE()
2020-06-11 23:49:21,432 INFO sqlalchemy.engine.base.Engine {}
2020-06-11 23:49:21,470 INFO sqlalchemy.engine.base.Engine show collation where "Charset" = 'utf8mb4' and "Collation" = 'utf8mb4_bin'
2020-06-11 23:49:21,470 INFO sqlalchemy.engine.base.Engine {}
2020-06-11 23:49:21,502 INFO sqlalchemy.engine.base.Engine SELECT CAST('test plain returns' AS CHAR(60)) AS anon_1
2020-06-11 23:49:21,502 INFO sqlalchemy.engine.base.Engine {}
2020-06-11 23:49:21,523 INFO sqlalchemy.engine.base.Engine SELECT CAST('test unicode returns' AS CHAR(60)) AS anon_1
2020-06-11 23:49:21,523 INFO sqlalchemy.engine.base.Engine {}
2020-06-11 23:49:21,537 INFO sqlalchemy.engine.base.Engine SELECT CAST('test collated returns' AS CHAR CHARACTER SET utf8mb4) COLLATE utf8mb4_bin AS anon_1
2020-06-11 23:49:21,537 INFO sqlalchemy.engine.base.Engine {}
2020-06-11 23:49:21,587 INFO sqlalchemy.engine.base.Engine DESCRIBE "nyc_jobs"
2020-06-11 23:49:21,588 INFO sqlalchemy.engine.base.Engine {}
2020-06-11 23:49:21,654 INFO sqlalchemy.engine.base.Engine ROLLBACK
2020-06-11 23:49:21,691 INFO sqlalchemy.engine.base.Engine
CREATE TABLE nyc_jobs (
    job_id INTEGER,
    agency TEXT,
    business_title TEXT,
    job_category TEXT,
    salary_range_from INTEGER,
    salary_range_to INTEGER,
    salary_frequency VARCHAR(50),
    work_location TEXT,
    division TEXT,
    job_description TEXT,
    created_at DATETIME,
    updated_at DATETIME
)
Just as we described, our database uses CREATE TABLE nyc_jobs to create a new SQL table, with all columns assigned appropriate data types.
Create DataFrame from SQL Table
Loading data from a database into a Pandas DataFrame is surprisingly easy. To load an entire table, use the read_sql_table() method:
table_df = pd.read_sql_table(
    table_name,
    con=engine
)
The first two parameters we pass are the same as last time: first is our table name, and then our SQLAlchemy engine. The above snippet is perhaps the quickest and simplest way to translate a SQL table into a Pandas DataFrame, with essentially no configuration needed! Interestingly, Pandas is still oblivious to the dtype of each column we've pulled despite having pulled from a database, as we can see with print(table_df.info()):
<class 'pandas.core.frame.DataFrame'>
RangeIndex: 3123 entries, 0 to 3122
Data columns (total 12 columns):
 # Column Non-Null Count Dtype
--- ------ -------------- -----
 0 job_id 3123 non-null int64
 1 agency 3123 non-null object
 2 business_title 3123 non-null object
 3 job_category 3121 non-null object
 4 salary_range_from 3123 non-null int64
 5 salary_range_to 3123 non-null int64
 6 salary_frequency 3123 non-null object
 7 work_location 3123 non-null object
 8 division 3123 non-null object
 9 job_description 3123 non-null object
 10 created_at 3123 non-null object
 11 updated_at 3123 non-null object
dtypes: int64(3), object(9)
memory usage: 292.9+ KB
None
The read_sql_table() method can accept far more arguments than the two we passed. Here's an example where we read a SQL table and force some explicit things to happen:
...

table_df = pd.read_sql_table(
    "nyc_jobs",
    con=engine,
    schema='public',
    index_col='job_id',
    coerce_float=True,
    columns=[
        'job_id',
        'business_title',
        'job_category',
        'posting_date',
        'posting_updated'
    ],
    parse_dates=[
        'created_at',
        'updated_at'
    ],
    chunksize=500
)
Some arguments should look familiar from when we ran to_sql() earlier. schema and chunksize have the same meanings as they did previously. We also have a few new arguments as well:
-
index_col: We can select any column of our SQL table to become an index in our Pandas DataFrame, regardless of whether or not the column is an index in SQL. We can pass the name of a single column as a string, or a list of strings representing the names of multiple columns. -
coerce_float: When set to True , Pandas will look at columns containing numbers and attempt to convert these columns to floating point numbers. This attribute is set to True by default. -
columns: Passing a list of column names to this attribute will create a DataFrame from only the columns we provide (similar to a SQL select on x columns). -
parse_dates: When moving data into Pandas we need to explicitly state which columns should be considered DateTime columns.
Create DataFrames From Query Results
There will probably be times where you're just looking for a subset of data in a table as opposed to the entire table. In this scenario we can use read_sql(), which creates a DataFrame from the results of a SQL query you run on a table:
...

sql_df = pd.read_sql(
    "SELECT * FROM nyc_jobs",
    con=engine,
    parse_dates=[
        'created_at',
        'updated_at'
    ]
)
This time around our first parameter is a SQL query instead of the name of a table. We can modify this query to select only specific columns, rows which match criteria, or anything else you can do with SQL.
That's all folks! If you're interested, the source is up on Github here:
https://github.com/hackersandslackers/pandas-sqlalchemy-tutorial

Top comments (0)