
Definition
Azure Functions is an event driven server less computer platform; with Azure Functions application can be deployed and scaled in the cloud. Note automatic scaling is possible depending on the workload volume. It supports several programming languages like python, Java, JavaScript, C# etc. Azure function apps houses the execution of functions hence allows functions to be grouped for convenience in deployment, management, resource sharing and scaling as a logical unit. Below are steps for creating Function App
Step 1
Login to Azure portal and click create a resource
Find Function App on the search bar in the marketplace and click on Function App
Click on create under the function app plan
Fill in the instance details to create the function app that are the function app name, the method of publishing choose code, runtime stack choose .Net, version and region. Then select windows the operating system and consumption (server less) for the plan type
To enable the Application Insights select yes under monitoring then click Review + Create
Step 2
Click on create which initializes the deployment process
Completion of the deployment provides us with the 'Go to Resource' button to access the service instance we created.
Now the details of the Azure Function are obvious and the URL showcased to explore. The Metrics visualized for memory functions execution count and time duration of the execution unit.
Creating the trigger
Step 3
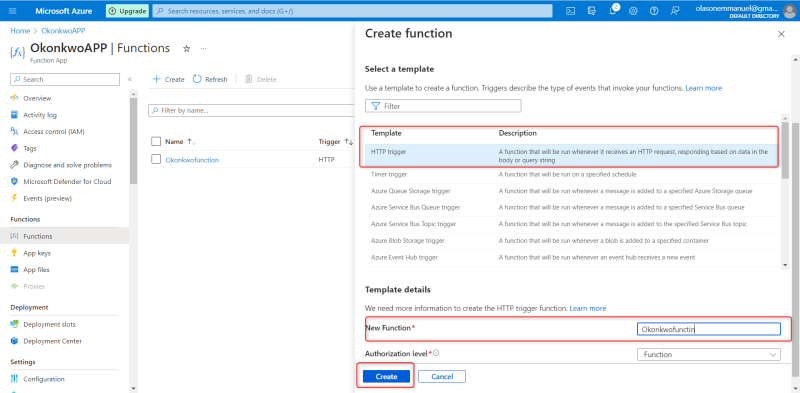
Under the function in the left menu click on Functions, next click create button. Now we are provided with the Development Environment via the portal, note we are given the choice of the template we want to use options as HTTP trigger, Azure Queue, String Trigger, Azure Event Hub Trigger etc
Select the HTTP trigger then name New function and set the authentication level to function, after setting all click on create
Step 4
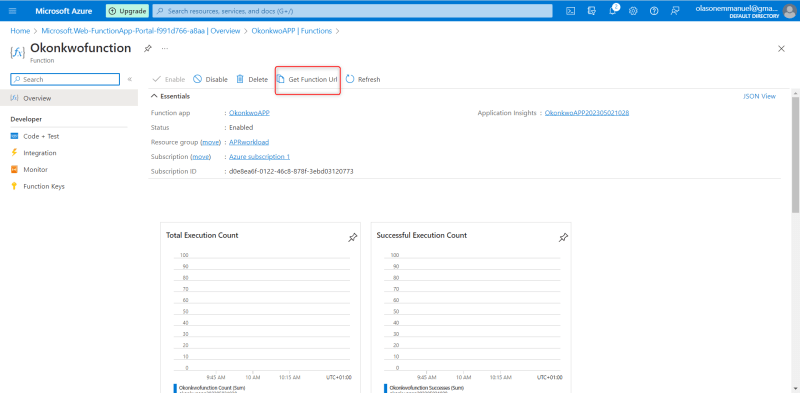
The notification is updated about the creation of the function [ new function name] visit the details page of the function to see visualization in details, also note here that status is enabled that is currently running
Function testing
Step 5
Go to developer menu, select Code + Test. Now we have the HTTP trigger code. Click to Get function URL. Set key to default and copy the URL
Step 6
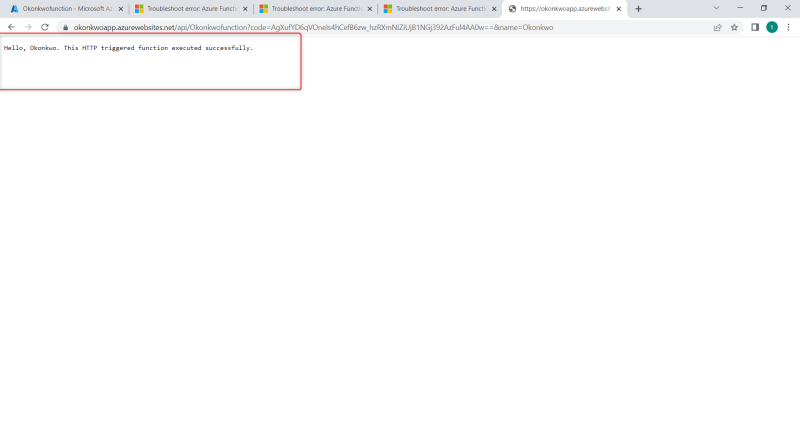
Go to your browser and paste the URL. We can now see the HTTP trigger success message that the HTTP triggered function has been created successfully

then add your name or a name at the end after ==
Hello Okonkwo. This HTTP triggered function executed successfully.


Top comments (1)
well done