

Most modern developer blogs and documentation websites have one thing in common— they run on JAMstack (static websites) and their content is file-based and powered by Git. This allows multiple developers to collaboratively edit content with perks like versioning and version control. In this tutorial, we’re going to see how we can build a simple yet powerful and interactive blog with Next.js and Markdoc.
A Brief Overview of the Article
This tutorial will cover how we can leverage modern tools and frameworks to build a fast & performant blog without relying on a backend to manage our content.
We’ll look into Next.js, its features, and why it’s important. We'll then take a look at tools like Markdoc that we can use to author and render markdown content into pages for blogs and documentation sites.
We’ll also explore the pros and cons of this approach to building static blogs and documentation websites.
Let’s get right into it!
A Introduction to the Stack
Let’s take a quick look at the tech stack we’ll be working with in this article.
JAMstack
JAMStack is an acronym for JavaScript API and Markup Stack. It's basically the way modern sites are built using tools like static site generators that can generate static content that is served over the internet. JavaScript is used for functionality and APIs are used to provide data.
For the past few years, since JAMstack became widespread, it has revolutionized the way many websites are built. JAMstack sites are fast and performant due to their static nature.
In order to provide content, APIs are used. These APIs can be called at build time during the static generation to provide content that will be sent to the client, but this is not the only way we can provide content.
We can use template files like Markdown to create content or even pages for our site using static site generators.
Next.js
According to Jamstack.org, Next.js is a minimalistic framework for server-rendered React applications as well as statically exported React apps.
Since Next.js offers both Server Side Rendering (SSR) and Static Site Generation (SSG), it’s a great choice for building fast applications.
Markdoc & File/Git-based content
According to the official docs, Markdoc is a Markdown-based document format and a framework for publishing content. It was designed at Stripe to meet the needs of their user-facing product documentation. Markdoc extends Markdown with a custom syntax for tags and annotations, providing a way to tailor content to individual users and introduce interactive elements.
With Markdoc, we can manage our content in markdown files and provide it to the frontend at build time without a database.
The Markdoc syntax is a superset of Markdown. This features markdown syntax with a few extensions to the syntax, such as tags and annotations.
Markdoc features several core concepts which include:
- Nodes: These are the elements that Markdoc inherits from Markdown.
-
Tags: Tags are the main syntactic extension that Markdoc adds on top of Markdown. Similar to HTML, each tag is enclosed with
{%and%}and includes the tag name, attributes, and content. - Annotations: These can be added to nodes to customize how they are rendered.
You can always view the full list of core concepts in the syntax docs.
What We’re Building with Next.js and Markdoc
We will be building a simple markdown-powered Next.js blog using Markdoc.
You can find the final result here: https://markdoc-app.vercel.app/
Prerequisites
To follow along, you should have:
- A basic understanding of JavaScript, React, and Markdown syntax
- Node.js (latest LTS version)
- Visual Studio Code
Seting up Next.js with Markdoc
Let’s follow the steps to build a Next.js app.
First, navigate to the folder of choice and run the command:
npx create-next-app@latest
# or
yarn create next-app
# or
pnpm create next-app
Once installed, navigate to the newly created directory to install the Markdoc package. We’ll be installing @markdoc/next.js and @markdoc/markdoc:
cd <name of app>
npm install @markdoc/next.js @markdoc/markdoc
Next, we update our next.config.js
const withMarkdoc = require('@markdoc/next.js');

module.exports = withMarkdoc(/* options */)({
 pageExtensions: ['md', 'mdoc', 'js', 'jsx', 'ts', 'tsx']
});
Also, we’ll set up TailwindCSS and Tailwind Typography to style our application. To do that, we’ll follow the steps in the Tailwind docs.
Install tailwindcss and its peer dependencies via npm, and then run the init command to generate both tailwind.config.js and postcss.config.js.
npm install -D tailwindcss postcss autoprefixer @tailwindcss/typography
npx tailwindcss init -p
Add the paths to all of our template files in your tailwind.config.js file. We’ll also add the Tailwind typography plugin:
// ./tailwind.config.js
/** @type {import('tailwindcss').Config} */
module.exports = {
 content: [
  "./pages/**/*.{js,ts,jsx,tsx}",
  "./components/**/*.{js,ts,jsx,tsx}",
  "./layouts/**/*.{js,ts,jsx,tsx}",
],
theme: {
  extend: {},
 },
 plugins: [require("@tailwindcss/typography")],
};
Add the @tailwind directives for each of Tailwind’s layers to your ./styles/globals.css file.
// ./styles/globals.css

@tailwind base;
@tailwind components;
@tailwind utilities;
To keep this tutorial short, the styling that will be applied to this application can be accessed on GitHub. You can copy the contents and enter them in your ./styles.globals.css file.
Creating our First Post
Create a new .md file within /pages/articles and name it getting-started.md:
---
title: "Get started with Markdoc"
description: "How to get started with Markdoc"
---
# Get started with Markdoc
Now, if we simply start the development server with the following command:
npm run dev
We should have something like the image below when we navigate to /articles/getting-started/.
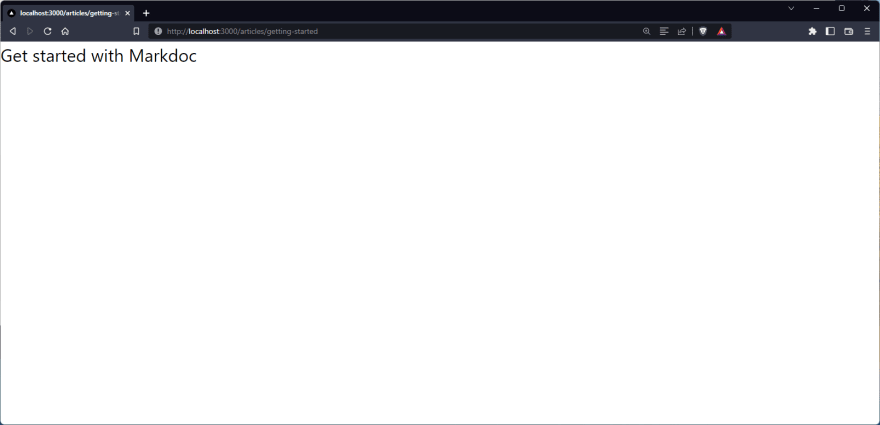
Here, we can see that the content of our markdown file has been rendered, but it’s pretty bare.
We need to display the data (i.e., the title and description) included in the front matter of the .md file:
---
title: Get started with Markdoc
description: How to get started with Markdoc
---
The front matter data will be displayed on the article page and also added to the site’s metadata. In the following sections, we’ll cover how we can achieve that.
Creating a SiteHeader Component
First, we have to create a global site header component which will be included in our layouts.
Create a new file— ./components/SiteHeader.jsx:
// ./components/SiteHeader.jsx
const { default: Link } = require("next/link");
const SiteHeader = () => {
  return (
    <header className="site-header">
      <div className="wrapper">
        <Link href={"/"}>
          <figure title="Site header">
            <h1>My site</h1>
          </figure>
        </Link>
        <nav className="site-nav">
          <ul className="links">
            <li className="link">
          <Link href={"/articles"}>Articles</Link>
        </li>
       </ul>
     </nav>
   </div>
 </header>
 );
};

export default SiteHeader;
Next, we’ll create our layouts.
Creating a SiteLayout in Markdoc
The <SiteLayout /> layout component will be responsible for displaying all pages that are not rendered by Markdoc. We’ll also create another <ArticleLayout /> component which will be responsible for displaying pages rendered by Markdoc, e.g., .md files.
Now, let’s create the layout. Create a new file ./layouts/SiteLayout.jsx:
// ./layouts/SiteLayout.jsx
const { default: SiteHeader } = require("../components/SiteHeader");
const SiteLayout = ({ children }) => {
  return (
   <>
    <SiteHeader />
    <main>{children}</main>
   </>
  );
};

export default SiteLayout;
Creating ArticleLayouts
Create a new file— ./layouts/ArticleLayout.jsx:
// ./layouts/ArticleLayout.jsx

import Head from "next/head";
import SiteHeader from "../components/SiteHeader";

const ArticleLayout = ({ markdoc, children }) => {
  const { title, description } = markdoc?.frontmatter;
  return (
   <>
    <Head>
     <title>{title}</title>
     <meta name="description" content={description} />
    </Head>
    <SiteHeader />
    <article className="site-article">
     <div className="wrapper">
      <header className="article-header">
       <div className="wrapper">
        <h1 className="font-extrabold text-6xl">{title}</h1>
        <p className="text-2xl">{description}</p>
       </div>
      </header>
      <div className="article-content prose">{children}</div>
     </div>
    </article>
   </>
  );
};

export default ArticleLayout;
Here, we have markdoc as a prop in this component. With that, we get title and description by destructuring.
Using the Next.js <Head> component, we add the title and description to our page meta.
To display the data within the page, we add it to the .article-header element.
Finally, to display the actual markdown content, we pass children to the article-content.prose element.
Now that we have created these components, let’s see how we can add them to our application.
Setting up Dynamic Layouts in Next.js
So far, we’ve created two different layouts for our application. We want to display the <SiteLayout /> component on normal pages while we use the <ArticleLayout /> component on article pages, that is, pages rendered with Markdoc.
Next.js allows us to define layouts on a per-page basis by adding the getLayout property to our page.
Since we cannot easily add a getLayout property to a .md file to define which layout will be used for the page, we can define a default layout for such pages. Then .js pages can define their layouts using the getLayout property.
To get this working, we’ll modify our ./pages/_app.js file:
// ./pages/_app.js
import ArticleLayout from "../layouts/ArticleLayout";
import "../styles/globals.css";

function MyApp({ Component, pageProps }) {
 // configure default article layout
 const articleLayout = (page) => {
  // pass `markdoc` props to ArticleLayout
  return (
   page.props.markdoc && (
    <ArticleLayout markdoc={page.props.markdoc}> {page}</ArticleLayout>
   )
  );
};

// Use the layout defined at the page level, if available
const getLayout = Component.getLayout || articleLayout;

  return getLayout(<Component {...pageProps} />);
}

export default MyApp;
In order to make <ArticleLayout /> the default layout, we create a function articleLayout() which accepts page as a parameter. Within this function, we return the <ArticleLayout /> component while passing the page and markdoc props.
Next, we initialize getLayout and assign the layout defined in Component (the current page) or articleLayout if the page does not define a layout.
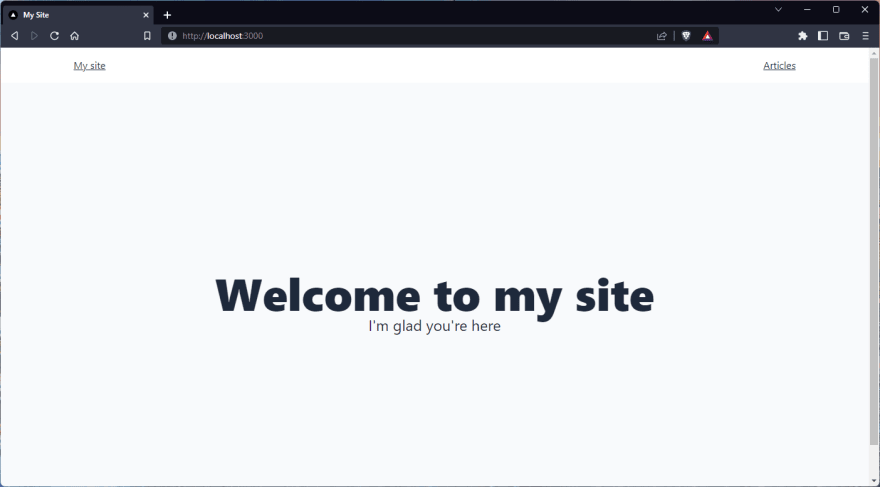
Now that we’ve set up dynamic layouts in our application, let’s define the layout for our home page(./pages/index.js):
// ./pages/index.js
import Head from "next/head";
import styles from "../styles/Home.module.css";
import SiteLayout from "../layouts/SiteLayout";
export default function Home() {
return (
<div className={styles.container}>
<Head>
<title>My Site</title>
<meta name="description" content="This is my Next.js site" />
<link rel="icon" href="/favicon.ico" />
</Head>
<section>
<header className="flex flex-col items-center justify-center min-h-screen">
<h1 className="font-extrabold text-7xl">Welcome to my site</h1>
<p className="text-2xl">I'm glad you're here</p>
</header>
</section>
</div>
);
}
// define layout for home page
Home.getLayout = (page) => {
return <SiteLayout> {page} </SiteLayout>;
};
Now, if we go to http://localhost:3000 in our browser, we should have something like this:
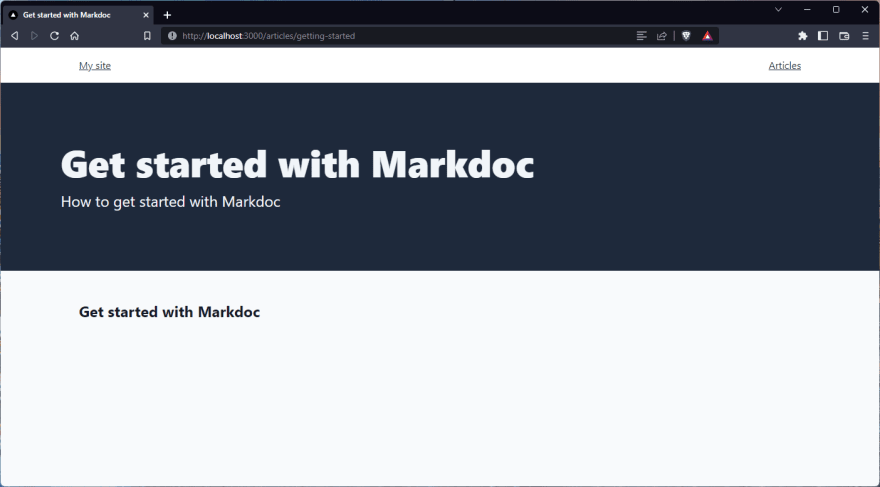
Also, if we go to http://localhost:3000/articles/getting-started, we should see our content with the heading contained in the front matter:
Building out the Blog
In the following sections, we’ll gradually build out our blog while exploring some of Mardoc’s features.
We’ll cover how to add custom components using tags, customize nodes, create functions, and more.
Markdoc syntax
The Markdoc syntax is built on Markdown with a few additions or extensions to the syntax including nodes, tags, functions, and annotations; we’ve talked a bit about this in previous sections and you can learn all about it in their docs.
Creating Custom Tags & Attributes
According to the Markdoc docs, tags are the main syntactic extension that Markdoc adds on top of Markdown. Each tag is enclosed with {% and %}, and includes the tag name, attributes, and the content body.
Markdoc comes out-of-the-box with four built-in tags: if, else, table, and partial. However, we can also create custom tags of our own. To illustrate this, we’ll create a custom infobox tag.
First, we can create the component that will be rendered. Create a new file, ./components/Infobox.jsx:
// ./components/Infobox.jsx

const Infobox = ({ type, title, children }) => {
  return (
   <div className={`info-box ${type}`}>
    <details>
     <summary>{title}</summary>
     <div>{children}</div>
    </details>
   </div>
  );
};

export default Infobox;
Here, we dynamically include the type value in the element class. This way, we can define styles for the .info-box element depending on the type.
Creating a Custom Infobox
Next, we’ll create a custom infobox tag definition in our Markdoc schema by creating a new file, ./markdoc/tags/infobox.markdoc.js:
// ./markdoc/tags/infobox.markdoc.js
import Infobox from "../../components/Infobox";

export const infobox = {
  render: Infobox,
  attributes: {
   type: {
    type: String,
    default: "info",
    matches: ["warning", "info", "error"],
   },
   title: {
    type: String,
   },
  },
};
Here, in our infobox declaration, we import and define the component that will be rendered with the render property.
We also define the attributes that our tag accepts using the attributes property and they include type and title.
For the type attribute, we defined the type of value it accepts, the default value ('info') and other acceptable matches, including 'warning' and 'error'.
Next, we will create a ./markdoc/tags/index.js file to export our Markdoc tags:
// ./markdoc/tags/index.js
/* Use this file to export your markdoc tags */
export * from './infobox.markdoc';
Great! With that, we can add our infobox to our Markdoc document. Back in ./pages/articles/getting-started.md, we’ll add some more content with our new infobox tag:
---
title: Get started with Markdoc
description: How to get started with Markdoc
---
## Get started with Markdoc
Markdoc is a static site generator that uses Markdown files as input and outputs HTML files.
Markdoc features several core concepts which include:
- **Nodes**:
 These are the elements that Markdoc inherits from Markdown
- **Tags**:
 Tags are the main syntactic extension that Markdoc adds on top of Markdown.   Similar to HTML, each tag is enclosed with `{%` and `%}` and includes the tag name, attributes, and the content body.
- **Annotations**:
 These can be added to nodes to customize how they are rendered
### Installation
To install markdoc in Next.js, run the following command:
bash
npm install @markdoc/next.js @markdoc/markdoc
### Background
Markdoc was built by [Stripe](https://stripe.com/) to power their developer documentation.

{%infobox title="Hey there!" type="info"%}
Here's some info for you!
{%/infobox%}

{%infobox title="Hey there!" type="warning"%}
Here's a warning for you!
{%/infobox%}

{%infobox title="Hey there!" type="error"%}
Here's an error for you!
{%/infobox%}
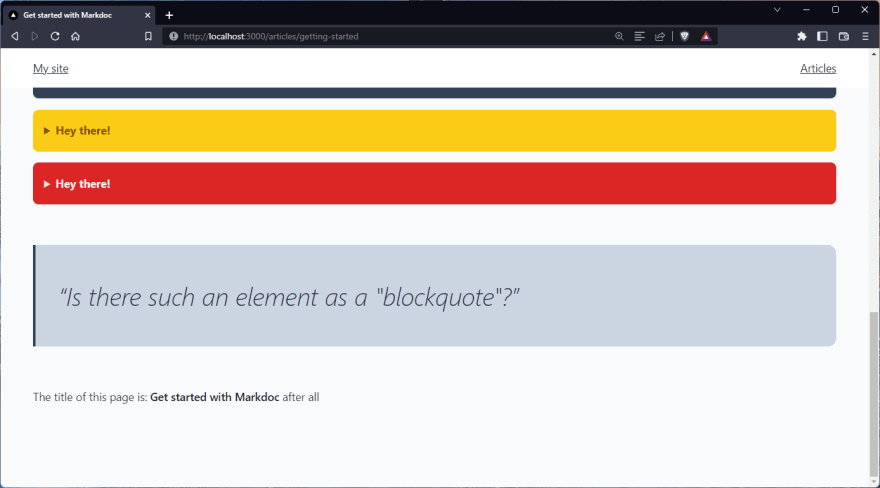
Here, in the {% infobox %} tag, we define the title and type attributes for each. When we run the app, we should see something like this:

Sweet! With custom Markdoc tags, we’re able to add components that can do just about anything to our .md files.
Customizing Default Nodes in Markdoc
Next, we’ll be looking at how to customize Nodes. To illustrate this, we’ll be customizing the default blockquote node.
First, we create a new Blockquote component that will be used. Create a new file: ./components/Blockquote.jsx
// ./components/Blockquote.jsx
const Blockquote = ({ children }) => {
  return <blockquote className="blockquote">{children}</blockquote>;
};
export default Blockquote;

Create a new file: ./markdoc/nodes.js

// ./markdoc/nodes.js
import Blockquote from "../components/Blockquote";
export const blockquote = {
  render: Blockquote,
  attributes: {
   author: {
    type: String,
  },
 }
}
Now, by styling the .blockquote class that was attached to the <Blockquote /> component, we can add the following to our article:
> Is there such an element as a "blockquote"?
And have something like this:

Now we’ve seen how to customize a node with a custom component. In the next section, we’ll take a look at another handy Markdoc feature, Partials, and how we can use variables in Markdoc.
Variables and Partials in Markdoc
Variables allow us to customize your Markdoc documents at runtime. Variables are accessed using the $ symbol.
You can pass variables in a few ways:
- Through the
variablesfield on the Config object. Also, the frontmatter of a Markdoc page can be accessed via the$markdocvariable in the document. - If we add the following to our document:
The title of this page is: **{% $markdoc.frontmatter.title %}**
- We should see the title of the document:
- Via the variables attribute on a partial tag.
- Manually from within your Node or Tag
transformfunctions.
Markdoc uses partials to reuse content across documents. A separate Markdoc file stores the content, and it's referenced from within the partial tag.
We can create a partial that displays a particular promotional content in any page we add it to.
To create a partial, create a new file, ./markdoc/partials/BikePromo.md:
----
It seems you’re enjoying this article on **{% $title %}**. I'm sure you'll be interested in the following offer:
## Buy a bike and get two wheels free!
What do you get when you buy a bike?
_Two wheels!_
Well, for a limited time only, you can get two new bike wheels for free when you purchase one of our bikes!
Find out more [here](/), or maybe not, *I'm not your boss*.
----
Partials automatically load from the /markdoc/partials/ directory. Now, if we add the following to our document:
{% partial file="bike-promo.md" /%}
It will load and render the variables and contents of markdoc/partials/bike-promo.md:

Next, we’re going to see how we can use another Markdoc feature: Functions.
Using Functions in Markdoc
Functions in Markdoc allow us to extend Markdoc with custom utilities, which lets us transform our content and variables at runtime.
Markdoc comes out-of-the-box with six built-in functions: equals, and, or, not, default, and debug. You can learn more about these functions in the Markdoc docs.
Custom function registrations are almost identical to tags and nodes, except you create a ./markdoc/functions.js file instead. Within this file, we’ll create an includes function that checks if a string contains a defined sub-string.
// ./markdoc/functions.js

// ./markdoc/functions.js
export const includes = {
 transform(parameters) {
  const [string, value] = Object.values(parameters);
  return string.includes(value);
 },
};
Now, we can add our custom function to our document:
{% if includes($markdoc.frontmatter.title, "Llamas") %}
 > This page is about Llamas
 {% else /%}
 > This page is not about Llamas
{% /if %}
With that, we should have something like this:

So far, we’ve explored the basic features of Markdoc and seen how we can use it to build out an impressive article page. In the next section, we’ll quickly cover how to add images to our content.
Working with Images in Markdoc
We can simply use the markdown syntax to add any image that is in our /public directory to our article. For example, if we add the following to ./pages/articles/getting-started.md:

We should see that the image shows up in the rendered page:

We can also do something similar in the front matter section of the document and add a cover image for our article.
To do that, first add the path to the image in the front matter section:
---
title: Get started with Markdoc
description: How to get started with Markdoc
cover: /images/martin-sanchez-gD3dUQpMlvk-unsplash.jpg
---
Next, in ./layouts/ArticleLayout.jsx, we’ll add the image:
// ./layouts/ArticleLayout.jsx

import Head from "next/head";
import Image from "next/image";
import SiteHeader from "../components/SiteHeader";
const ArticleLayout = ({ markdoc, children }) => {
 const { title, description, cover } = markdoc.frontmatter;
 return (
  <>
   {/* ... */}
   <article className="site-article">
    <div className="wrapper">
     <header className="article-header">
      {/* render image */}
      <div className="img-cont relative h-56">
       <Image
        src={cover}
        fill={true}
        alt="cover"
        className="object-cover rounded-b-2xl"
       />
      </div>
      {/* ... */}
     </header>
     {/* ... */}
    </div>
   </article>
  </>
 );
};

export default ArticleLayout;
With that, we should see our image:
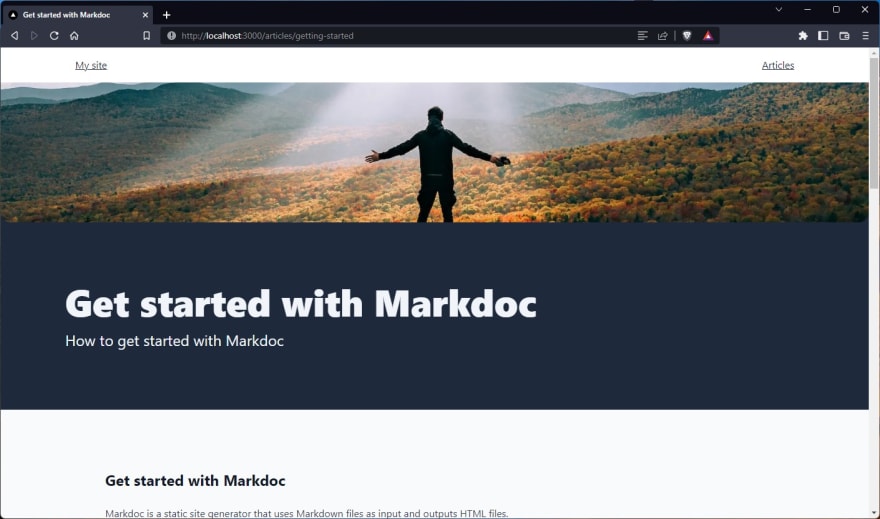
In the next section, we’ll see how we can render a list of our articles.
Creating an Articles page
First, we’ll have to install a few packages, namely:
-
glob-promiseso we can find all of our Markdown files in thearticles/folder -
gray-matterso we can extract the title from the Markdown frontmatter
To install, run:
npm install gray-matter glob-promise
Now, create a new file: ./pages/articles/index.js
// ./pages/articles/index.js

import fs from "fs";
import glob from "glob-promise";
import matter from "gray-matter";
import Head from "next/head";
import Image from "next/image";
import Link from "next/link";
import path from "path";
import SiteLayout from "../../layouts/SiteLayout";

export const getStaticProps = async () => {
  // Find all Markdown files in the /articles directory
  const ARTICLES_DIR = path.join(process.cwd(), "pages/articles");
  const articlesPaths = await glob("**/*.md", { cwd: ARTICLES_DIR });

  const articles = articlesPaths.map((articlePath) => {
    // get the slug from the markdown file name
    const slug = path.basename(articlePath, path.extname(articlePath));
    // read the markdown files
    const source = fs.readFileSync(
      path.join(process.cwd(), "pages/articles", articlePath),
      "utf8"
    );
    // use gray-matter to parse the article frontmatter section
    const { data } = matter(source);
    const { title, description, cover } = data;

    return {
      title,
      description,
      cover,
      slug,
    };
  });
  return {
    props: {
      articles,
    },
  };
};

const Articles = ({ articles }) => {
  return (
    <>
      <Head>
        <title>My articles</title>
        <meta name="description" content="View all my articles" />
      </Head>
      <section>
        <header className="articles-header">
          <div className="wrapper">
            <h1 className="font-extrabold text-5xl">
              Hey there, view all my articles
            </h1>
          </div>
        </header>
        <ul className="articles">
          {articles.map((article) => (
            <li key={article.slug} className="article">
              <Link href={`/articles/${article.slug}`}>
                <header className="article-item-header">
                  <Image
                    src={article.cover}
                    width={300}
                    height={200}
                    alt="cover"
                  />
                  <div className="details">
                    <h2 className="font-bold text-3xl">{article.title}</h2>
                    <p> {article.description} </p>
                  </div>
                </header>
              </Link>
            </li>
          ))}
        </ul>
      </section>
    </>
  );
};
export default Articles;

// define layout for articles page
Articles.getLayout = (page) => {
  return <SiteLayout> {page} </SiteLayout>;
};
Here, we’re using getStaticProps to do the following:
- Retrieve all of the
.mdfiles in the./pages/articlesfolder - Read the contents of each file and obtain the
slugandfrontmatterdata
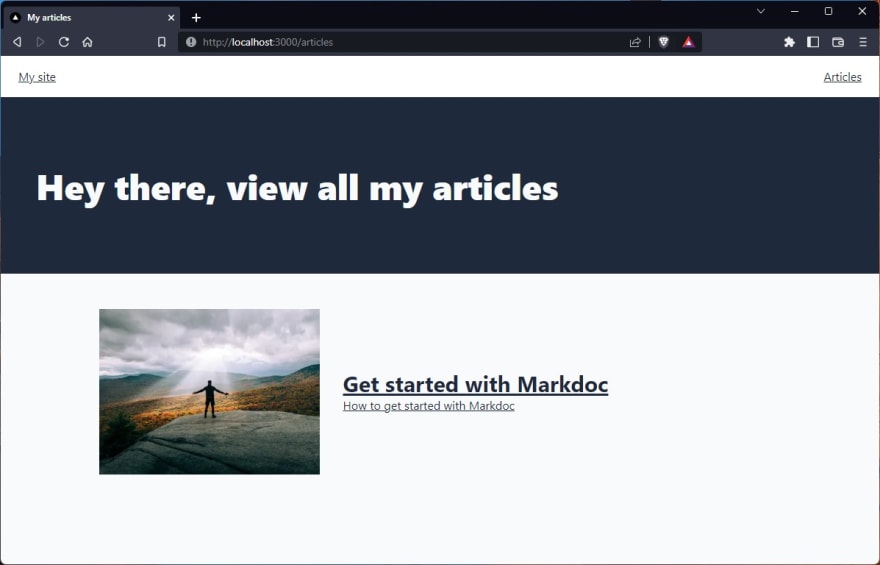
Then, we export the data and access it from our Articles component as props. We can create a list of articles with slug, title, description, and cover data.
Sweet!
Conclusion
In this article, we built out a blog using Markdoc and all we have to do to update our content is edit a markdown file or create a new one, save it, and redeploy.
Since the content and the application live together, we do not have to go back and forth between a CMS or database in order to update our blog.
We can also add more features, like tags and sorting by date, just by including the information in the front matter of each .md file.
Thanks for going through this tutorial! I hope you learned a thing or two; feel free to keep exploring.
Further Reading and Resources
Here are a few links you might find useful:

Top comments (0)