
I’ve switched to Mac … for work …
There, I’ve said it.
It feels like confessing a fault. A confession where forgiveness doesn’t ensue. A confession where what follows is contempt, contempt in my (Linux-minded) colleagues’ eyes. So I’ll just give them a good reason ...
… and so far I’m enjoying it.
Even though I’m a big Linux fan, I’m used to working with a bunch of applications that are not available there, and the Mac (despite the steep price) appeared as an alternative to the virtual-machines hell. Far from being perfect, it’s a good balance between a Unix system and an end-user general-purpose machine.
However, coming from Linux, the jarring out-of-the-box experience with the terminal was a shock. The default setup is just plain terrible — outdated, no autocompletion, no colors … no fun.
But after a few tweaks I’m feeling at home, and this article is all about sharing configuration options so that people like me will keep enjoying their beloved command lines.
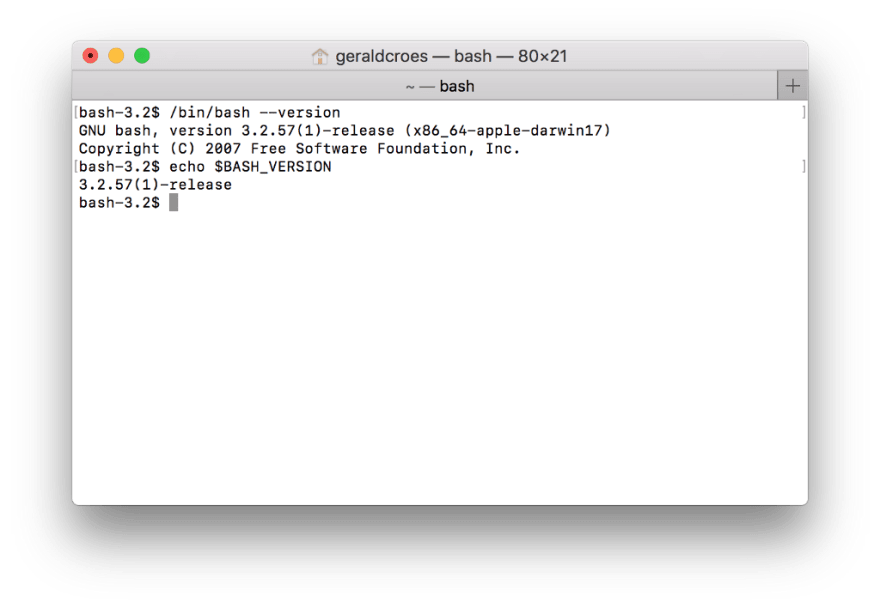
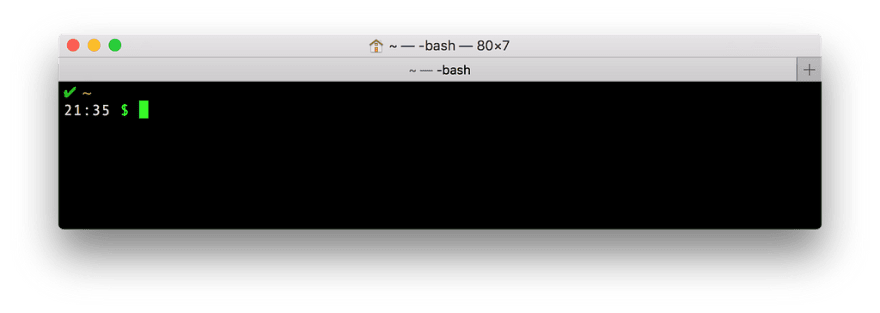
Here is our starting point.
Step 1 — Homebrew
Because there is a life beyond the App Store, your first step on Mac should be to install Homebrew. It’s not mandatory; it just makes your life easier (you decide).
According to its website, Homebrew is the “Missing package manager for Mac.”
In Linux words, it’s our apt, yum, dnf, or pkg (depending on where you come from).
Installing Homebrew is a one-liner:
Done, but Nothing Has Changed
Exactly, nothing has changed, except that you’ll be able to install, update, and remove the other tools we’ll talk about in a minute.
Step 2 — Update Bash to Version 4.4
Supposedly because of licensing issues (GPLv2 vs. GPLv3), the bash that comes with our Macs is stuck in 2007 (version 3.2).
Let’s fix this and update to version 4.4 (at the time of this writing).
brew install bash
Yes, it’s that simple.
Configure Bash 4.4 as Your Default Bash
Now that you have the newer version of Bash installed, you need to tell your terminal to use it instead of the default login shell.
Open the terminal preferences and set the “Shells open with” option so that it points to your new best friend, /usr/local/bin/bash, which is the location where Homebrew has installed it.
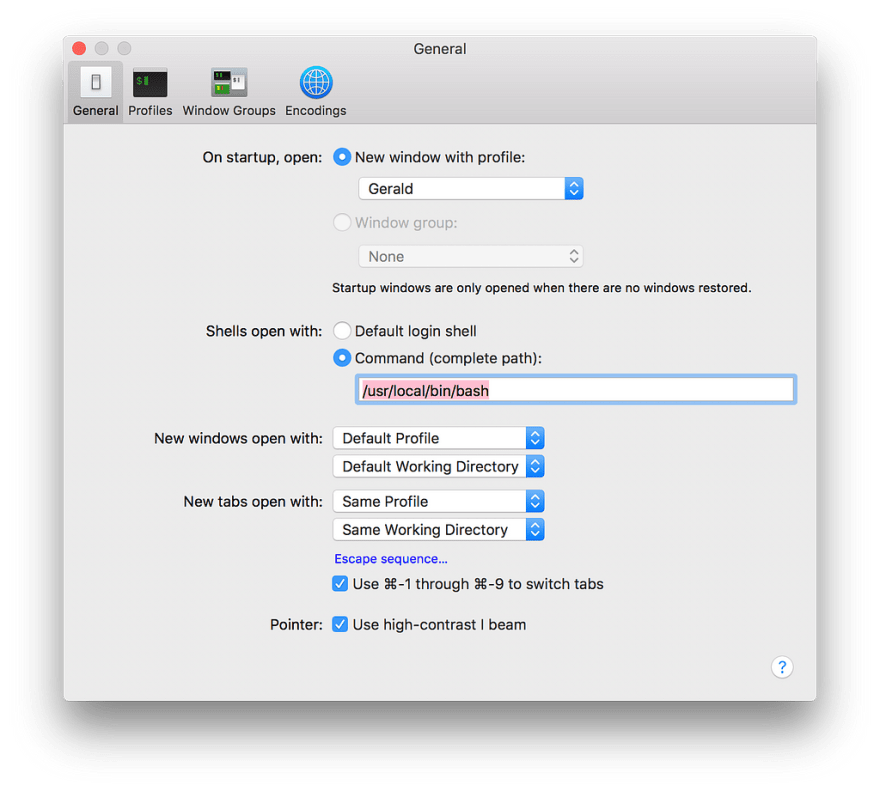
Then, for a reason I have yet to understand, you need to add that same path to your /etc/shells file. If you don’t, you might stumble upon small issues (e.g. I wasn’t able to make my terminal play along with Alfred).
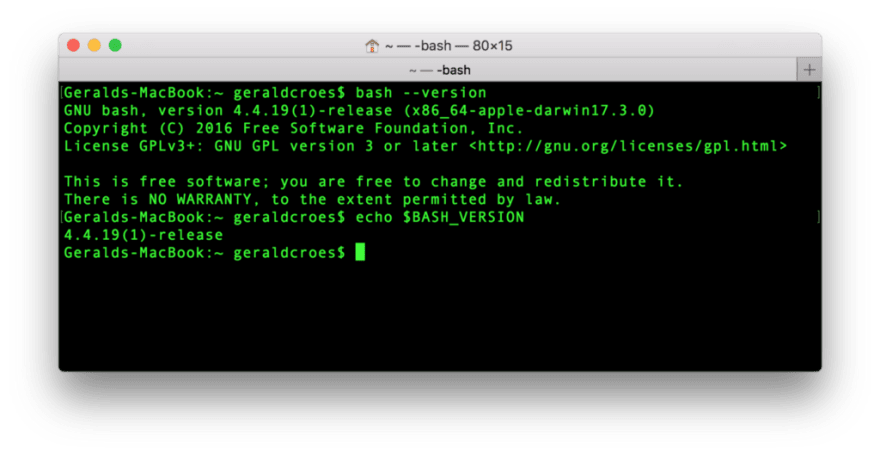
Restart your terminal and type bash --version to check that everything works as expected (you can also try to echo $BASH_VERSION).
Step 3 — The Colors of Bash
To steer clear of the dim monochrome corner Apple wants you to stay in, enable the colors.
vi ~/.bash_profile
Take this new configuration file into account (source ~/.bash_profile) and see for yourself :-)
Before

After
Step 4 — Autocomplete Time
It’s time to allow your fingers to rest and let them enjoy the power of the tab key for a bit of auto-completion (that goes beyond file names).
brew install bash-completion
Now update your .bash_profile (vi ~/.bash_profile), and add the following line
[-f /usr/local/etc/bash_completion] && . /usr/local/etc/bash_completion
If you need autocompletion for Git, you’ll need to install or update it (the version provided with XCode doesn’t work with the completion).
brew install git
And as usual, restart your terminal if you want to test it right away.
Step 5 — May I Ask for a Git Prompt?
If you use Git, the one thing still missing from your now-good-looking terminal is a Git prompt with the state of your repository and the branch you’re on.
Once again, you’re just a single brew command away from the solution.
brew install bash-git-prompt
To load its configuration at startup, you need to add the following lines into your .bash_profile file.
vi ~/.bash_profile
You now have a nice Git prompt you can configure to your taste.
What It Looks Like in a Non-Git Directory
What It Looks Like in a Git Directory
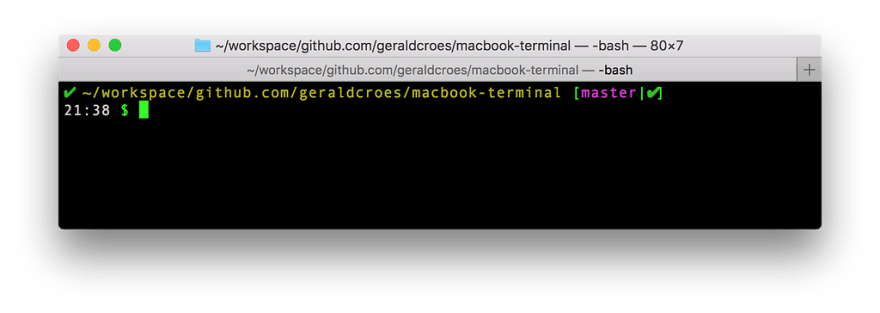
You can see that I’m on the master branch and that everything is synchronized with the distant repository.
Tune It a Bit More
The bash-git-prompt package comes with multiple configuration options. To test them out, you can create a ~/.git-prompt-colors.sh file. For what it’s worth, here is mine below.
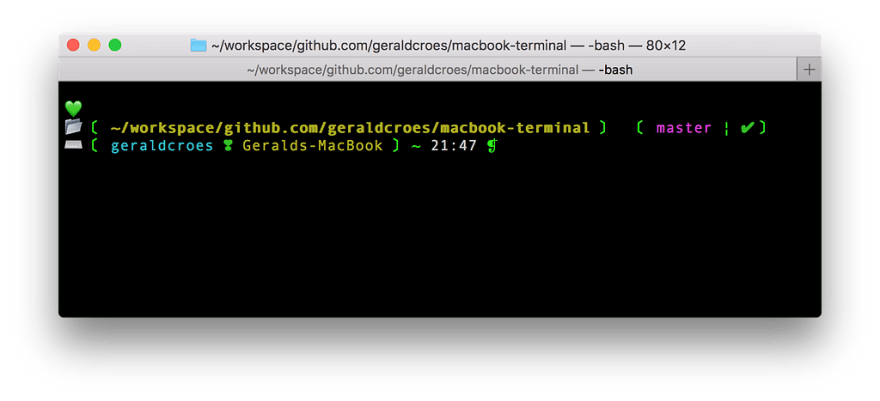
My Pimped Out Terminal
With a pinch of transparency and a nice background texture, here is what my own terminal looks like.

I hope you’ve enjoyed the tour and that you have learned a trick or two to make your terminal a better experience.
You can download my configuration from Github.
If you have some tips you’d like to share with a new Mac user, make sure to add them in the comments section.


Top comments (2)
I have recently moved to mac as well but from Windows and always wandered how people get to see their git branch.
Thanks a lot!
P.S. The command under the sentence:
should be something like this (it also pops when after installing the bash-git-promt):
Suggestion:
iTerm2 (configured to show up on cmd+Esc key shortcut similar to Quake console) + zsh + oh-my-zsh (and powerlevel9k as its theme)... In screenshot you can see just glimpse of it...
Believe me, you will love it... ;)