If you aim to boost productivity on Windows 11, consider harnessing the power of virtual desktops. This feature allows you to create separate desktops for different tasks, streamlining your workflow and enhancing focus. This guide shows you how to enable and use virtual desktops effectively.
Enabling and Using Virtual Desktops in Windows 11
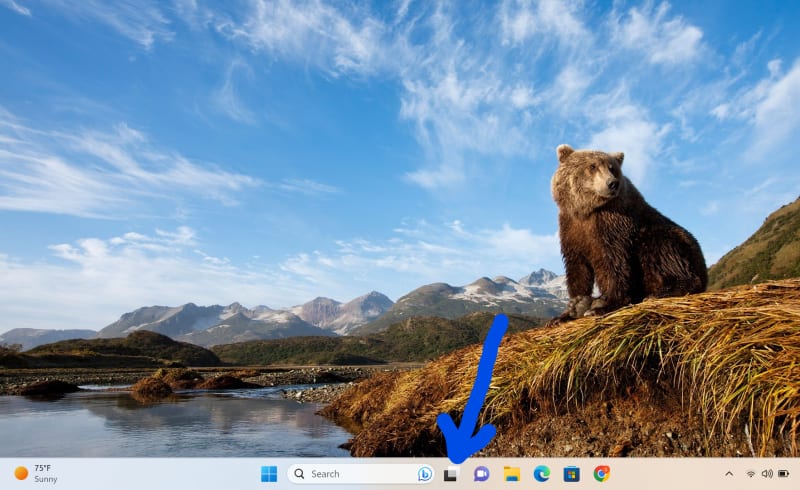
Before getting started, you will need to access the virtual desktop.
Access Virtual Desktops:
- Open Task View by clicking the "Task View" icon in the taskbar.

- Alternatively, press the Windows key + Tab to open the Task View.
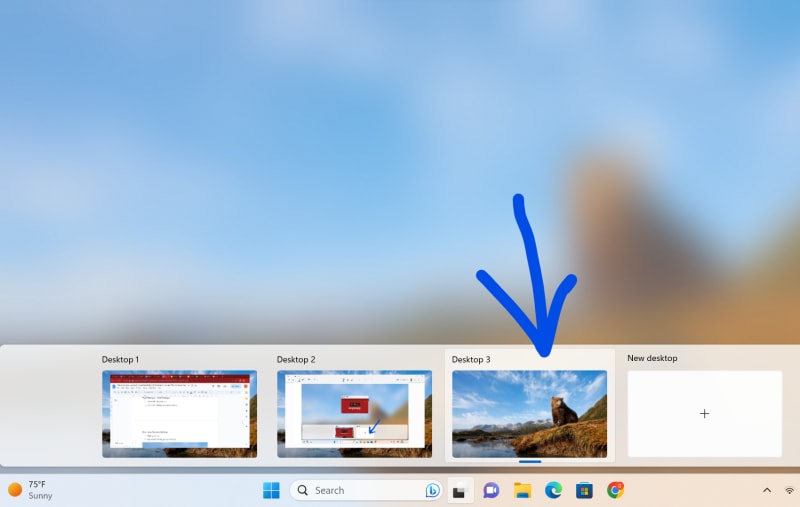
Create a New Virtual Desktop:
Click the "New Desktop" button in the bottom-right corner of the Task View.

You can also press the Windows key + Ctrl + D.
Toggle Between Virtual Desktops:
Click on the Task View icon
Click on the desktop you want to switch to.
Move Apps Between Desktops:
Open Task View.
Close Virtual Desktops:
Open Task View.
Hover over the desktop you want to close.
Click the "X" icon in the top-right corner of the desktop thumbnail.

Press the Windows key + Ctrl + F4 to close the virtual desktop.
Frequently Asked Questions
Can I use keyboard shortcuts to manage virtual desktops in Windows 11?
Yes, you can use keyboard shortcuts for efficient virtual desktop management.
Ending Thoughts
Incorporating virtual desktops into your Windows 11 workflow is a game-changer, enabling you to transform your workspace into a dynamic and highly organized environment. Mastering these steps and keyboard shortcuts will enhance workspace organization and supercharge multitasking capabilities.


Top comments (0)
Some comments may only be visible to logged-in visitors. Sign in to view all comments.