Cloud SQL is the convenient in-house way to host your database when deploying an app via Google Cloud's App Engine. Here's a brief rundown of how to get your SQL database up and running:
Create a Cloud SQL Instance
In the Google Cloud Console for your project, go to Storage -> SQL -> Create Instance.
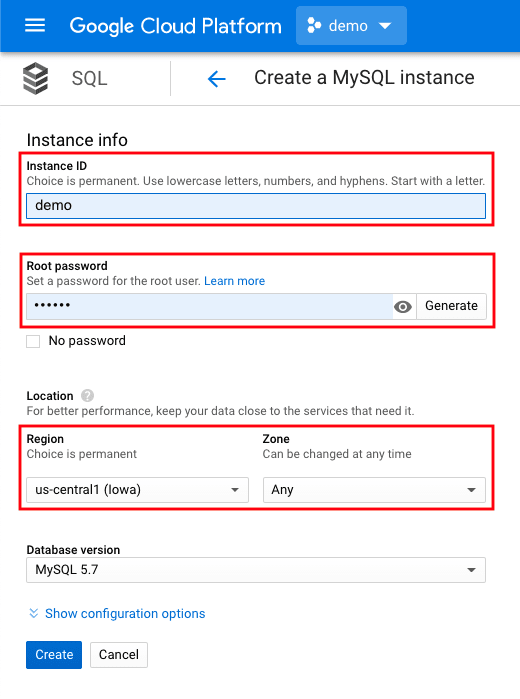
Options such as Instance ID, region/zone, storage capacity are up to the user. Once these configurations are made, you'll need your instance's IP address and Connection Name as shown below:

Your user account will need to have "Cloud SQL Admin" permissions, which are located in the "IAM" portion of the "IAM & Admin" section:

The Cloud Admin API must be enabled, along with the Cloud SQL API. These can be found in the "API's and Services" menu section. You will also need to have Google Cloud SDK installed, which allows you to control your Google Cloud applications through gcloud command line tools (among others)—note that you will have to run gcloud init the first time you use Google Cloud SDK. Lastly, in order for you to shell into Google Cloud SDK to maintain your database instance locally, you will have to list your ip address as an authorized network in the "connections" area ("add network") for your instance:

Accessing Your Cloud SQL Instance
To connect using the cloud shell, run gcloud sql connect [INSTANCE_NAME] --user=root and enter your password. To connect to the instance without encryption, you can shell into MySQL with mysql --host=[INSTANCE_IP] --user=root --password (where INSTANCE_IP is 0.00.000.000 in the above example) and enter the password you created for your instance. Note: this method is not secure, and you should pursue an SSL connection if managing sensitive information.
Connecting Your App to Your Cloud SQL Instance: app.yaml
App Engine apps use an app.yaml file for configurations and environmental variables. If you don't already have one, create an app.yaml file in your root directory. Note: the app.yaml file must be in the root directory of your project. It should contain the following information (at a minimum):
runtime: nodejs10
env_variables:
  DB_USER: "root"
  DB_NAME: "<database name>"
  DB_PASS: "<instance password>"
  DB_INSTANCE_CONNECTION_NAME: "<instance connection name>"
The host (the ip address) would only be used in production, but the instance connection name is what gets you connected in deployment. For production, you would want this information in your .env file:
  DB_USER: "root"
  DB_NAME: "<database name>"
  DB_PASS: "<instance password>"
  DB_HOST: "<instance ip>"
In production, a connection configuration would look something like this (where the configurations after the host property can be adjusted):
  const connection = mysql.createPool({
    user: process.env.DB_USER,
    password: process.env.DB_PASS,
    database: process.env.DB_NAME,
    host: process.env.DB_HOST,
    connectTimeout: 10000,
    acquireTimeout: 10000,
    waitForConnections: true,
    queueLimit: 0,
  });
Meanwhile, in deployment, you'll need to connect your app to your database via socket, so let's establish a socketpath for the database (again, the configurations aren't fast-and-true):
  poolConnection = mysql.createPool({
    user: process.env.DB_USER,
    password: process.env.DB_PASS,
    database: process.env.DB_NAME,
    socketPath: `/cloudsql/${process.env.DB_INSTANCE_CONNECTION_NAME}`,
    connectTimeout: 10000,
    acquireTimeout: 10000,
    waitForConnections: true,
    connectionLimit: 20,
    queueLimit: 20,
  });
Notice the createPool used above. Pool connections are a critical part of database connection practices that you'll want to implement in your database operations. More to come on that topic in another blog post! But for now, we've learned how to create a Cloud SQL database instance, access it for maintenance, and connect our app for production and deployment modes. I hope this tutorial has been helpful!


Top comments (0)