NodeBB is a modern well supported forum software package. It has many plugins and provides a great user experience. Unlike hosted forums, you can run this on your own domain, which has UX and SEO benefits.
In this post, we’ll show you how to set up single sign-on (SSO) for your NodeBB forum.
The dream
Imagine you build out an application. Let’s say you are building the world’s best todo tracking app. Everyone loves it and it becomes wildly popular. Users are adding tasks and checking them off with abandon. Your customers clamor for a place to share all their task management tips.
Enter NodeBB. You download and install it. The forum works great! Then you notice that every one of your users now must sign up for another username and password. Boo.
Luckily, you planned ahead and used an identity management system with OpenID Connect (OIDC) support. You realize you can set up NodeBB to use this existing system to provide SSO to your users. All your todo app users will be able to log in and post in your forum with the same username and password they use for your app. Ah, the glory of single sign-on.
Let’s see how you can achieve this dream.
Prerequisites
Before you start, you need a working NodeBB server (installation instructions here) including a database–I used mongodb. You’ll need administrative access to NodeBB because you’ll be installing a plugin. Note where the NodeBB app lives; for me, it is at http://localhost:4567.
You’ll also need an OIDC server. In this post, I’ll be using FusionAuth as my identity provider (here’s the five minute setup guide), but the NodeBB configuration will be much the same with any OIDC server. FusionAuth will live at http://local.fusionauth.io.
(Wait, what if you aren’t using an OIDC compliant identity management system as your SSO server? Well, FusionAuth is free for unlimited users and here’s migration instructions. Get going!)
Setting up the SSO server
First, create an application in FusionAuth. I’m going to call mine, creatively, “nodebb”. Note that you can create as many applications as you want. If you were really building out “The Dream”, you’d also have a ‘todo app’ FusionAuth application, but for this tutorial we’ll only set up the NodeBB FusionAuth config. Users will have the same username and password for all applications, but may not be able to access every one of them. (Access is controlled by user registrations, which we’ll cover below.)
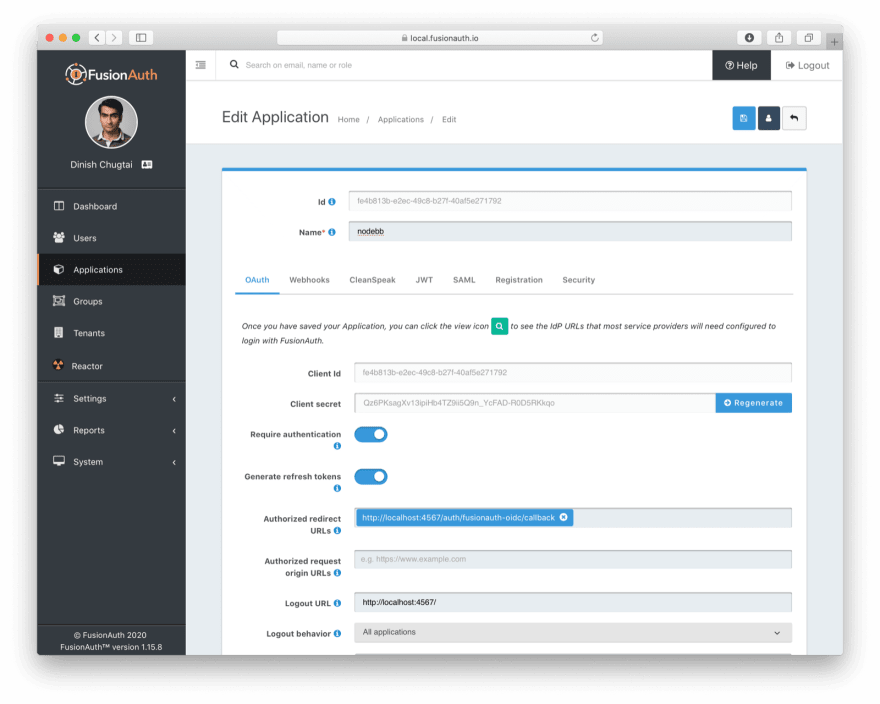
After you save the application, edit it again, as we’ll need to record a couple of configuration variables. Start at the “OAuth” tab.
The client id and client secret are used by FusionAuth to identify the application asking for user information. These values look like fe4b813b-e2ec-49c8-b27f-40af5e271792 and and Qz6PKsagXv13ipiHb4TZ9ii5Q9n_YcFAD-R0D5RKkqo respectively. Save them off to a text file, as you’ll use them later.
We also need to set up an “authorized redirect URL”. This will look like https://HOSTNAME/auth/fusionauth-oidc/callback where HOSTNAME is the location of your NodeBB server. Since I’m running NodeBB locally, this value is http://localhost:4567/auth/fusionauth-oidc/callback.
You want to set up a “logout redirect URL”; when a user logs out, they should be sent back to the NodeBB app homepage. I set mine to this: http://localhost:4567/
This is what the “OAuth” tab should look like when you’ve set up FusionAuth.
Next, let’s create a user. If this weren’t a walkthrough, you’d have a way for a user to register in the todo app, but I’m not going to build the entire app for you! Go to “Users” and add a user–I’m going to add “fornodebb@example.com”.

Then associate the new user with the NodeBB application by creating a FusionAuth user registration. Again, if you had the todo app FusionAuth application set up, you might add a user registration for that application as well.
When you’re done, the user edit screen should look like this:

Phew. We’re all done with setting up our FusionAuth OIDC server. One final reminder that all these instructions are FusionAuth specific but your user identity management system of choice should have analogous configuration options.
Now, let’s set up NodeBB.
Configuring NodeBB for SSO
Now we’re ready to allow our todo app users to login with an account from our SSO server. First, log in as the NodeBB admin and install the fusionauth-oidc plugin. Even though the name says FusionAuth, it should work with any OpenID Connect compatible identity provider. It’s named FusionAuth because we maintain it.
The install and configuration instructions on the GitHub project are up to date, so I’m not going to walk you through each step here.
However, I will say that:
- I had to rebuild and restart the NodeBB server when I installed the plugin.
- You need to set the client secret and client id to the values you noted from the FusionAuth application screen.
- You have to set the discovery URL to the FusionAuth discovery URL which is
http://local.fusionauth.iofor me, and you if you installed NodeBB locally on that port.
Okay. Just head over there and come back when you’re done.
Welcome back. You should be able to log in with the user you created in FusionAuth, “fornodebb@example.com” in my case. Click on the “login” link on the NodeBB home page and then click the icon under “Alternative Logins”, as seen below.

Enter the email and password. Success! You should now see the NodeBB homepage and be authenticated as that user.

Disallowing local login
Now, should you turn off local login? Doing so means that all user authentication operations will be handled by your SSO server.
It depends on your use case. If you already have a forum with existing users, you might want to allow them to continue to use the username and password they are familiar with to sign in.
But if you’re starting with a fresh NodeBB installation, I can’t think of any reason to leave local login enabled. If you do leave local login turned on, your users will see both options when they click the “login” link, as shown above.
In either case, you should turn off local registration because the whole point of this post is to have all user data stored in your SSO server, not in NodeBB.
If you disallow local logins, when you click on the login link, you are sent straight to the SSO server page as seen below (this should look familiar, as you saw it when you signed in above after clicking the image under “Alternate Logins”):

This is a better user experience, so turning off local login is what I’d recommend. Note that turning off local login and registration doesn’t mean that users can’t modify their profile. They absolutely can, as you can see from this NodeBB profile edit screen for my example user:

Essentially, customer username and password information are kept in the identity server, and almost everything else is stored in NodeBB.
FusionAuth features
The steps above should work with any compliant SSO identity provider. Now we’re going to cover features that aren’t entirely part of the OIDC standard but are useful for managing users. If you are using a different identity management server, there should be analogs for the features outlined below.
User management
If you lock the user account in the SSO server, the user won’t be able to log in. This is helpful when managing a forum; if a user is not being a good community member you can disable their account either temporarily or permanently. In FusionAuth, you’d navigate to the list of users and click on the “Lock” icon (you’ll be warned that a locked user can’t login):

And here’s what the locked out user would see when they tried to log in:

Of course, people can change. So an admin can unlock an account anytime, either using the FusionAuth admin console or with the FusionAuth API.
Admin users
If you want your admin users to authenticate with the SSO server, you need to do a bit more configuration. With these settings, you can grant administrative privileges to one or more applications from the SSO server and have a single place to update user information when someone joins or leaves your organization.
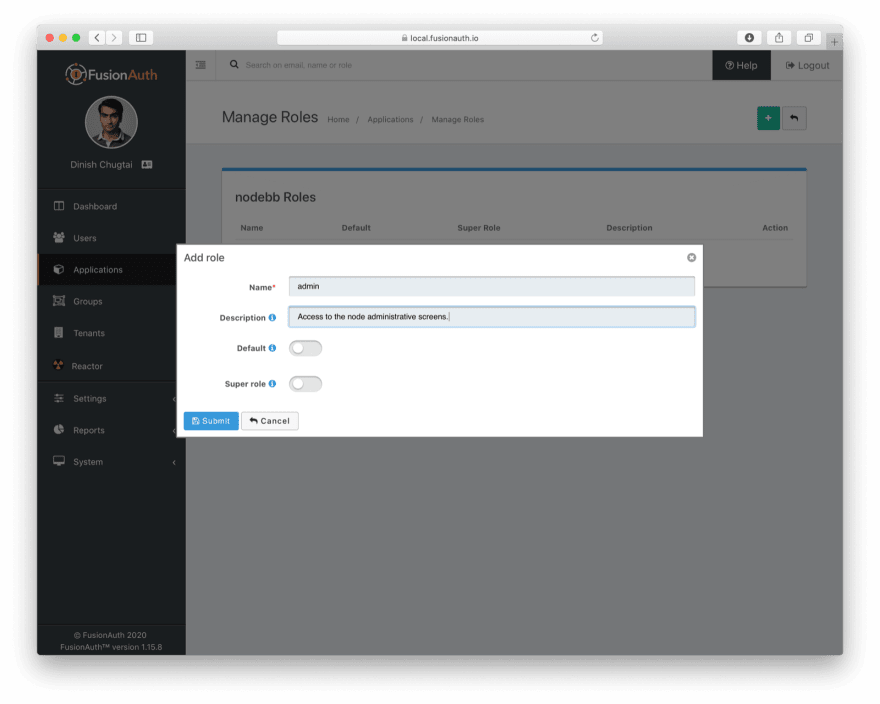
We’ll need to return to the application screen in FusionAuth. We’ll add an admin role for the NodeBB application.
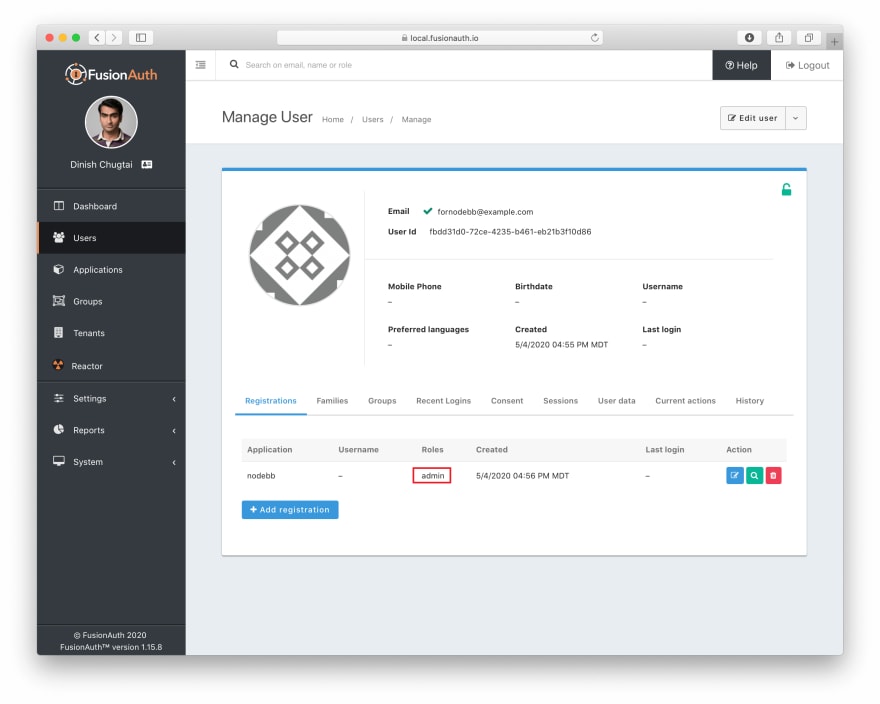
Next, we’ll associate the user you previously created with the admin role. We do this on the user edit page. This role will be passed to NodeBB. That will allow this user access to the NodeBB admin screens. When you are done, the role should be shown on the user’s page:
We also need to update the plugin with the correct “Roles claim”. Sign in as an admin to NodeBB. (If you disabled local login already, you may need to use a special login path; you can always go directly to the local login screen by adding /login?local=1 to your NodeBB base URL: http://localhost:4567/login?local=1.)
Update the plugin configuration; set the “Roles claim” be roles and restart NodeBB. Now you can log in to NodeBB with this user, or any other with the admin role in FusionAuth and view forum admin pages. Admin users will be able to move topics, edit posts and perform all the other tasks needed to keep your todo app forum users happy.
Self registration
You may want to allow registration with the SSO server as well. This will allow someone who isn’t a todo app user to sign up for the forum. There they can ask their task management questions; hopefully the community will be welcoming and enthusiastic enough that they’ll sign up for your todo app.
You can enable registration by going to the “Registration” tab of your application in FusionAuth. Enable “Self service registration”, but leave the other fields with the default values. Click the blue save icon.
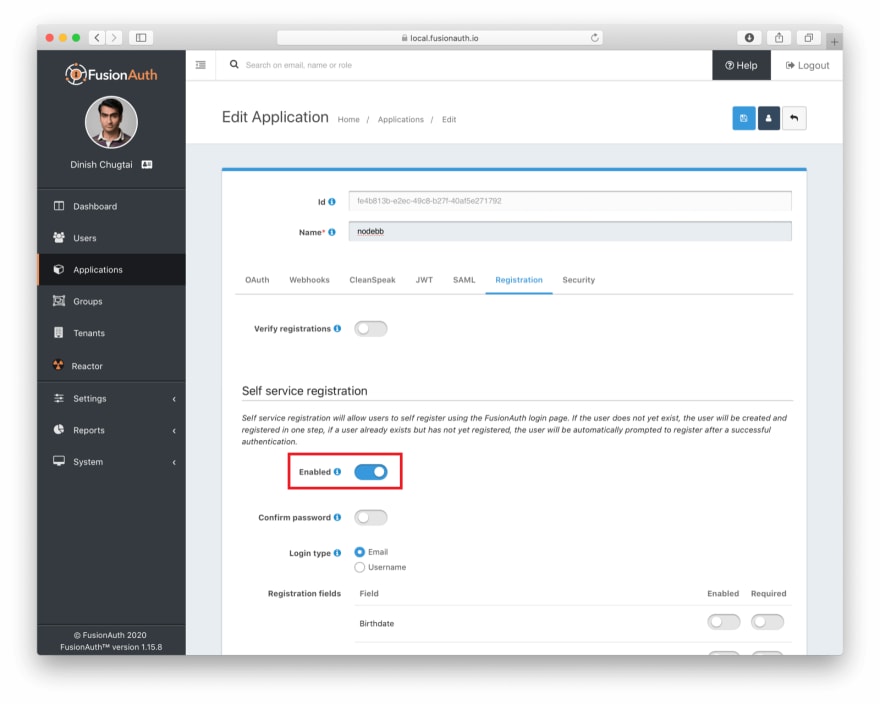
After this change, users will see a registration prompt on the login page: “Don’t have an account? Create an account”. When they click on it, they’ll be prompted to register, with a screen like below:

After a user creates an account, they’ll be logged in. At this point, they’d only have the ability to log in to NodeBB.
Theming the pages
You may have noticed that the login and logout pages didn’t look like the NodeBB pages. FusionAuth gives you the ability to theme your login, logout, and other authentication pages. This involves changing templates which you can access via the admin screen.
The FusionAuth theme documentation outlines the templates and gives an example of customizing the login page.
Conclusion
NodeBB is a powerful piece of forum software. Standing up a forum lets your users communicate with each other and can be a powerful mechanism for knowledge sharing, search engine optimization, and community building.
Using an SSO server such as FusionAuth lets your users minimize the number of usernames and passwords they must manage. It also allows you to control access to your applications from one screen, also known as “The Dream”. Using a single sign-on server for centralized user management will make both your life and your users’ lives easier.

Top comments (0)