Create the Debian 11 virtual machine
Debian is one of the stable Linux distributions out there. Unlike other distros, you won’t be getting frequent upgrades on the Debian operating system. However, when it does, it will be a very stable one.
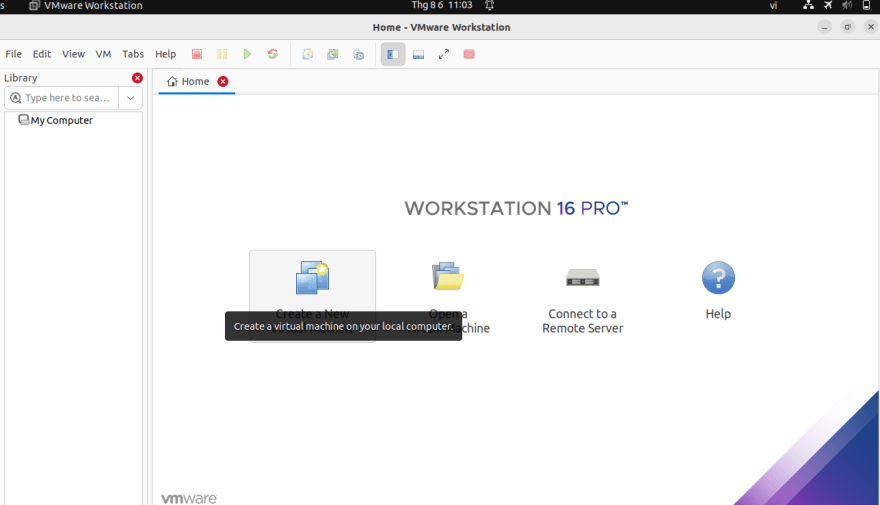
Open the Vmware workstation, and click on Create a new virtual machine. You can alternatively press CTRL+N to create the new virtual machine.
The new virtual machine creation wizard will open. To get more control over the Debian virtual machine installation, we will choose the Custom option and click on Next.

Click on Next

Attach the ISO image
We have already downloaded the Debian 11 ISO image from the official site. You need to point the iso image file here.

Name Debian virtual machine and choose the location
You need to choose where you would like to store the virtual machine files. You can either choose the default or change it based on your preferences.


Configure the CPU
For decent performance, it is good to have at least 2 CPU’s, and if you are going to do more processor-intensive tasks, you might require more CPUs. So based on your requirement, you may configure the CPU and click on Next.

Configure the Memory
The 2GB of default memory should be enough for minor usage, but if you plan to use more applications, you need to consider adding more RAM. 2GB is enough for me; hence, I choose 2048MB and click on Next.

Configure the Debian 11 network
For most users, you can leave the default NAT network connection in the VMware worksation for Debian 11. With the NAT network, only internet access will work. If you want anyone in your LAN network to talk to the virtual machine, you cannot do that in NAT.
I recommend choosing a bridged network for the VM because it will make the Debian VM part of the local area network, and your LAN DHCP server will assign an IP address to your Debian VM. It is good if you want your LAN users to talk to the VM and go out to the internet.
However, it is recommended not to use the bridged option in your office networks because, most probably, your IT policy wouldn’t recommend connecting a Virtual machine to the LAN network, which may be against the company policy.

Configure the virtual hard disk for Debian’s virtual machine
Choose LIS Logic as the I/O controller Type.

Choose SCSI as the Virtual disk type and click on Next.

As we will create a brand new virtual disk, you will have to choose, Create a new virtual disk and click on Next.


You would get a summary of the virtual machine configuration. If you want to make any changes, you may click on the Customize hardware button. You may go ahead and click on Finish.


Debian 11 VM installation
After a few seconds, the Debian 11 iso will boot and start the installation. In the installation screen, choose Graphical install by hitting enter.


Configure the hostname and domain name and click on Continue


Setup root account
In Debian, the root account will automatically be created; however, you are required to set the password for the root account during the installation. This account is necessary if you plan to modify any files that need root privileges.

Setup a regular user account
In the previous step, we configured the root account, now, we will configure a regular user account in Debian.
- Enter the Full name for the new user, and continue.
- Enter your username. This username is used to login into the system and clicks on Continue.

 Finally, set up the password for the regular account and click on Continue
 In the Debian clock configuration, you have to choose your time zone and click on Continue.

 ## Partition disk
We are going to choose Guided-use entire disk option. If you would like to manually set up hard disk based on your requirement, you may select manual and then define storage for each partition, such as root, home, and swap.
## Partition disk
We are going to choose Guided-use entire disk option. If you would like to manually set up hard disk based on your requirement, you may select manual and then define storage for each partition, such as root, home, and swap.
After the selection, click on Next


On the next screen, you will get the summary of how the partition is going to configure, make sure it is looking good and then click on Continue.

In the write the changes to disk option choose yes and continue.

The Debian 11 installation will now proceed, and the installation will take some time to complete.

Configure the package manager
In the scan extra installation media, choose no and click on Continue.

Use a network mirror option, choose yes and click on Continue.

Choose the location of your choice

In the Debian archive mirror, you have multiple options, it is recommended to choose deb.debian.org and click on Continue.

If you are using a proxy to get to the internet, you may enter the proxy address here, if not you may leave it blank and click on Continue.

Choose popularity-contest based on your internet, I choose no.

Software selection
You will be required to choose what type of software you would like to install on the server. Apart from the default selection, I have chosen the SSH server option checked. This would enable me to ssh into the Debian system whenever I want.

In the install grub boot loader option, choose yes and continue

Choose the automatically chosen location as the grub boot loader install location.

Finally, the installation is now complete. You may click on continue to complete the installation and reboot into the Debian 11 operating system.

As you can see, we have successfully installed the debain11 operating system on vmware workstation, there is one last step we will have to perform which is the installation of VMware workstation tools.


Top comments (0)