In my last blog post I talked about how to get started with writing tests for a JavaScript project using the Mocha testing library. As I mentioned at the end of that post, this time I will talk about some of the more interesting and less intuitive things you can do when testing with Mocha.
One interesting thing that Mocha gives you is the hooks before(), after(), beforeEach(), and afterEach(). You can use these inside a describe block, and each of them has a different purpose: before and after are only run once, before or after all of your tests in describe, while beforeEach and afterEach are run before or after each test. One way this can come in handy is if you want to run all of your tests on the same piece(s) of data, like an array. You could define an array at the top level of the describe block, but if your tests do a lot of transformations to the array, you could use the beforeEach method to reset the array before each new test like this:
describe('Array', function () {
  let a

  beforeEach(function () {
    a = ["reset", "the", "array", "to", "be", "the", "same"]
  })

  // all of your tests go here
})
Each hook takes a callback function and an optional description string, the same as the it function. It also doesn’t matter what order you put your hooks or tests in, the hooks will still be run at the time they are intended, and your tests will run in the order you have written them in your file.
Another useful thing that Mocha gives you is the ability to write tests that don’t run. This may sound silly, but it can be very helpful. Tests that don’t run are called pending tests and there are a few ways to write them. One way is making a test without a callback. The idea of this type of test is that someone should write a test case for it eventually. For example:
describe('Array', function () {
  describe('#includes()', function () {
    // pending test below
    it('should return false when the value is not present')
  })
})
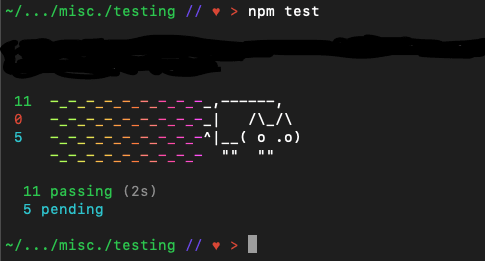
Pending tests will be included in the test results, and marked as pending. A pending test is not considered as passing or failing. When you run your tests, the result will tell you how many pending tests you have, along with the passing and failing ones. The result would look something like this:
Another way that you can make pending tests is by writing tests that are skipped. One reason you would do this is if you wrote out a test, but it doesn’t pass and you don’t know why, or you don’t want to take the time to fix it right now, then you can skip it temporarily. This is better than commenting out the test because, if it you get a pending result every time you run your tests, you won’t forget to come back to it later. Skipped tests work by appending .skip() to the test functions. A single skipped test will look like this:
describe('#includes()', function () {
  it.skip('should return true when present', function () {
    // this test will not be run
  })

  it('should return false when not present', function () {
    // this test will be run
  })
})
Or, to skip an entire suite, you can use the skip keyword on the describe function like this:
describe.skip('#includes()', function () {
  it('should return true when present', function () {
    // this test will not be run
  })

  it('should return false when not present', function () {
    // neither will this one
  })
})
The last place you could use skip is inside your test function to skip the test at runtime using this.skip(). If a test requires an environment or configuration that you wouldn’t be able to know about beforehand, using skip at runtime is the best way to handle the problem. For example:
it('should only test in the correct environment', function() {
  if (/* check test environment */) {
    // make assertions
  } else {
    this.skip()
  }
})
If the environment isn’t right, the result of this test will be pending, and it will essentially abort the test, instead of completely skipping it. The example above is also a best practice, compared to leaving the space in the else block blank, because a blank test will be reported as passing, and it would be much more useful for us to know the test was aborted.
Opposite but similar to skip, you can also append .only() to it or describe to choose to run only one distinct test or test suite. This can be useful if you are working to make one specific test pass and you don’t want to waste time waiting while all the other tests are run. Both only and skip can be added to any number of tests you like (but adding them to too many would defeat the purpose). One thing to note: any Hooks you have will still be run.
One other thing that is necessary to consider when writing anything in JavaScript is how to deal with asynchronous code. Mocha has a few ways to deal with asynchronous code in your tests. One way is by adding an argument to the test callback, usually called done. For example:
describe('Tea', function () {
  describe('#save()', function () {
    it('should save without error', function (done) {
      let tea = new Tea('Chai')
      tea.save(done)
    })
  })
})
Using done like this will ensure that Mocha knows it should wait for this function to be called to complete the test. This format will also handle any errors in the save function. But if the APIs you are testing return promises instead of taking callbacks, rather than using the done() callback, you can use Chai as Promised, and have something like this in your test:
return expect(Promise.resolve({ foo: "bar" }))
                               .to.eventually.have.property("foo")
The essential piece that Chai as Promised gives you is the eventually property. It also gives you more than the .have.property() chains, so you can check for a variety of things. There are more examples of how to use it in their documentation.
The last thing I will mention is that Mocha has a wide variety of optional flags you can add to the end of your command to run your tests. The flags are all listed in their documentation, but I’ll mention a few here. One is --bail, and it causes the test suite to abort after the first failed test, which is handy if you want to work on fixing one test at a time. There is also the --parallel flag, which will cause the tests to be run in parallel mode. This mode is designed to help your test suite run faster by making your tests run somewhat at the same time, instead of one after another, which can be very practical and save time if you have a large number of tests to run. There are a few drawbacks to parallel mode though, so make sure you know enough about parallel mode to recognize if it will work for you.
And this is the end of my introduction to testing with Mocha. There are other JavaScript testing libraries, but Mocha is one that is well used, thoroughly documented, and, as I hope you can tell from my posts, easy enough to work with. Tests are very useful, and I hope my posts have convinced you to consider using Mocha to write tests for your next JavaScript project.

Top comments (1)
This is quite a good post! Recently I've been seeing people talking about Jest here and there but not giving love to the other test frameworks.
Enjoyed reading this and I'm looking forward to reading the next posts in this series (especially if you mention Enzyme in one of those 😉)