
All the new features of the Microsoft Graph API are first available in the beta version. By using the beta version you can get early access to new features. Microsoft often adds new features as can be seen on their GitHub changelog here.
In this post we will do three things:
- Create an Azure Active Directory application registration
- Get the access token through the registered application
- Call the Graph API on the beta version
This is all done by using the Azure portal and implementing the code to call the Graph API in C#.
Adding an Application to your Azure Active Directory
To get access to the Graph API we need to register an application in the Azure Active Directory (AAD). This application can be used to add permissions. An administrator of that AAD can then consent to the permissions selected by you. Let's go through this step by step.
Open the Azure portal and go to the AAD that you want to add the application to. Now you can add the new application like this
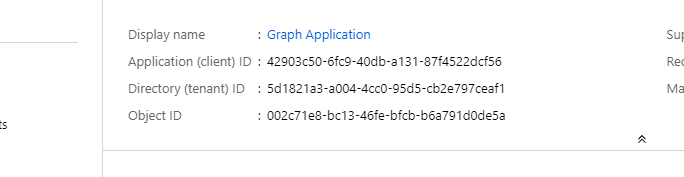
When the application registration is created you can see 2 important id's we need in a later stage. This is the Application (client) Id and the Directory (tenant) Id.
Next step is to add permissions to the application registration. These permissions give the application the ability to access resources. In our case, this is the Graph API. Let's add the Directory.Read.All which gives us permission to read everything within this AAD but not change it.
As you might have seen there are 2 types of permissions:
- Delegated Permissions - These permissions are used when there is a signed-in user. Typically used for portals or Azure functions that have AD authentication.
- Application Permissions - Should only be used on background services. These permissions can only be granted by an administrator.
Now that the application registration has the permission we want, it is still not granted. To grant this permission on this AD we need an administrator account to give consent. This can be done on the 'API Permissions' page where we just added the new permission.

After giving consent to the permission there is only one thing left to do and that is adding a secret to the application. This is basically the same as a password that gives you access to use the application. Only in this case, you can have multiple secrets with each a different expiry time. You can also delete these secrets. To add a secret we need to go to the "Certificates & secret page".
Do keep in mind that you can only see the secret once. Now that we finished this we have the following data that we need to use in the next step:
Tenant id: '5d1821a3-a004-4cc0-95d5-cb2e797ceaf1'
App Id or Client Id: '42903c50-6fc9-40db-a131-87f4522dcf56'
App Secret or Client Secret: 'fe_?xg+VhSxe_iq4RSw9TE4AUlddktg8'
We only created an app registration for a single tenant with default settings mostly. If you want more detailed information on i.e. a multi-tenant application you can go to the Microsoft docs here.
Get the access token
In order to access the Graph API, we first need to acquire an access token. This token can be used as a bearer authorization header later on. To do this I used the NuGet package Microsoft.Identity.Client version 4.0.
private async Task<string> GetAccessToken(
    string tenantId,
    string clientId,
    string clientSecret)
{
    var builder = ConfidentialClientApplicationBuilder
        .Create(clientId)
        .WithClientSecret(clientSecret)
        .WithTenantId(tenantId)
        .WithRedirectUri("http://localhost/")
        .Build();

    var acquiredTokenResult = builder.AcquireTokenForClient(
        // Here we set the scope to https://graph.microsoft.com/.default
        new List<string> { "https://graph.microsoft.com/.default" });
    var tokenResult = await acquiredTokenResult.ExecuteAsync();
    return tokenResult.AccessToken;
}
Call the Graph API
Normally you would just use the Graph API client SDK which is the NuGet Microsoft.Graph but even the preview versions do not have all the available calls. Therefore I am not using this NuGet. Instead by using a simple HttpClient we can achieve the same.
The code below will do the following:
- Retrieve the access token
- Set the version to beta
- Set the endpoint and the action we want to execute
- Create the HTTP client
- Set the headers including the authorization bearer header
- Sending the request which actually is an HTTP get
- Read the result as a string, since the response will be in JSON format
private async Task CallGraphApiBetaChannel()
{
    // Retrieve the access token
    var accessToken = await GetAccessToken(
        "5d1821a3-a004-4cc0-95d5-cb2e797ceaf1",
        "42903c50-6fc9-40db-a131-87f4522dcf56",
        "fe_?xg+VhSxe_iq4RSw9TE4AUlddktg8");

    // Set the version to beta
    var graphApiVersion = "beta"; // 'beta' or 'v1.0'

    // Set the endpoint and the action we want to execute
    var endpoint = $"https://graph.microsoft.com/{graphApiVersion}";
    var action = "/applications";

    // Create the http client
    using (var client = new HttpClient())
    using (var request = new HttpRequestMessage(HttpMethod.Get, endpoint + action))
    {
        // Set the headers including the authorization bearer header
        request.Headers.Accept.Add(new MediaTypeWithQualityHeaderValue("application/json"));
        request.Headers.Authorization = new AuthenticationHeaderValue("Bearer", accessToken);

        // Sending the request which actually is a http get
        using (var response = await client.SendAsync(request))
        {
            if (response.IsSuccessStatusCode)
            {
                // Read the result as string, since the response will be json
                var result = await response.Content.ReadAsStringAsync();
                // Do something with the result
            }
        }
    }
}
After you get the results you can parse the response how you like. Do keep in mind that if you generate a class model from the JSON it can be broken at any moment since they regularly push updates to the beta.
If all went right you should be able to retrieve all the available applications in your Azure Active Directory. It is in my opinion re[mark]ably easy to use this and you can change the action variable to any method you can find in the beta reference docs here. Also by using this, you have control over how to parse the responses.
Thanks for reading!

Oldest comments (0)