
In today's guide, you'll discover how to skyrocket your project translations, thanks to FlyCode.
At the end of this guide, you'll have:
- the FlyCode app installed on a sample web application
- a robust translation management workflow
- managed your first translation update using the FlyCode UI
Before starting, you must know that everything we'll use in this step-by-step guide is free. FlyCode offers a free version for independent developers and small teams, don't hesitate to refer to the pricing page to discover more about the plans.
Give your product team the power to manage your multilingual website with FlyCode
Requirements
To complete this guide successfully, there are some requirements; you'll need to:
- have a GitHub account
- fork the sample web application we'll use in this guide
Once you did both of these, you're ready to improve your translation management! 🚀
Note: To simplify your reading experience, each step of this guide is accompanied by an annotated picture.
Step 1. Open the FlyCode homepage
As a first step, I invite you to open the FlyCode homepage and click on "Get Started".

Step 2. Create an account
You should be redirected to the account creation page. We recommend you log in with your GitHub account for this tutorial purpose.

Step 3. Authorize FlyCode on GitHub
GitHub will prompt you with the parameters FlyCode needs to create your account. Click on the "Authorize flycode-org" button.

Step 4. Create an organization
Once your account is created, the next step is to create an organization. On FlyCode, you can consider an organization like a workspace where you can import your different projects and collaborate on them with your team.

I invite you to fill out the form, and when you're ready, you can click on "Continue".
As you can notice, there is a checkbox called "Allow domain access". If you're using your organization's email, this option allows everyone with the same domain as yours to access the FlyCode organization.
Note: If you don't tick this option at the onboarding step, you can still invite your co-workers afterward.
Discover the FlyCode mission
After saving your organization, you'll have a short introduction video.
If you want to discover more about FlyCode and have a head start, I'll recommend you to watch it. Otherwise, feel free to move to the next step!
%[https://www.youtube.com/watch?v=nQ8wR74kYX0]
Step 5. Link your GitHub to your FlyCode organization
After closing the pop-up, you'll see a prompt to import your first Git repository to your organization.
This step is crucial because you'll discover how to configure your repository.
You can click on the "Connect GitHub" button.
Note: In the next step, you'll have the choice between different Git providers (GitHub, GitLab, etc.).

a. Select a Git provider
As you can see, FlyCode is compatible with GitHub, GitLab, and BitBucket for now. In this guide, we'll use GitHub as our Git provider.

b. Authorize FlyCode App on GitHub
After selecting GitHub, a pop-up will appear asking you to authorize the repositories of your choice.
The repositories you're importing here correspond to the ones you'll see in the next step (the one you'll be able to configure).
Note: In the image below, you see only the option to select all the repositories because we use a new GitHub account. But, only choose the repositories you want to import for security and privacy purposes.

c. Pick a repository from GitHub
You should see the repositories you imported in this step. Pick the one of your choice to start its configuration.

Note: The sample repository name is: "next-js-sample-with-translations".
d. Let the magic happens!
Here we are! FlyCode is scanning your repository to find the translations into it! 🪄🎩
In a few seconds only, you'll see the result appearing. If you're using the sample GitHub repository provided, the result should be similar to the below.
As you can see, many details are available, from your project stack to your translations (keys and values).

Once you're ready, click on "Complete configuration" to move to the next step.
e. Configure your FlyCode application
For the last step of your repository configuration, you'll have to provide some additional information to FlyCode.
Yes... it's magic, but you have to also work a little! 😆
To give you more context about the different properties, you can hover the "?" sign on the right of each input, but here is a summary:
- Select branch: the branch FlyCode will use to work with (edit the translations). We'll keep the default one for this tutorial
- App name: it's... the app name! You can type the name of your project
-
Base directory: where your source files are located. You can indicate the path to them here. For example,
src/if they are under ansrc/folder. Leave empty if your app code is at the repository root - Text resources format: how are your texts stored. We'll go with "Json resources files (flat keys)" for this tutorial. Feel free to discover the others later!
- Text resources path: the path to your text resources (have a look at the "?" sign for more details on how to indicate it)

Step 6. Activate your configuration
a. Select the FlyCode pull-request
Now, let's click on "Merge Pull Request" to access your repository on GitHub.

It opens a new page, do not close the previous one!

b. Discover what's under the FlyCode's hood
If you're curious and want to know more about how FlyCode is working, you can have a look at the "Files changed" section of the pull request.
You'll see a .flycode.yaml file corresponding to the parameters you input in step 5.
For now, the project on-boarding on FlyCode is quite simple and does not allow you everything. But, the YAML configuration can handle way more parameters, and you can build pretty advanced translations using it. I invite you to look at the FlyCode documentation to discover more about it.

c. Merge the pull-request
Once you're ready, you can smash the "Merge pull request" button to activate FlyCode on your project.

Step 7. Come back to FlyCode and enjoy! 🎉
Yes, you are r-e-a-d-y! 👏 If you return to the FlyCode page you left in the background, you'll see a success page.

Step 8. Open your application via your dashboard
After the configuration success page, you can select your application in the dashboard.

Step 9. Visualize your translations
Now we're at the most exciting part of this guide. You'll learn how to manage all your translations from your FlyCode dashboard in a few clicks only.
As you can see, your project page contains all your repository translations in a table (keys, values, and language).
Let's compare with our sample NextJS application to see if everything matches.
Here's the project tree in the repository (a locales folder with two JSON files, en.json and fr.json).
.
├ [...]
├── locales
│   ├── en.json
│   └── fr.json
[...]
If we open these two files, here is what we have:
-
en.json:
{
  "metaTitle": "Next.js Localization with Next-Translate",
  "title": "Welcome to my i18n NextJS application!",
  "description": "I'm using the Next-Translate library to translate this page."
}
-
fr.json:
{
  "metaTitle": "Localisation de Next.js avec Next-Translate",
  "title": "Bienvenue dans mon application NextJS i18n !",
  "description": "J'utilise la bibliothèque Next-Translate pour traduire cette page."
}
Now, let's look at the page more in-depth with this annotated image below.

Step 10. Time to edit a translation
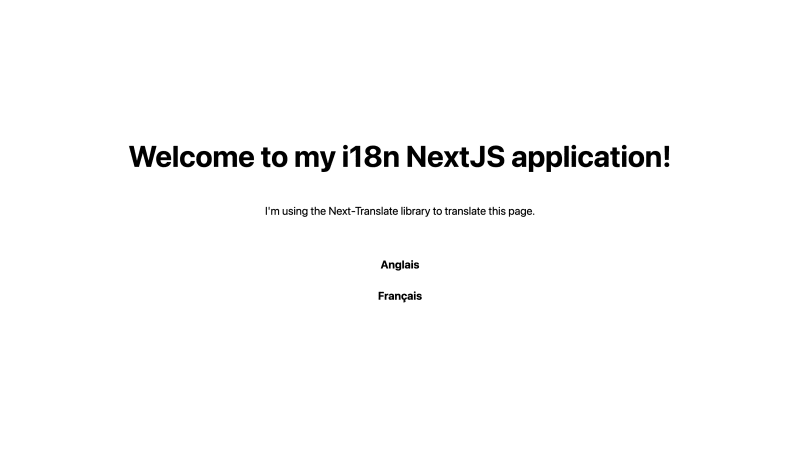
a. Current website version
Now that you have seen how is organized your project homepage! We'll see how to edit a translation of your website using FlyCode.
But, before doing that, let's run your website locally and see what it looks like.
You can type the following commands in your local Git repository root to run the project:
$ npm install
$ npm run dev
b. Edit a translation using FlyCode
Let's say you want to shorten the English description of your website. Next to the corresponding translation, you'll see a "pen" icon. Click on it and start editing.

You can click on the "✅" icon to validate your changes when you finish.

Step 11. Send the update to engineers
a. Save your new translation
Now your changes are ready for production, let's send the update to engineers. We mean to create a GitHub pull request on your project by sending an update.
Later, the engineers will accept the changes and automatically integrate them into the code (step 12).
To do so, you can click on the top-right button of your table.

b. Describe your changes
To help the engineers with your updates, you can leave a comment before sending them. We strongly advise you to do it as often as possible. It helps avoid the back and forth between the product/marketing team and the engineers.

Step 12. Accept the changes on GitHub
a. Open your GitHub pull-requests
Let's come back to GitHub by clicking the button at the top right!

b. Check the changes
Once redirected to the GitHub page, your engineers can look at the different changes made.

c. Merge the changes
They can also see the comment you left on FlyCode. When they are ready, they can click on "Merge pull request" to make your changes live.

Step 13. Refresh your website
A few days later... your changes are in production! But, what about now?
Let's try refreshing your local version of the website using the following commands:
$ git pull
$ npm run dev
TADA! Your new translation is live. 🥳

Step 14. Could you do it again?
That's all for this first step-by-step guide on how to use FlyCode. Did you see how simple a product team can edit a translation?
Now, it's your turn to edit more translations, add another project and start using FlyCode with your following projects. If you have any feedback or inquiries, we would love to hear from you on our contact page!
Wrapping up
We hope you learned a lot with this step-by-step guide and are excited by the value we're bringing to your translation management.
If you want to keep track of the latest product updates and our content, follow us on Twitter.


Top comments (0)