
Especially when dragging markers across an image, it's quite common to show a magnifier that enlarges the area because it's covered by the finger. Let's have a look at how to implement that in Flutter.
Our goal
This above description is very broad. Let's go into further detail by defining the key features of our magnifier:
- There is a half-transparent circle than can be dragged across the image
- Once it's being dragged, the magnifier appears on the top left
- Whenever the circle interferes with the magnifier, it jumps to the top right
- The magnifier enlarges the area of the underlying image by a factor that is definable
- Once the drag ends, the magnifier disappears
- This does not only work for images but for every widget
Implementation
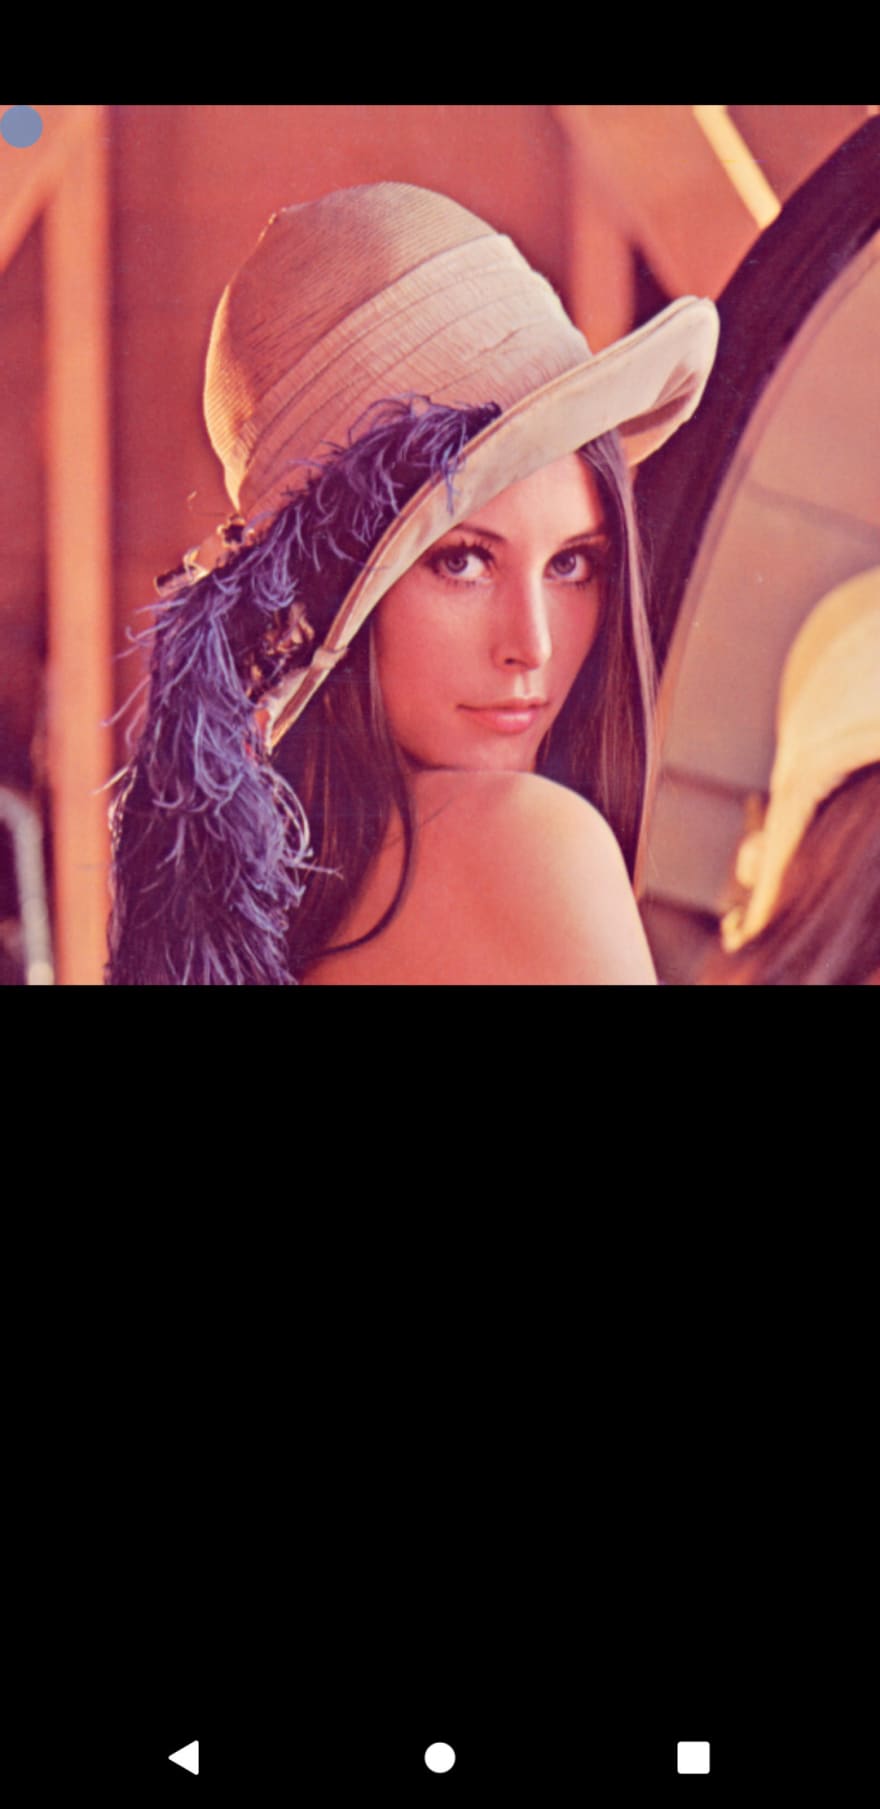
We start by implementing a sample screen that contains the image we want to add the possibility to zoom on. For this, we use the most popular test image: Lena Forsén, better known as Lenna.
  @override
  Widget build(BuildContext context) {
    return Stack(
      children: [
        Image(
          image: AssetImage('assets/lenna.png')
        )
      ],
    );
  }
We use a Stack widget because we want to put the touch bubble and the magnifier on top later on.
The touch bubble
Now we need the touch bubble the user should be able to position on the part of the image that should be magnified.
class _SampleImageState extends State<SampleImage> {
  static const double touchBubbleSize = 20;

  Offset position;
  double currentBubbleSize;
  bool magnifierVisible = false;

  @override
  void initState() {
    currentBubbleSize = touchBubbleSize;
    SystemChrome.setEnabledSystemUIOverlays([SystemUiOverlay.bottom]);
    super.initState();
  }

  @override
  Widget build(BuildContext context) {
    return Stack(
      children: [
        Magnifier(
          position: position,
          visible: magnifierVisible,
          child: Image(
            image: AssetImage('assets/lenna.png')
          ),
        ),
        _getTouchBubble()
      ],
    );
  }

  Positioned _getTouchBubble() {
    return Positioned(
        top: position == null ? 0 : position.dy - currentBubbleSize / 2,
        left: position == null ? 0 : position.dx - currentBubbleSize / 2,
        child: GestureDetector(
          child: Container(
            width: currentBubbleSize,
            height: currentBubbleSize,
            decoration: BoxDecoration(
              shape: BoxShape.circle,
              color: Theme.of(context).accentColor.withOpacity(0.5)
            ),
          )
        )
    );
  }
We need to store the position of the touch bubble so that we can provide that piece of information to the magnifier. This is necessary so that the magnifier can only enlarge the particular area that is determined by the touch bubble.
We also have a static size of the touch bubble which determines the base size the bubble returns to when no interaction is happening. We also need the actual current size that can differ when the user drags the bubble. To highlight the drag event we want the bubble to grow by 50 %.
We could implement it like above and just extract the visual description of the touch bubble into its own method which resides in the sample image widget. However, it's a good idea to put it into its own widget.
This will make it look like this:
import 'package:flutter/material.dart';

class TouchBubble extends StatelessWidget {
  TouchBubble({
    @required this.position,
    this.bubbleSize
  });

  final Offset position;
  final double bubbleSize;

  @override
  Widget build(BuildContext context) {
    return Positioned(
      top: position == null ? 0 : position.dy - bubbleSize / 2,
      left: position == null ? 0 : position.dx - bubbleSize / 2,
      child: GestureDetector(
        child: Container(
          width: bubbleSize,
          height: bubbleSize,
          decoration: BoxDecoration(
            shape: BoxShape.circle,
            color: Theme.of(context).accentColor.withOpacity(0.5)
          ),
        )
      )
    );
  }
}
So far so good. But yet, there is no interaction possible:
The touch bubble is visible at the top left because that is the fallback value for the top and left property of the Positioned widget inside our TouchBubble class.
In order to add interactivity to our magnifier, we let the TouchBubble expect some callbacks in its constructor:
import 'package:flutter/material.dart';

class TouchBubble extends StatelessWidget {
  TouchBubble({
    this.position,
    @required this.onStartDragging,
    @required this.onDrag,
    @required this.onEndDragging,
    @required this.bubbleSize,
  }) : assert(onStartDragging != null),
       assert(onDrag != null),
       assert(onEndDragging != null),
       assert(bubbleSize != null && bubbleSize > 0);

  final Offset position;
  final double bubbleSize;
  final Function onStartDragging;
  final Function onDrag;
  final Function onEndDragging;

  @override
  Widget build(BuildContext context) {
    return Positioned(
      ...
      child: GestureDetector(
        onPanStart: (details) => onStartDragging(details.globalPosition),
        onPanUpdate: (details) => onDrag(details.globalPosition),
        onPanEnd: (_) => onEndDragging(),
        ...
      )
    );
  }
}
Now we have three new additional arguments: onStartDragging, onDrag and onEndDragging. The behavior that is triggered by these functions, will be defined in the parent widget. We annotate all of them (expect for position because we have a fallback) as @required which tells our IDE to warn us if we omit this argument. Additionally, we provide asserts for runtime errors to occur at the correct place if we ignore the suggestions of our IDE.
onStartDragging and onDrag are expected to be provided with the new absolute (global) position. onEndDragging does not expect any argument.
Our new SampleImage widget looks like this:
import 'package:flutter/material.dart';
import 'package:flutter/services.dart';
import 'package:flutter_magnifier/touch_bubble.dart';

class SampleImage extends StatefulWidget {
  @override
  _SampleImageState createState() => _SampleImageState();
}

class _SampleImageState extends State<SampleImage> {
  static const double touchBubbleSize = 20;

  Offset position;
  double currentBubbleSize;
  bool magnifierVisible = false;

  @override
  void initState() {
    currentBubbleSize = touchBubbleSize;
    SystemChrome.setEnabledSystemUIOverlays([SystemUiOverlay.bottom]);
    super.initState();
  }

  @override
  Widget build(BuildContext context) {
    return Stack(
      children: [
        Image(
          image: AssetImage('assets/lenna.png')
        ),
        TouchBubble(
          position: position,
          bubbleSize: currentBubbleSize,
          onStartDragging: _startDragging,
          onDrag: _drag,
          onEndDragging: _endDragging,
        )
      ],
    );
  }

  void _startDragging(Offset newPosition) {
    setState(() {
      magnifierVisible = true;
      position = newPosition;
      currentBubbleSize = touchBubbleSize * 1.5;
    });
  }

  void _drag(Offset newPosition) {
    setState(() {
      position = newPosition;
    });
  }

  void _endDragging() {
    setState(() {
      currentBubbleSize = touchBubbleSize;
      magnifierVisible = false;
    });
  }
}
The position is updated on drag start and on drag update. When the dragging starts, the mag is made visible and increases its size by 50 %. When dragging has ended, the size is turned back to normal and the magnifier is turned invisible.
It leads to a UI that behaves like this:
The magnifier
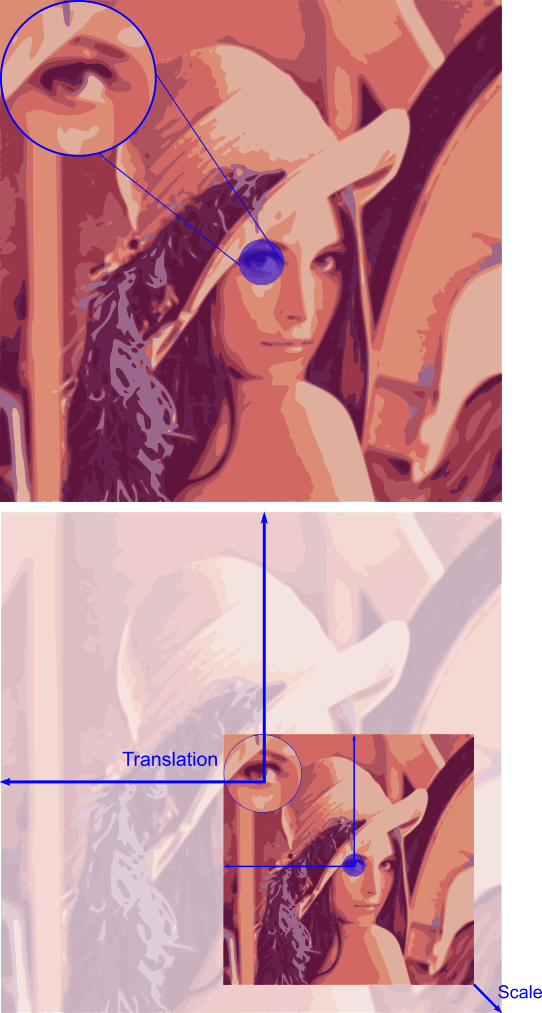
Before we jump into the implementation, let's think for a second, what magnifying actually means. We take an image, scale it up, move the image to where the center of the mag is and then crop it so that only the inner part of the mag shows the translated image.
The translation is also influenced by the scale factor. Visually this can be explained like this:
Let's first create a new widget that represents our magnifier:
class Magnifier extends StatefulWidget {
  const Magnifier({
    @required this.child,
    @required this.position,
    this.visible = true,
    this.scale = 1.5,
    this.size = const Size(160, 160)
  }) : assert(child != null);

  final Widget child;
  final Offset position;
  final bool visible;
  final double scale;
  final Size size;

  @override
  _MagnifierState createState() => _MagnifierState();
}

class _MagnifierState extends State<Magnifier> {
  Size _magnifierSize;
  double _scale;
  Matrix4 _matrix;

  @override
  void initState() {
    _magnifierSize = widget.size;
    _scale = widget.scale;
    _calculateMatrix();

    super.initState();
  }

  @override
  void didUpdateWidget(Magnifier oldWidget) {
    super.didUpdateWidget(oldWidget);

    _calculateMatrix();
  }

  @override
  Widget build(BuildContext context) {
    return Stack(
      children: [
        widget.child,
        if (widget.visible && widget.position != null)
          _getMagnifier(context)
      ],
    );
  }

  void _calculateMatrix() {
    if (widget.position == null) {
      return;
    }

    setState(() {
      double newX = widget.position.dx - (_magnifierSize.width / 2 / _scale);
      double newY = widget.position.dy - (_magnifierSize.height / 2 / _scale);

      final Matrix4 updatedMatrix = Matrix4.identity()
        ..scale(_scale, _scale)
        ..translate(-newX, -newY);

      _matrix = updatedMatrix;
    });
  }
}
We have a few constructor arguments here. The most relevant are child and position. Because we want this feature to work with every widget, we need this widget to be provided (child parameter). In order to determine which part of the underlying widget should be magnified, we also let it require a position parameter.
visible is used to only display it when the user drags the bubble. scale and size should be self-explanatory and have a default value.
The crucial business logic here is the _calculateMatrix() method because it determines scaling and translation based on the position of the touch bubble. We take the identity matrix and use the scale and translation method to update it. Important: we need to use the center of the touch bubble as the anchor. That's why we subtract half of the height and the width to determine the position.
Okay, now the part of drawing the actual magnifier is still missing. We call _getMagnifier() but yet, there is no implementation.
Widget _getMagnifier(BuildContext context) {
  return Align(
    alignment: Alignment.topLeft,
    child: ClipOval(
      child: BackdropFilter(
        filter: ImageFilter.matrix(_matrix.storage),
        child: Container(
            width: _magnifierSize.width,
            height: _magnifierSize.height,
            decoration: BoxDecoration(
              color: Colors.transparent,
              shape: BoxShape.circle,
              border: Border.all(color: Colors.blue, width: 2)
        ),
      ),
    ),
  );
}
This deserves some explanation. Now, the crucial widget here is BackdropFilter. This filter takes a filter and a child. It applies the given filter to the child. The filter we use is matrix. This lets us apply the calculated matrix to the child. It's very important to wrap it in a ClipOval because we only want a sized circle to be seen and not the whole scaled and translated duplication of our original image.
In order to improve the possibility to place the bubble exactly where we want to, we can add a crosshair to the magnifier. This requires us to replace the Container by a self-drawn widget.
import 'package:flutter/material.dart';

class MagnifierPainter extends CustomPainter {
  const MagnifierPainter({
    @required this.color,
    this.strokeWidth = 5
  });

  final double strokeWidth;
  final Color color;

  @override
  void paint(Canvas canvas, Size size) {
    _drawCircle(canvas, size);
    _drawCrosshair(canvas, size);
  }

  void _drawCircle(Canvas canvas, Size size) {
    Paint paintObject = Paint()
      ..style = PaintingStyle.stroke
      ..strokeWidth = strokeWidth
      ..color = color;

    canvas.drawCircle(
      size.center(
        Offset(0, 0)
      ),
      size.longestSide / 2, paintObject
    );
  }

  void _drawCrosshair(Canvas canvas, Size size) {
    Paint crossPaint = Paint()
      ..strokeWidth = strokeWidth / 2
      ..color = color;

    double crossSize = size.longestSide * 0.04;

    canvas.drawLine(
      size.center(Offset(-crossSize, -crossSize)),
      size.center(Offset(crossSize, crossSize)),
      crossPaint
    );

    canvas.drawLine(
      size.center(Offset(crossSize, -crossSize)),
      size.center(Offset(-crossSize, crossSize)),
      crossPaint
    );
  }

  @override
  bool shouldRepaint(CustomPainter oldDelegate) {
    return true;
  }
}
We start by drawing a circle of the given size but in stroke mode so we only draw the outline. After that, we draw the cross by using the center and shifting it by 4 % of the magnifier size to the top left and bottom right.
Now the _getMagnifier() method in the Magnifier class looks like this:
  Widget _getMagnifier(BuildContext context) {
    return Align(
      alignment: Alignment.topLeft,
      child: ClipOval(
        child: BackdropFilter(
          filter: ImageFilter.matrix(_matrix.storage),
          child: CustomPaint(
            painter: MagnifierPainter(
              color: Theme.of(context).accentColor
            ),
            size: _magnifierSize,
          ),
        ),
      ),
    );
  }
What we want to take care of now is that the magnifier jumps to the top right when our touch bubble's position interferes with the magnifier.
  Alignment _getAlignment() {
    if (_bubbleCrossesMagnifier()) {
      return Alignment.topRight;
    }

    return Alignment.topLeft;
  }

  bool _bubbleCrossesMagnifier() => widget.position.dx < widget.size.width &&
    widget.position.dy < widget.size.height;
Instead of assigning Alignment.topLeft statically to the magnifier, we decide whether to use topLeft or topRight based on its position.
Now we need to add an extra block to the calculateMatrix() method:
if (_bubbleCrossesMagnifier()) {
  final box = context.findRenderObject() as RenderBox;
  newX -= ((box.size.width - _magnifierSize.width) / _scale);
}
Whenever the conditions are met, we influence the matrix translation by shifting the newX by the whole width subtracted by the mag width because that is exactly the amount by which the magnifier moves when the alignment is changed from left to right.
Closing comment
Using the expensive but handy Widget BackdropFilter and a little bit of matrix calculation, we were able to implement a magnifier that is able to enlarge every child widget given a position. The magnifier is located at the top left but jumps out of the way when our touch collides with the position of the magnifier.
You can see it in action (and see the code) by having a look at my edge detection project. The magnifier is used on touch bubbles that mimic the detected edges around a dynamic image.


Top comments (0)