Who remembers good old audio tapes? In my opinion although they are technically outdated, they are still very fascinating. Compared to modern media, one could actually see what's happening inside.
To appreciate this awesome invention, let's implement an actually working audio player that mimics the visuals and behavior of a good old tape!
The goal
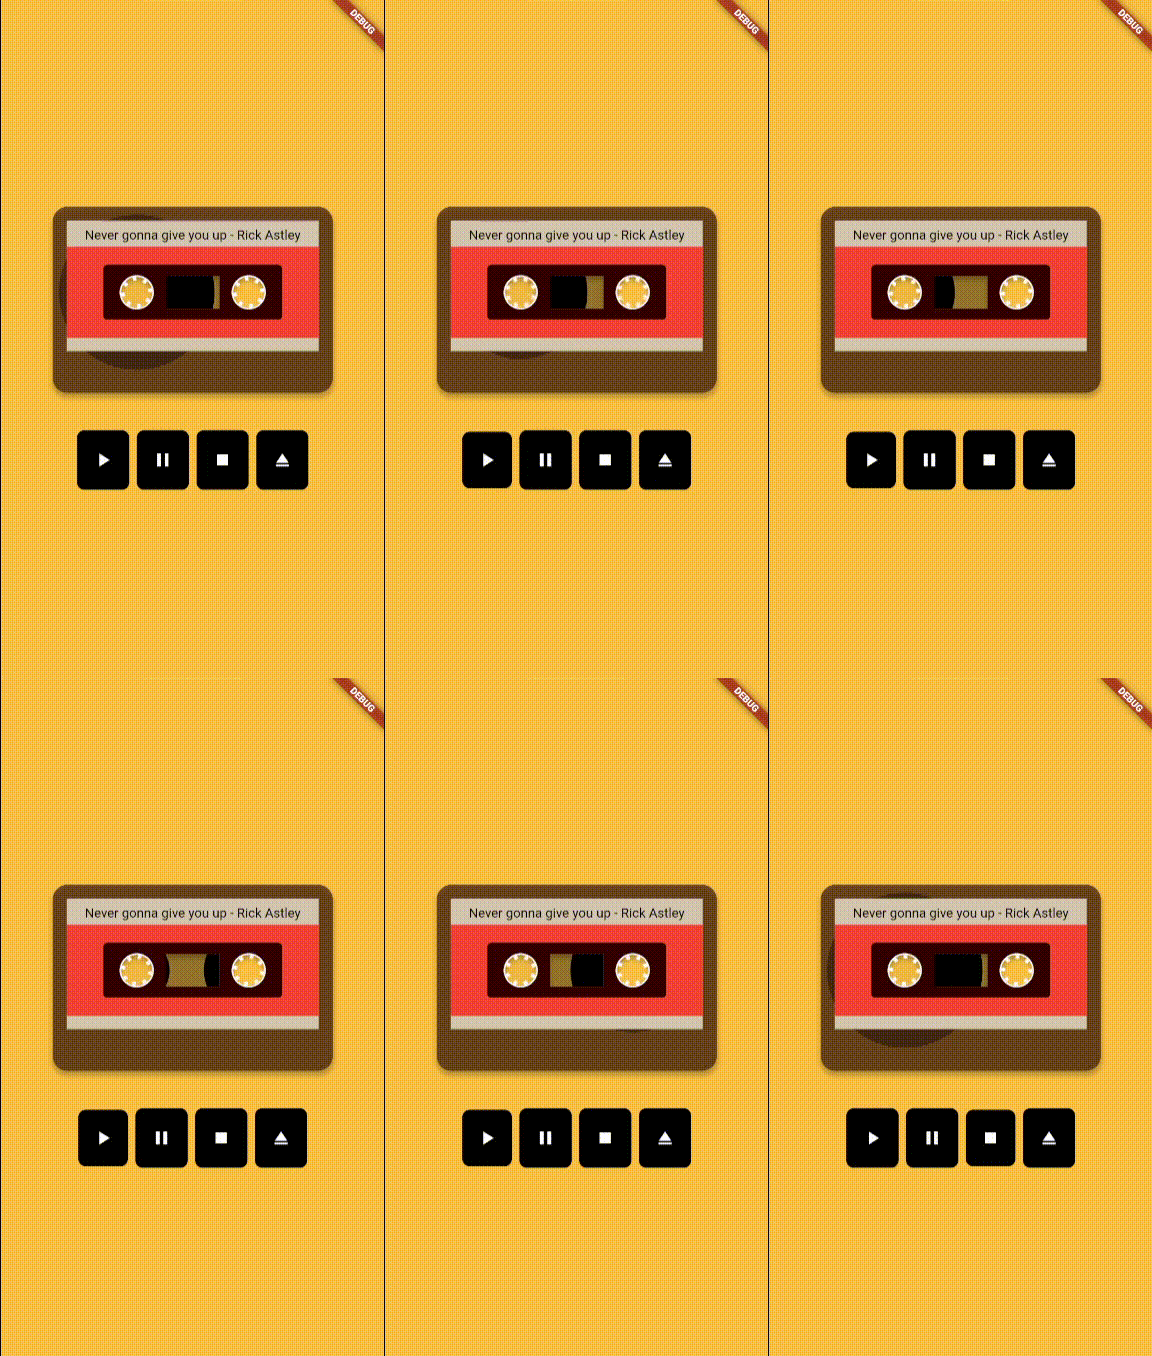
The above animation describes our goal better than 1000 words, but let's define the features more formally:
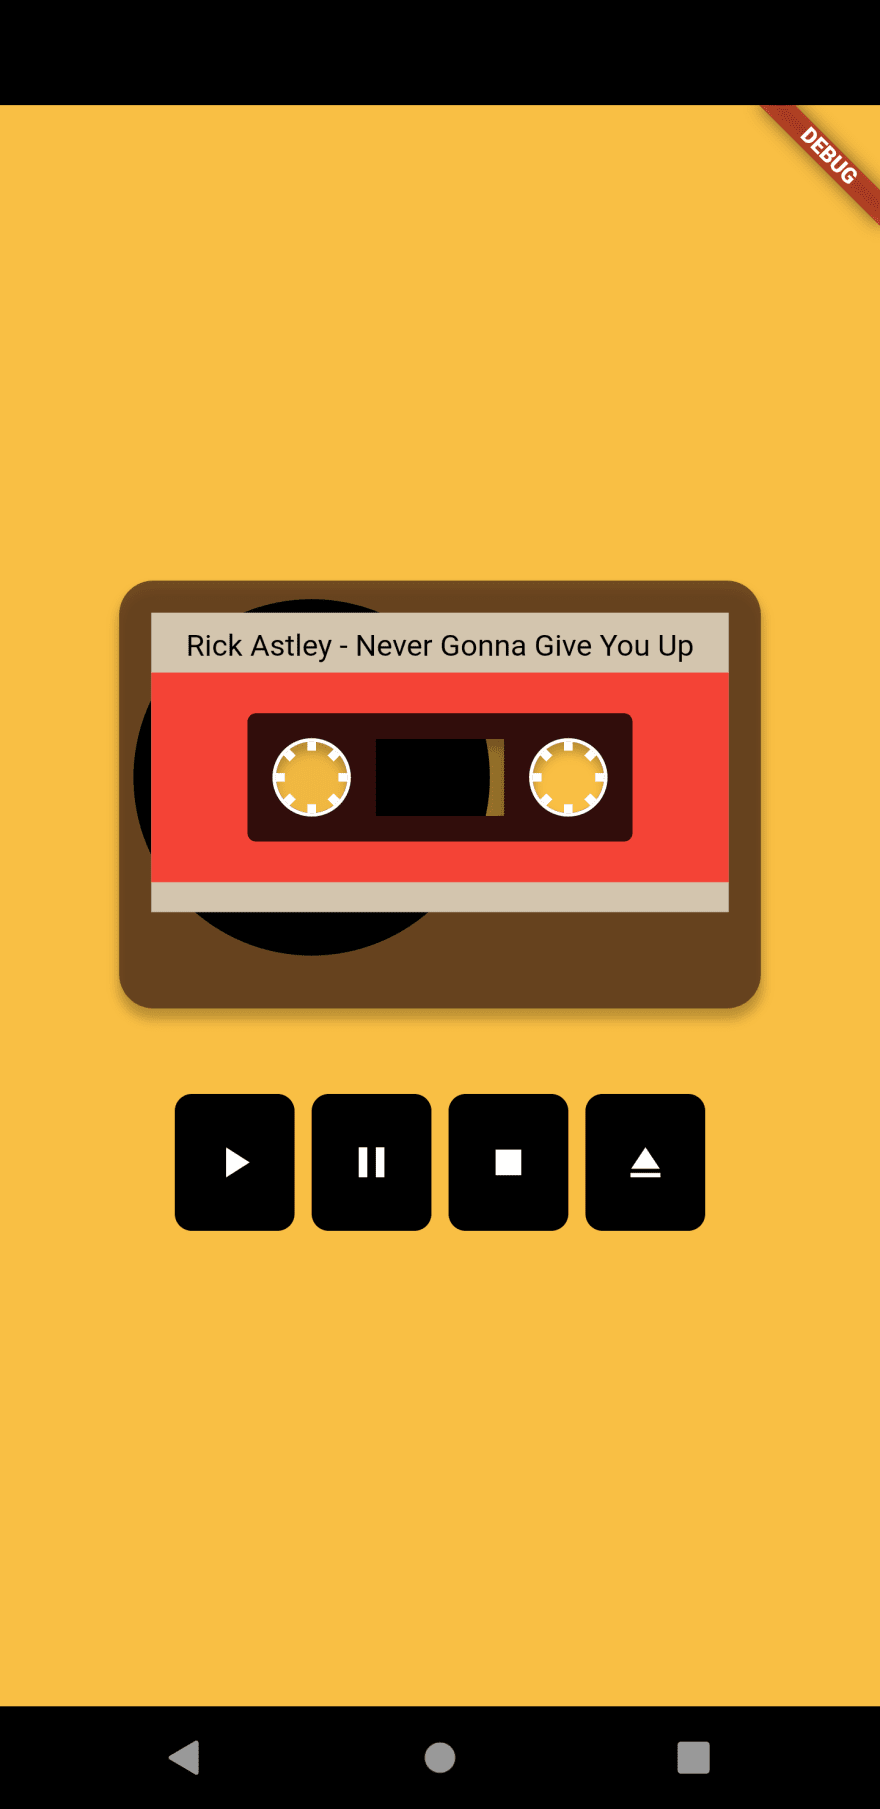
- There is a tape at the top and a control panel below
- One can choose an audio file from the phone by tapping the eject button (the one on the right)
- The title and author are extracted from the meta information and written on the blank label of the tape When a song is chosen and the play button is tapped, the pins of the tape rotate counter-clockwise (and the song actually plays)
- The left tape reel shrink whereas the right tape reel grow according to the current position of the song
- The pause button just pauses the song. When tapping "play" afterwards, it's possible to resume
- The stop button rewinds the song to the beginning
- A button of the control panel indicates being tapped by shrinking. When one button is tapped, every other button goes back to the original size
The implementation
We are going to start with the basic skeleton: a Tape widget. This widget will have the responsibility of painting the tape using the parent's space.
class Tape extends StatefulWidget {
  @override
  _TapeState createState() => _TapeState();
}

class _TapeState extends State<Tape> with SingleTickerProviderStateMixin {
  AnimationController _controller;

  @override
  void initState() {
    super.initState();

    _controller = new AnimationController(
      duration: const Duration(milliseconds: 2000),
      vsync: this
    );

    Tween<double> tween = Tween<double>(
      begin: 0.0, end: 1.0
    );

    tween.animate(_controller);
  }

  @override
  void dispose() {
    _controller.dispose();
    super.dispose();
  }

  @override
  Widget build(BuildContext context) {
    return Column(
      mainAxisSize: MainAxisSize.min,
      children: [
        SizedBox(
          width: 300,
          height: 200,
          child: AnimatedBuilder(
            builder: (BuildContext context, Widget child) {
              return CustomPaint(
                painter: TapePainter(),
              );
            },
            animation: _controller,
          ),
        ),
      ],
    );
  }

  void stop() {
  }

  void pause() {
  }

  void play() {
  }

  void choose() {
  }
}
This is the first basic iteration of our Tape class. We already know we want to rotate the pins to make it look like the cassette is being played. That's why we initialize an AnimationController with a duration of 2 seconds and attach a tween animating a double from 0.0 to 1.0 that represents the amount of rotation.
The build method returns a SizedBox with a width ratio of 3:2 whose child is an AnimatedBuilder containing our CustomPaint. AnimatedBuilder because we want our tape to be repainted every time the animation is updated so that we have the rotating pins at the center.
Drawing the tape
The code won't compile because we're missing the actual TapePainter. Let's take care of that.
class TapePainter extends CustomPainter {
  double holeRadius;
  Offset leftHolePosition;
  Offset rightHolePosition;
  Path leftHole;
  Path rightHole;
  Path centerWindowPath;

  Paint paintObject;
  Size size;
  Canvas canvas;

  @override
  void paint(Canvas canvas, Size size) {
    this.size = size;
    this.canvas = canvas;

    holeRadius = size.height / 12;
    paintObject = Paint();

    _initHoles();
    _initCenterWindow();
  }


  void _initCenterWindow() {
    Rect centerWindow = Rect.fromLTRB(size.width * 0.4, size.height * 0.37, size.width * 0.6, size.height * 0.55);
    centerWindowPath = Path()..addRect(centerWindow);
  }

  void _initHoles() {
    leftHolePosition = Offset(size.width * 0.3, size.height * 0.46);
    rightHolePosition = Offset(size.width * 0.7, size.height * 0.46);

    leftHole = Path()..addOval(
      Rect.fromCircle(
        center: leftHolePosition,
        radius: holeRadius
      )
    );

    rightHole = Path()..addOval(
      Rect.fromCircle(
        center: rightHolePosition,
        radius: holeRadius
      )
    );
  }

  @override
  bool shouldRepaint(CustomPainter oldDelegate) {
    return true;
  }
}
Before we actually draw the cassette, we need to initialize certain things. That's because we want to extract the draw process of every part of the tape into a single method to keep the code readable and maintainable. Because we don't want to provide the very same arguments over and over again to every method, we initialize them at the beginning and make them member variables of the class.
We let the position of the holes depend on the width we have. This way, we prevent a completely static painting. The center window also depends on the measurements we're given.
The holes and their radii are needed for drawing several parts because the holes will be cut through them. Same for the window.
_drawTape() {
  RRect tape = RRect.fromRectAndRadius(
    Rect.fromLTRB(0, 0, size.width, size.height),
    Radius.circular(16)
  );

  Path tapePath = Path()..addRRect(tape);

  tapePath = Path.combine(PathOperation.difference, tapePath, leftHole);
  tapePath = Path.combine(PathOperation.difference, tapePath, rightHole);
  tapePath = Path.combine(PathOperation.difference, tapePath, centerWindowPath);

  canvas.drawShadow(tapePath, Colors.black, 3.0, false);
  paintObject.color = Colors.black;
  paintObject.color = Color(0xff522f19).withOpacity(0.8);
  canvas.drawPath(tapePath, paintObject);
}
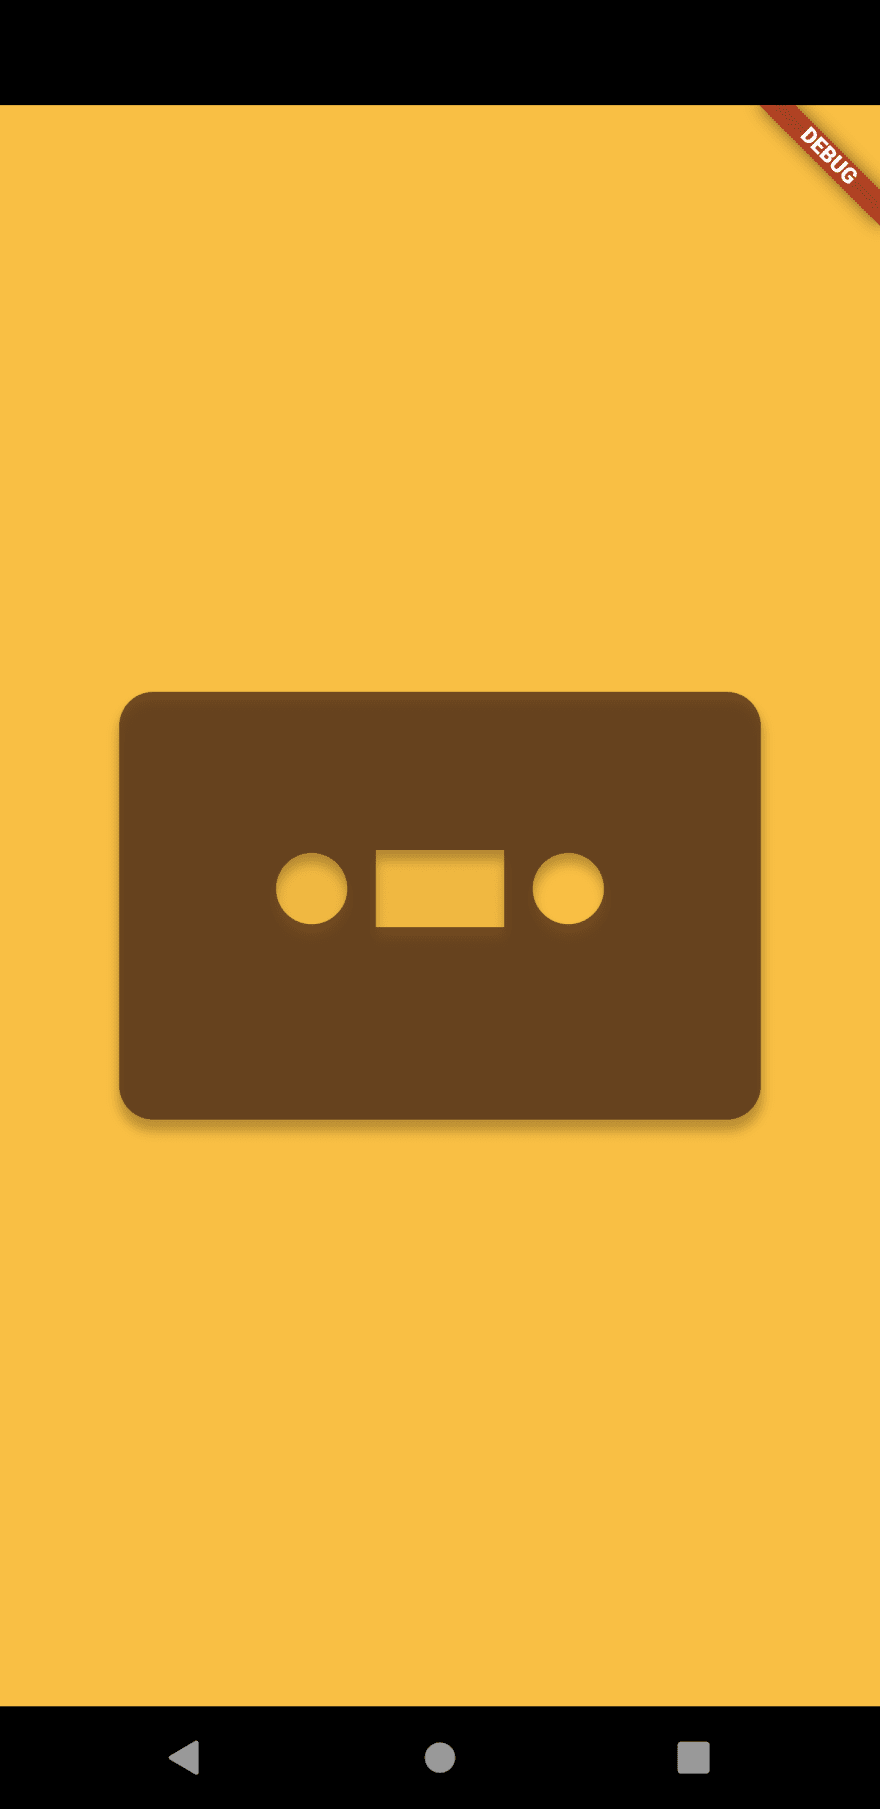
We start by adding a new private method called _drawTape() that actually draws the tape which is nothing else but a rounded rectangle covering the hole size with the holes and the window being cut into the shape. We also draw a shadow to make it look a little bit more realistic.
...
Path _cutCenterWindowIntoPath(Path path) {
  return Path.combine(PathOperation.difference, path, centerWindowPath);
}

_cutHolesIntoPath(Path path) {
  path = Path.combine(PathOperation.difference, path, leftHole);
  path = Path.combine(PathOperation.difference, path, rightHole);

  return path;
}
...
Because we are going to need the same cutting algorithm for other parts of the tape as well, we are extracting it into separate methods called _cutCenterWindowIntoPath() and _cutHolesIntoPath(). Then we replace the Path.combine calls by our new methods.
Next, we are going to paint the label on top of the tape.
void _drawLabel() {
  double labelPadding = size.width * 0.05;
  Rect label = Rect.fromLTWH(labelPadding, labelPadding, size.width - labelPadding * 2, size.height * 0.7);
  Path labelPath = Path()..addRect(label);
  labelPath = _cutHolesIntoPath(labelPath);
  labelPath = _cutCenterWindowIntoPath(labelPath);

  Rect labelTop = Rect.fromLTRB(label.left, label.top + label.height * 0.2, label.right, label.bottom - label.height * 0.1);
  Path labelTopPath = Path()..addRect(labelTop);
  labelTopPath = _cutHolesIntoPath(labelTopPath);
  labelTopPath = _cutCenterWindowIntoPath(labelTopPath);

  paintObject.color = Color(0xffd3c5ae);
  canvas.drawPath(labelPath, paintObject);
  paintObject.color = Colors.red;
  canvas.drawPath(labelTopPath, paintObject);
}
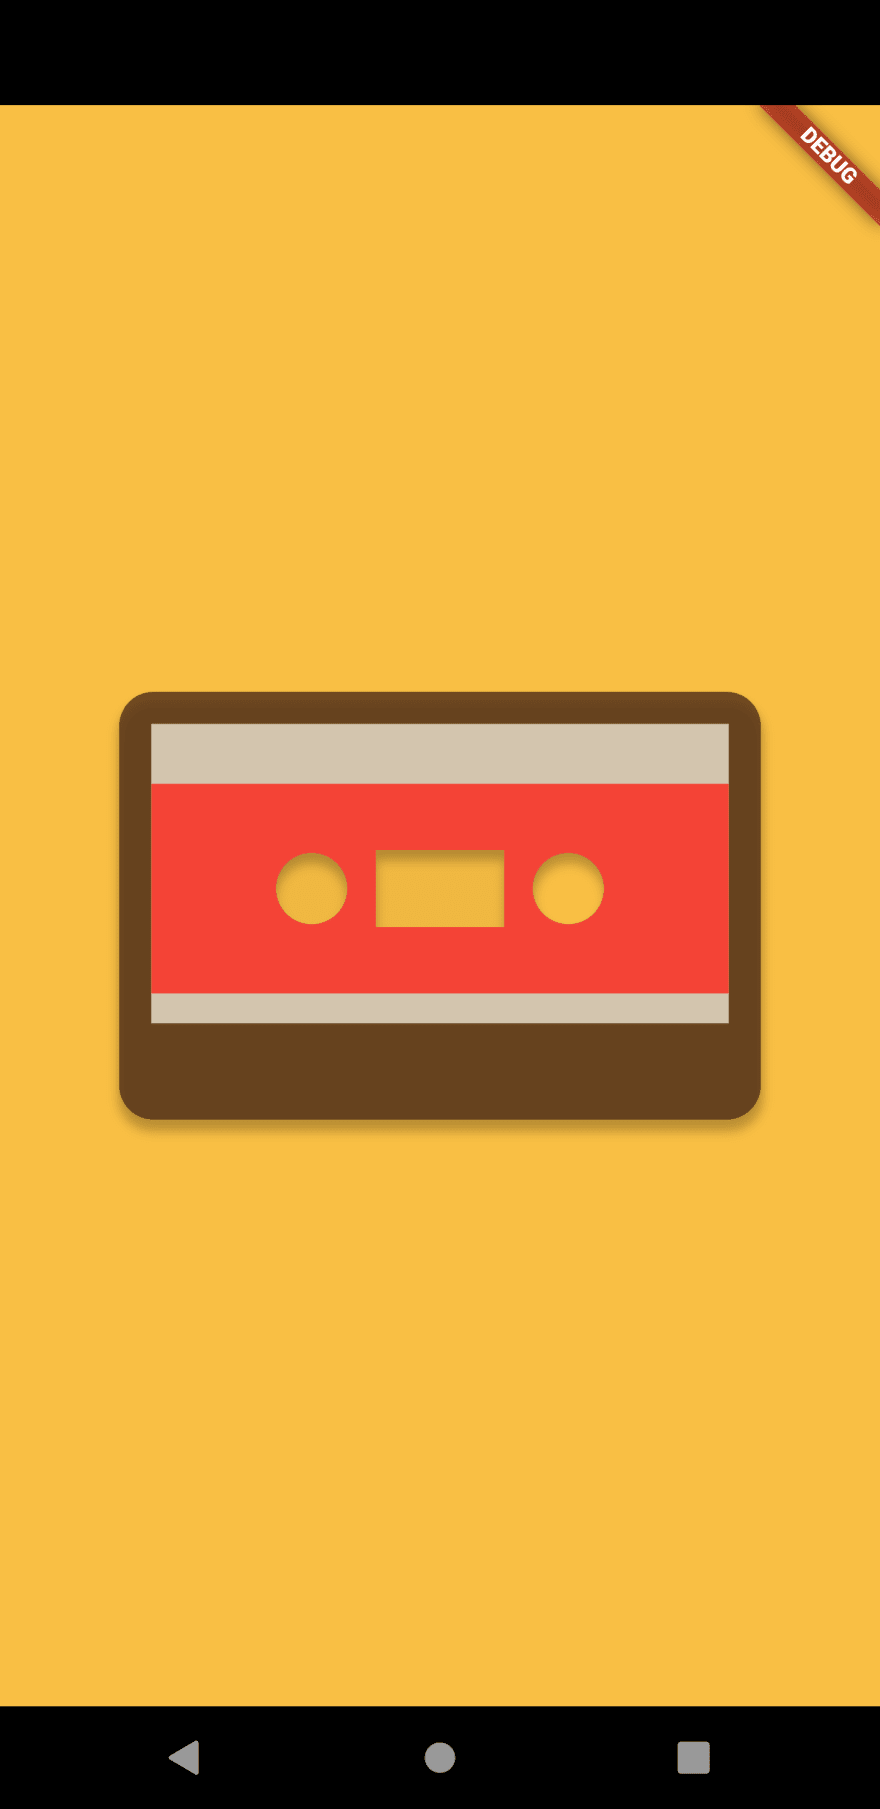
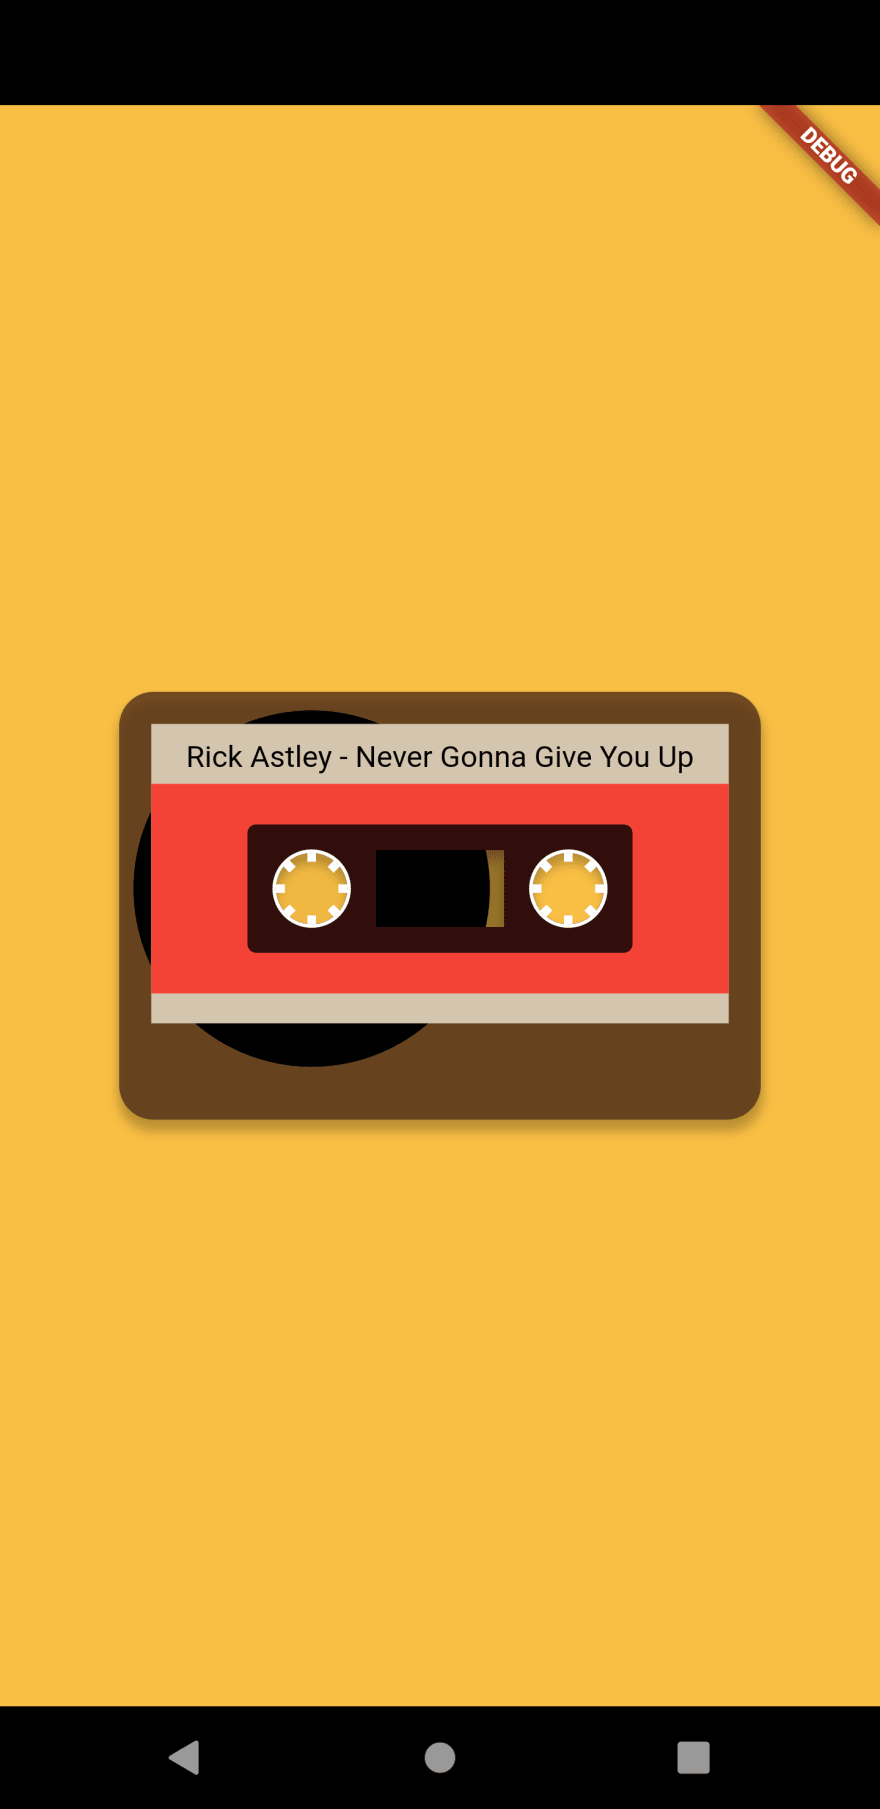
The label consists of a grayish rectangle that provides some space for the actual text label describing the current song at the top and a red body. The label also needs to be cut at the position of the holes and the window.
It's starting to look like an actual cassette. Let's add the window which is nothing but a hole yet. On top of that, let's add this black rectangle that is a typical visual part of an audio tape.
void _drawCenterWindow() {
  paintObject.color = Colors.black38;
  canvas.drawPath(centerWindowPath, paintObject);
}

void _drawBlackRect() {
  Rect blackRect = Rect.fromLTWH(size.width * 0.2, size.height * 0.31, size.width * 0.6, size.height * 0.3);
  Path blackRectPath = Path()
    ..addRRect(
        RRect.fromRectXY(blackRect, 4, 4)
    );

  blackRectPath = Path.combine(PathOperation.difference, blackRectPath, leftHole);
  blackRectPath = Path.combine(PathOperation.difference, blackRectPath, rightHole);
  blackRectPath = _cutCenterWindowIntoPath(blackRectPath);

  paintObject.color = Colors.black.withOpacity(0.8);
  canvas.drawPath(blackRectPath, paintObject);
}
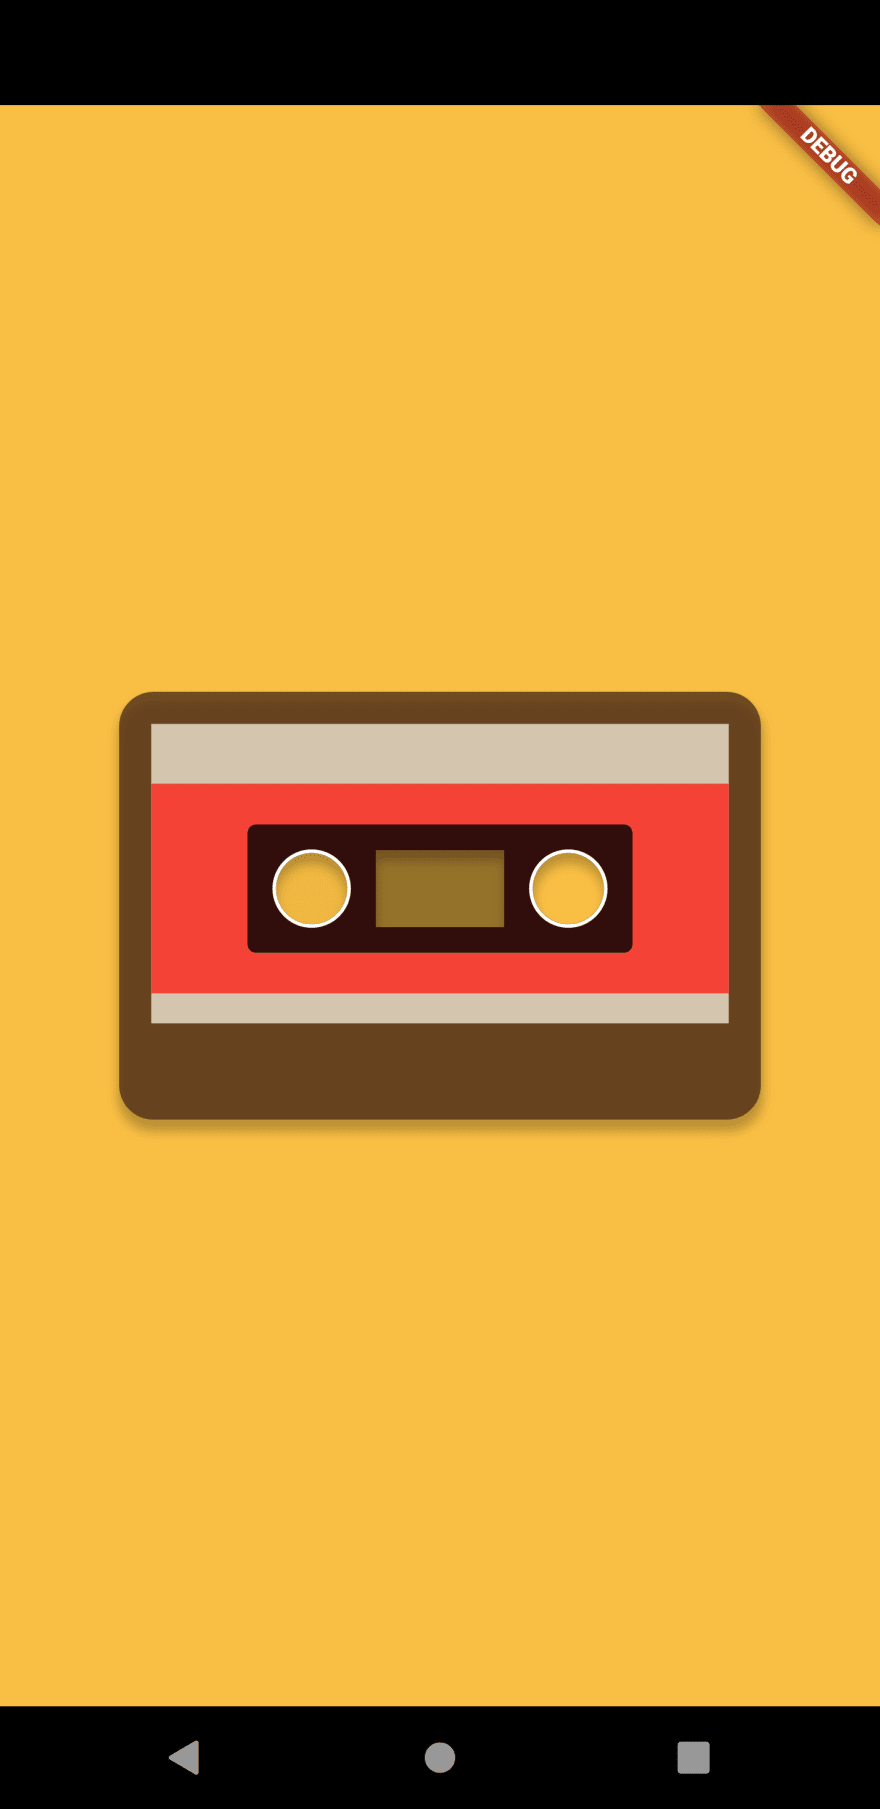
Since we already have the path of the window, drawing a semi-transparent rectangle on top of that is an easy task.
The rectangle is also a very basic shape. Just a rounded rectangle whose dimensions are defined by fractions of the given size. The holes and the window need to be cut here as well.
We're almost done with painting the basic components of the cassette. A tiny detail that's still missing are the circles in which the pins will be rotating. So let's indicate that by painting a white ring where the holes are located.
void _drawHoleRings() {
  Path leftHoleRing = Path()..addOval(
    Rect.fromCircle(
      center: leftHolePosition,
      radius: holeRadius * 1.1
    )
  );

  Path rightHoleRing = Path()..addOval(
    Rect.fromCircle(
      center: rightHolePosition,
      radius: holeRadius * 1.1
    )
  );

  leftHoleRing = Path.combine(PathOperation.difference, leftHoleRing, leftHole);
  rightHoleRing = Path.combine(PathOperation.difference, rightHoleRing, rightHole);

  paintObject.color = Colors.white;
  canvas.drawPath(leftHoleRing, paintObject);
  canvas.drawPath(rightHoleRing, paintObject);
}
Nothing really special here. We take the hole positions we initialized at the beginning and draw circles that have a slightly higher radius than the holes and then we subtract the holes from these shapes which results in only the outlines.
Now we're done with the static part of the tape. The dynamic parts are: the rotating pins, the tape reels and the text label showing author and title.
Adding animated parts
We're going to prepare the tape so that it expects values that are going to be defined by the animation later but can be static for now.
...
AnimatedBuilder(
  builder: (BuildContext context, Widget child) {
    return CustomPaint(
      painter: TapePainter(
        rotationValue: _controller.value,
        title: 'Rick Astley - Never Gonna Give You Up',
        progress: 0
      ),
    );
  },
  animation: _controller,
),
...
class TapePainter extends CustomPainter {
  TapePainter({
    @required this.rotationValue,
    @required this.title,
    @required this.progress,
  });

  double rotationValue;
  String title;
  double progress;
...
Let's take care of the label first as it's the easiest part.
void _drawTextLabel() {
  TextSpan span = new TextSpan(style: new TextStyle(color: Colors.black), text: title);
  TextPainter textPainter = TextPainter(
    text: span,
    textDirection: TextDirection.ltr,
    textAlign: TextAlign.center
  );

  double labelPadding = size.width * 0.05;

  textPainter.layout(
    minWidth: 0,
    maxWidth: size.width - labelPadding * 2,
  );

  final offset = Offset(
    (size.width - textPainter.width) * 0.5,
    (size.height - textPainter.height) * 0.12
  );

  textPainter.paint(canvas, offset);
}
We are using a TextPainter to achieve what we want. We let the text be drawn across the width of the label with a little padding. The text has a center alignment.
Next, we'll take care of the rotating pins.
void _drawTapePins() {
  paintObject.color = Colors.white;
  final int pinCount = 8;

  for (var i = 0; i < pinCount; i++) {
    _drawTapePin(leftHolePosition, rotationValue + i / pinCount);
    _drawTapePin(rightHolePosition, rotationValue + i / pinCount);
  }
}

void _drawTapePin(Offset center, double angle) {
  _drawRotated(Offset(center.dx, center.dy), -angle, () {
    canvas.drawRect(
      Rect.fromLTWH(
        center.dx - 2,
        center.dy - holeRadius,
        4,
        holeRadius / 4,
      ),
      paintObject
    );
  });
}

void _drawRotated(Offset center, double angle, Function drawFunction) {
  canvas.save();
  canvas.translate(center.dx, center.dy);
  canvas.rotate(angle * pi * 2);
  canvas.translate(-center.dx, -center.dy);
  drawFunction();
  canvas.restore();
}
This one is a little bit trickier so I'm gonna explain everything step by step.
In general, we need the possibility to draw something being rotated by a certain angle. Then we can draw the same pin several times but each time rotated a little bit more around the center which in sum generates the whole. In order to do that, we add a new method called _drawRotated() which rotates the canvas before drawing in order to achieve the effect of something being drawn rotated by a given angle.
_drawTapePin() draws a pin which is nothing more than a rectangle going from the (given) center up. The height is the holeRadius we initialized earlier. We use minus angle because we want it to rotate counter-clockwise.
The _drawTapePin() method is called as often as the pin count (in our case 8). In the loop the rotation value is multiplied with the current loop index divided by the pin count. This way, the pins are evenly spread across the circle.
The last dynamic parts are the moving tape reels.
void _drawTapeReels() {
  Path leftTapeRoll = Path()..addOval(
    Rect.fromCircle(
      center: leftHolePosition,
      radius: holeRadius * (1 - progress) * 5
    )
  );

  Path rightTapeRoll = Path()..addOval(
    Rect.fromCircle(
      center: rightHolePosition,
      radius: holeRadius * progress * 5
    )
  );

  leftTapeRoll = Path.combine(PathOperation.difference, leftTapeRoll, leftHole);
  rightTapeRoll = Path.combine(PathOperation.difference, rightTapeRoll, rightHole);

  paintObject.color = Colors.black;
  canvas.drawPath(leftTapeRoll, paintObject);
  canvas.drawPath(rightTapeRoll, paintObject);
}
It's simple: we just draw two black circles that mimic the tape reels. The radius of the circles directly depend on the progress argument we added earlier. It's supposed to range from 0 to 1. The left one's radius is defined by (1 - progress), which makes it shrink, the right one just uses progress which makes it grow.
Adding the control panel
Now we have a tape that can theoretically animate based on a song that is played. Unfortunately, there is no user interaction possible yet because we have no UI parts that support it. Next step: adding a control panel.
class TapeButton extends StatelessWidget {
  TapeButton({
    @required this.icon,
    @required this.onTap,
    this.isTapped = false
  });

  final IconData icon;
  final Function onTap;
  final bool isTapped;

  @override
  Widget build(BuildContext context) {
    return GestureDetector(
      child: Container(
        width: isTapped ? 53.2 : 56,
        height: isTapped ? 60.8 : 64,
        decoration: BoxDecoration(
          color: Colors.black,
          borderRadius: BorderRadius.all(Radius.circular(8))
        ),
        child: Center(
          child: Icon(icon, color: Colors.white)
        ),
      ),
      onTap: onTap
    );
  }
}
First, we need a tappable button. Whether it's tapped or not will be determined by the parent widget because we want only one button to be tapped at a time. Once another button is tapped, every other button is untapped. Being tapped is visualized by a smaller button.
enum TapeStatus { initial, playing, pausing, stopping, choosing }

class Tape extends StatefulWidget {
  @override
  _TapeState createState() => _TapeState();
}

class _TapeState extends State<Tape> with SingleTickerProviderStateMixin {
  AnimationController _controller;
  TapeStatus _status = TapeStatus.initial;
  ...
  @override
  Widget build(BuildContext context) {
    return Column(
      mainAxisSize: MainAxisSize.min,
      children: [
        SizedBox(
          width: 300,
          height: 200,
          child: AnimatedBuilder(
            builder: (BuildContext context, Widget child) {
              return CustomPaint(
                painter: TapePainter(
                  rotationValue: _controller.value,
                  title: 'Rick Astley - Never Gonna Give You Up',
                  progress: 0
                ),
              );
            },
            animation: _controller,
          ),
        ),
        SizedBox(height: 40),
        Row(
          mainAxisAlignment: MainAxisAlignment.center,
          children: [
            TapeButton(icon: Icons.play_arrow, onTap: play, isTapped: _status == TapeStatus.playing),
            SizedBox(width: 8),
            TapeButton(icon: Icons.pause, onTap: pause, isTapped: _status == TapeStatus.pausing),
            SizedBox(width: 8),
            TapeButton(icon: Icons.stop, onTap: stop, isTapped: _status == TapeStatus.stopping),
            SizedBox(width: 8),
            TapeButton(icon: Icons.eject, onTap: choose, isTapped: _status == TapeStatus.choosing),
          ],
        )
      ],
    );
  }
We create a new enum that holds the different possible states. We use this enum to trigger the isTapped argument of the constructors of the TapeButton widget we have just created.
Awesome, we have a control panel now. What's left is to give the buttons actual functionality.
dependencies:
  flutter:
    sdk: flutter
  file_picker: ^1.13.3
  audioplayers: ^0.15.1
  flutter_ffmpeg: ^0.2.10
For this, we're going to need three new dependencies. file_picker is used to let the user pick an audio file when the eject button is tapped. audioplayers lets us play, pause and stop the audio file. flutter_ffmpeg can extract meta information from a file. This is necessary because we want to display the author and the title of the current song.
import 'package:audioplayers/audioplayers.dart';
import 'package:file_picker/file_picker.dart';
import 'package:flutter/material.dart';
import 'package:flutter_retro_audioplayer/tape_button.dart';
import 'package:flutter_ffmpeg/flutter_ffmpeg.dart';
...
class _TapeState extends State<Tape> with SingleTickerProviderStateMixin {
  AnimationController _controller;
  TapeStatus _status = TapeStatus.initial;
  AudioPlayer _audioPlayer;
  String _url;
  String _title;
  double _currentPosition = 0.0;
...
  void stop() {
    setState(() {
      _status = TapeStatus.stopping;
      _currentPosition = 0.0;
    });
    _controller.stop();
    _audioPlayer.stop();
  }

  void pause() {
    setState(() {
      _status = TapeStatus.pausing;
    });
    _controller.stop();
    _audioPlayer.pause();
  }

  void play() async {
    if (_url == null) {
      return;
    }

    setState(() {
      _status = TapeStatus.playing;
    });
    _controller.repeat();
    _audioPlayer.play(_url);
  }
Stop, Play and Pause are fairly simple compared to the choose() method so we start with them.
By tapping "stop" we want the status to be TapeStatus.stopping. That will make every other button release. We set _currentPosition to 0 which influences our visual audio tape and makes the tape reels reset. We want the _controller to stop. This stops the animation of rotating pins. Lastly, we let the audio playback stop.
Pause behaves accordingly with the difference of not setting everything to 0 so that the playback can be resumed from there.
Play stats the animation and the playback. It has a check for _url which is the file url that is returned when picking a file. If no file is there then no playback should happen. It starts _controller.repeat() because we want the animation of the pins to be ongoing.
choose() async {
  stop();

  setState(() {
    _status = TapeStatus.choosing;
  });
  File file = await FilePicker.getFile(
      type: FileType.audio
  );

  _url = file.path;
  _audioPlayer.setUrl(_url);

  final FlutterFFprobe _flutterFFprobe = new FlutterFFprobe();
  Map<dynamic, dynamic> mediaInfo = await _flutterFFprobe.getMediaInformation(_url);

  String title = mediaInfo['metadata']['title'];
  String artist = mediaInfo['metadata']['artist'];
  int duration = mediaInfo['duration'];

  _audioPlayer.onPlayerCompletion.listen((event) {
    stop();
  });

  _audioPlayer.onAudioPositionChanged.listen((event) {
    _currentPosition = event.inMilliseconds / duration;
  });

  setState(() {
    _title = "$artist - $title";
    _status = TapeStatus.initial;
  });
}
The executing of the choose method starts with executing stop(). That's because we want everything to be reset before we play the new song. We then use FilePicker to let the user pick a file. The resulting url is set as a member variable and then used to gather media information using FlutterFFprobe. We then start listening to two events: when the playback is completed, the tape should rewind. That's done by calling stop(). Whenever the position is changed, the _currentPosition variable should be updated with a relative value from 0 to 1. This is necessary for the painting of our tape. Lastly, the _title string is updated with actual metadata from the audio file.
TapePainter(
  rotationValue: _controller.value,
  title: _title,
  progress: _currentPosition
)
Now that we have any dynamic value available, we replace the static values and call the constructor of our painter with the actual values.
Conclusion
That's it, we're done with the implementation.
With the help of three packages and a CustomPainter, we were able to implement a cross-platform audio player that mimics an audio tape. The audio tape has animating parts that depend on the current position of the song.





Top comments (1)
This is great!