
Creating a Virtual Machine Scale Set (VMSS) in Azure allows you to manage and automatically scale a group of virtual machines.
Here's a step-by-step guide to create a VMSS using the Azure portal:
Step 1: Sign in to Azure Portal
Open your web browser and go to the Azure portal.
Sign in with your Azure account credentials.
Step 2: Navigate to Virtual Machine Scale Sets
In the Azure portal, click the "Create a resource" button (+) in the left-hand menu.
In the "Search the Marketplace" box, type "Virtual Machine Scale Sets" and select it from the list.
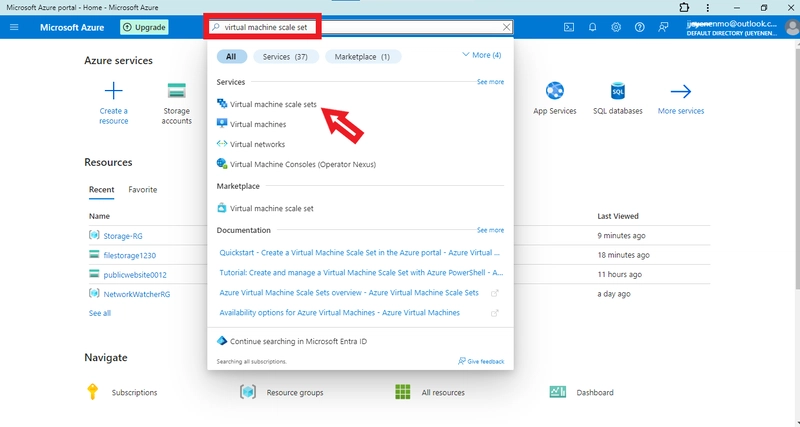
Click "Create" to start the creation process.

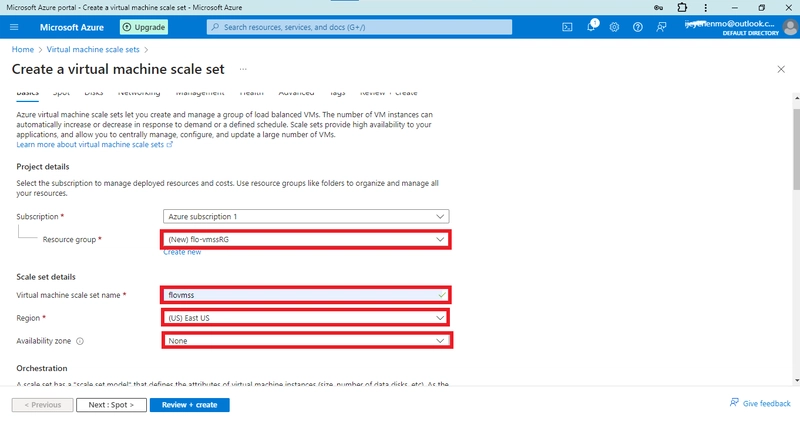
Step 3: Configure Basic Settings
Subscription: Select your Azure subscription.
Resource Group: Select an existing resource group or create a new one.
Name: Enter a name for your scale set.
Region: Choose the region where you want to deploy the VMSS.
Availability Zone: (Optional) Select an availability zone if required.
![select or create resource group, name, region, and availability zone]
Orchestration mode: Choose Uniform (recommended for most scenarios) or Flexible.
Scaling mode: Choose Autoscaling, there are other options.
For Scaling configuration click on Configure
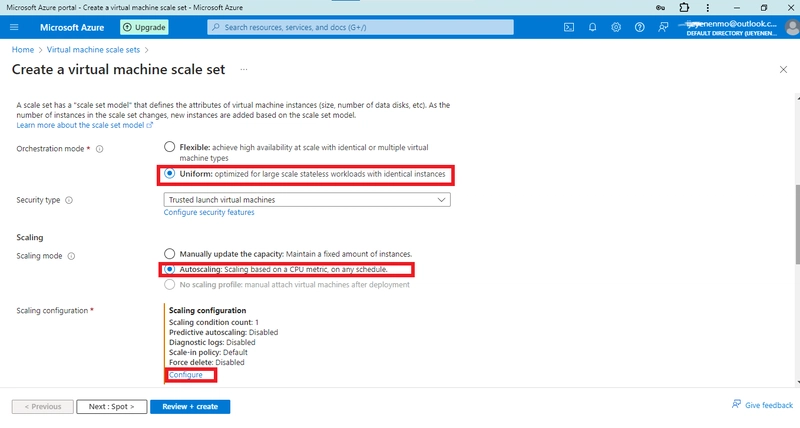
Step 4: Scaling Configuration
Scaling conditions: Click on Add a Scaling Condition

Configure Scaling Settings
Instance Count: Set the initial number of instances (e.g., 2).
Scaling Policy: Configure the scaling policy to automatically increase or decrease the number of instances based on CPU usage, memory, or custom metrics. Select the conditions, then click on Save

This takes us back to Scaling Configuration where the scale condition added appears.

Click on Save, which takes us back to where we started to Create a virtual machine scale set the next step is to configure instance details
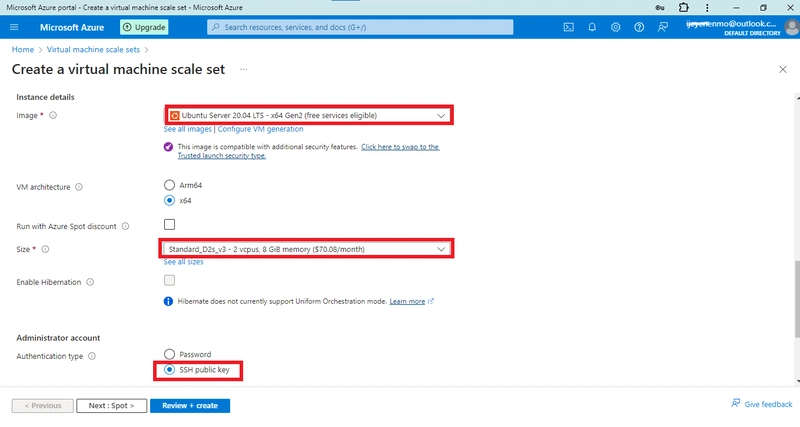
Step 5: Configure Instance Details
Image: Select an operating system image for your VMs (e.g., Ubuntu Server 20.04 LTS).
Size: Choose a VM size (e.g., Standard DS2_v3).
For Authentication type select SSH public key
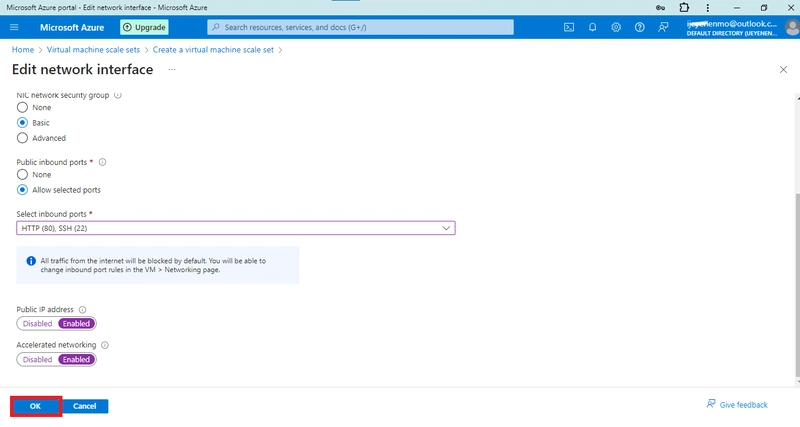
Step 6: Configure Networking
To edit the network interface, click on the icon.


Select inbound ports: Select **HTTP (80), SSH (22)

Also enable Public IP address and Accelerated networking then click on Ok
Select network interface and on the Load balancing options select Azure load balancer

On Select a load balancer, if there is no existing load balancer, click on Create a load balancer. A load balancer helps to distribute traffic across the VMs.
After creating a load balancer, click on Review and create


Step 7: Download Private Key

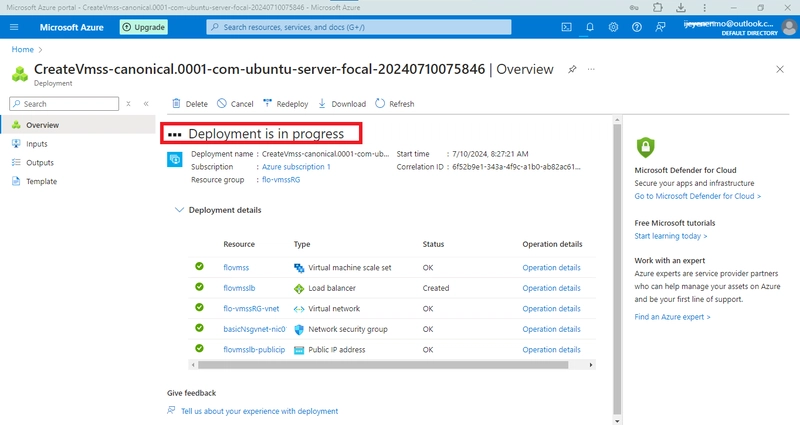
Deployment in progress
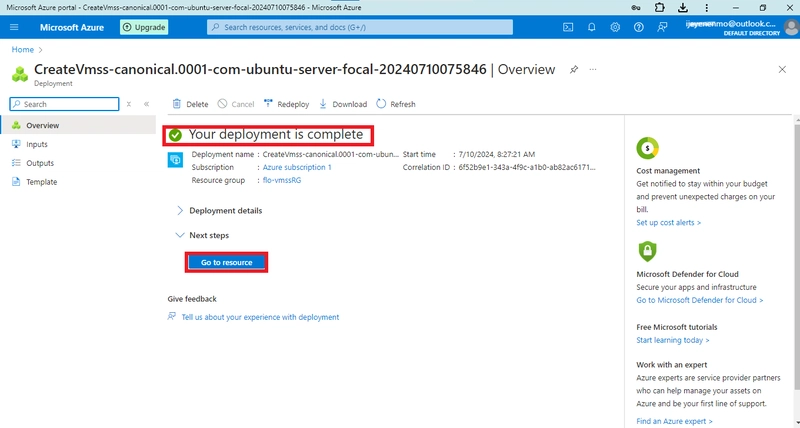
When deployment is complete, click on Go to resource
Click on Networking then Load balancing

Copy IP address

Go to Command prompt and Run as administrator

In the Command prompt type in "ssh -i", the file path of the Download private key in your file manager, username, and IP address

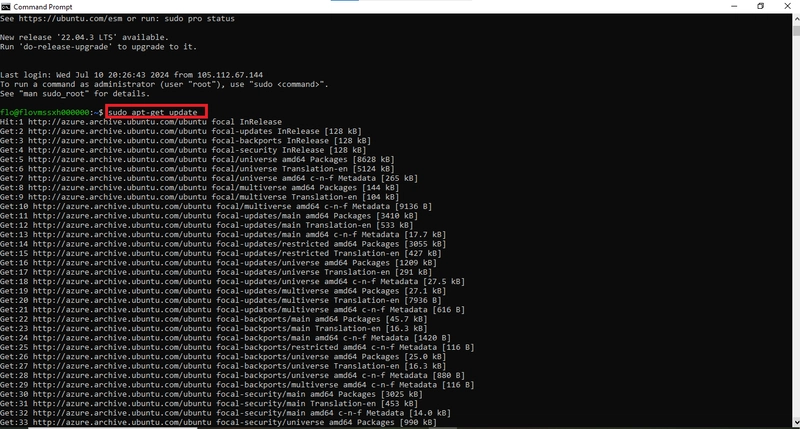
Step 8: Install Web Server
To install web server, type in sudo apt-get update
Type sudo apt-get install nginx -y in the next prompt

View of the Web Server

Step 9: Monitor
Use the "Instances" tab to monitor the status of individual VM instances.
Click on Monitoring, and then Metrics to monitor the workload

Use the "Scaling" tab to adjust scaling policies and settings.
Conclusion
By following these steps, you can create a Virtual Machine Scale Set in Azure, which allows you to automatically scale your application based on demand, ensuring high availability and performance.

Top comments (0)