Introduction
Github helps us to share and store our code easily. Today we will learn how we can push a project which is stored locally to a remote server or github. Before we push the project to Github, we need to configure and install git on our computer and you also need a GitHub account.
If you don’t know how to configure and install git read this Introduction to git and github. If you have already set it up. Let’s continue.
Below are few steps to take to push our project to github
Create a github repo
Initialize Git in the project folder on your local machine
Add the files to the git staging area
Commit the staged files.
Add the remote origin
Push to GitHub
Create a github repo
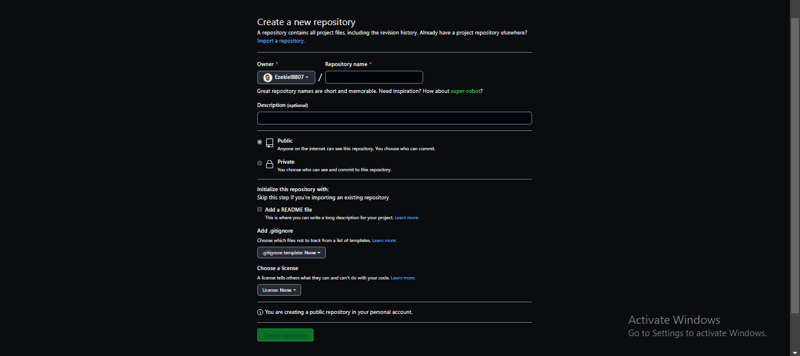
The first step in pushing your project to github is creating a
github repo. you can do that by following this link . fill information such as project name, description if you want to, and click on create the repository.

Initialize Git in the project folder on your local machine
To initialize git in your project, open command line in the root directory of your project and type the command below
git init

if you see this, it means you have now initialize git in your project.
Add the files to the git staging area
Add the files to the git staging area, where all the untracked files will be part of the staging area and will be ready to get tracked.
touch readme.md
git status
The touch is a command in git command line follow by the file name with his extension to create a file.
This command git status is used by git to track files.

Now the file created is colored red meaning its untrack, so let add the file to the staging area so it could be track by git.
git add 'file name'
git add .
The git add 'file name' is used to add a single file by its name.extension while git add . is used to add all file at once to the staging area.

Commit the staged files
Commit in git-speak, is the term used for saving changes. Git doesn’t add changes automatically. You need to specify which file and changes, you need to save by adding the files. The commit command saves changes in the local repository of Git.
git commit -m “Initial Commit”

In this command “-m” is used to tell the git, that we are adding a message.
Add the remote origin
Now to go to github to copy the link to our repo or click here

After copying the address, you have to add the origin of the remote repo to the local repo by using the following command.
git remote add origin https://github.com/Ezekiel8807/web.git
this address should be the address of the repo you created on your github account.

Push to GitHub
This is the last phase, now type the following command to push your code to the online repo. Before we push we need to check whether our branch is main or master to check that type the following command.
git branch
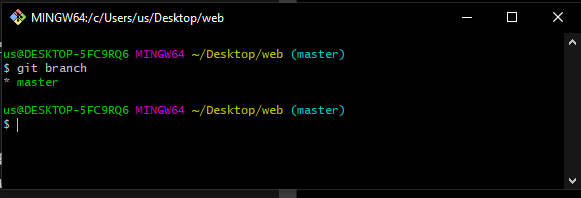
In these case my branch is "master" yours might be "main". To push your project use either of the two command below base on your branch name.
git push origin main
git push origin master
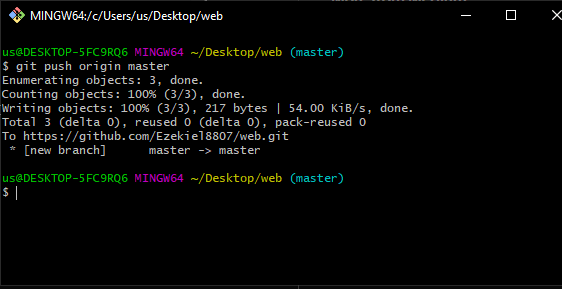
if you see this, congratulaton your project is now life. you can now share with friends or other developer.
finally let check the project we push to github by clicking here

So far, we have been able to cover how to push our project to github in continuation of the last article INTRODUCTION TO GIT AND GITHUB. Please do comment, like and share.


Top comments (0)