Note: This article was originally written in French by our guest blogger, Mohamed aly sidibe, who translated it to cross-post here. Thanks, Mohamed!

Expo is an amazing tool which lets you create not only Android and iOS mobile applications but also web apps and progressive web applications (PWA) very easily from one single Javascript and React codebase 😍.

In this article, we will explore all the steps from the creation of an Expo web project to its deployment on Netlify.

If you’re new to Expo, I’ve made a series of videos about Expo available on Youtube.
How it works 🛠
Developing for the web is just like you‘re developing your Expo mobile app. You’ll use the same components (View, Text, etc.) that will be executed on the web. In addition, you have access to almost all the Expo SDK Features.
Our web app
In this guide, we’ll create a simple web app that lets users to upload a picture from their computer, and (if they choose) rotate the image.

Creating the project 💡
We need to install expo-cli to create a Expo project:
npm install -g expo-cli
This lets us use expo-cli to create a fresh Expo project by running:
expo init

Done ✅
If you look in the app.json file under platforms, you can see that our app is executable on the web. That’s pretty cool.

Run the project 🚗
Now let’s run our Expo project on the web:
expo start -w
When you run this command, your app will automatically launch in your browser:

That’s cool: we just created our first web app with Expo! 🎉🎉🎉🎊
Develop the app 💻
We’ll need to install two of the Expo SDK modules for the app we have mind:
- expo-image-picker, to pick an image from the user’s gallery or camera
expo install **expo-image-picker**
- expo-image-manipulator, to manipulate images (flipping, rotating, etc.)
expo install **expo-image-manipulator**
After that, we can import them into our app.js file:
import \* as ImagePicker _from_ 'expo-image-picker';

import \* as ImageManipulator _from_ 'expo-image-manipulator';
Let’s declare our state, which will contain the uri of the selected image.
const [selectedImage, setSelectedImage] = React.useState(“”);
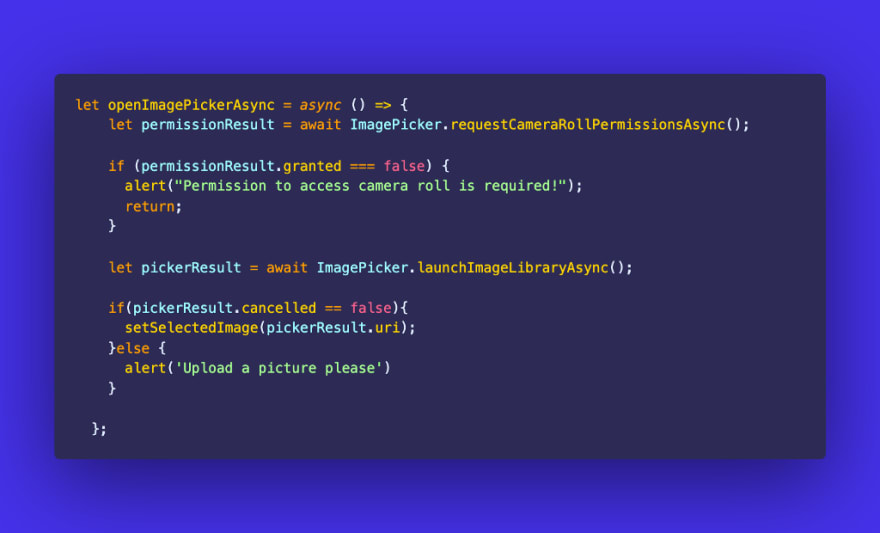
Our upload function will look like this:
And our rotate function:

A simple view containing our upload button, our rotate button and the selected image:

DEMO: write once, run everywhere!
The same code is runs here on the web and also on an iOS phone — Expo is multi-platform!
Deploying the app 🚀
Now, we’re going to deploy our app so others can use it.
BUILD
Building with Expo is so easy: you can build your app in just one command:
expo build:web
This command builds our app and savse the final product inside the build folder: web-build

If you want to test your app locally, just run
npx serve web-build
and open : http://localhost:5000
DEPLOYMENT
We can easily deploy our app with Netlify.
- Install the netlify-cli globally:
npm install netlify-cli -g
- Deploy:
netlify deploy


*Our app is now live * 🎉🎉🎉🎉

Continuous delivery
Netlify enables continuous delivery: with this setup, every time you push your code to git, Netlify will automatically deploy your site with the newest code. Here’s how it works:
- Start a new Netlify project
- Pick your Git hosting service and select your repository
- Click Build your site
You can test our final app here.
Progressive Web Apps (PWA) 🎁
Something really cool with building web apps with Expo is that by default your web app is a progressive web app — you don’t need to do anything special to enable PWAs. That’s awesome 🎊
PWAs are installable:


It’s now essentially a desktop app:

When you access the site via a smartphone, you can also install it so that the app is accessible from the home screen of your phone like a Native app.
This is just a default PWA with basics configurations; there’s a guide if you want to customize your PWA.
And that’s all you need to do to create and deploy a mobile app, web app and a PWA with Expo.
The code is available on GitHub. Thanks Evan Bacon for this amazing work. Thanks for reading and share if you found this article helpful. 😀🚀
This article was written by our awesome guest-blogger, Mohamed aly sidibe. You can follow him here on Medium or on Twitter to keep in touch.

Top comments (0)