
Ubuntu is a popular Linux distribution that offers users a wide range of features and applications. Ubuntu is a great choice for those new to Linux who want to explore its capabilities. However, it can be difficult to set up and configure on a Windows desktop.
Fortunately, there is a way to get Ubuntu up and running quickly and easily with VirtualBox and Vagrant. This tutorial will guide you through setting up Ubuntu with VirtualBox and Vagrant on a Windows desktop, creating a secure and isolated virtual environment for testing and experimenting.
What is Vagrant?
Vagrant is an open-source software for building and managing virtual machine environments in a single workflow. With Vagrant, you can define a configuration file that specifies the details of the virtual machine you want to create and then use a single command to create and configure the virtual machine. This makes it easy to set up and maintain a consistent development environment across multiple machines and to share that environment with others.
Vagrant works with various virtualization software, including VirtualBox, VMware, and Hyper-V, and can manage both Linux and Windows virtual machines.
What is VirtualBox?
VirtualBox is a free, open-source virtualization software platform developed by Oracle that allows you to run multiple operating systems on a single physical machine. With VirtualBox, you can create and run virtual machines (VMs) on your computer, each of which runs a separate operating system and can be configured with its virtual hardware.
VirtualBox is designed to be easy to use, with a simple graphical user interface (GUI) that allows you to create and manage virtual machines. It supports a wide range of operating systems, including Windows, Linux, macOS, and many others, and can be used for various purposes, such as testing software, running legacy applications, and more.
How would Vagrant and VirtualBox work?
When you use Vagrant with VirtualBox, Vagrant creates and manages virtual machines in the VirtualBox environment. You define the operating system type, the amount of memory, and other resources the virtual machine should have in the Vagrant configuration file. Vagrant then uses this configuration to create and configure the virtual machine in VirtualBox.
Once the virtual machine is up and running, you can use Vagrant to manage it by SSHing into it or running provisioning scripts to set up the environment.
Prerequisite
To follow along with this article, you need to have the following:
- A computer with
- at least 8 GB RAM
- Windows 10 x64-bit operating system (OS)
- A modern multi-core Intel/AMD CPU
- Virtualization is enabled in its BIOS settings. Find out how to here.
- Have a basic knowledge of Powershell or Gitbash.
Installing VirtualBox
To install VirtualBox, you will need to follow these steps:
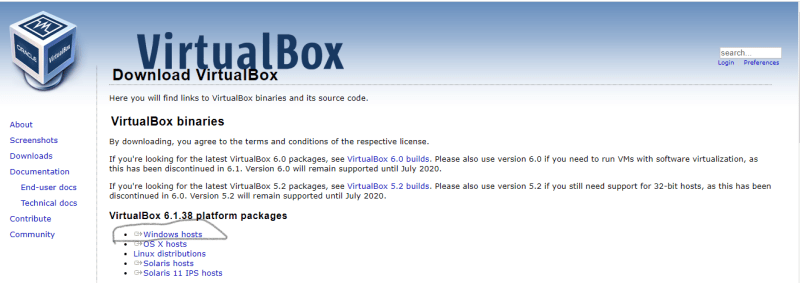
Step 1: Visit the VirtualBox website using this link, and you will see a page similar to the one below.

Step 2: Click on “Download VirtualBox” and then on Windows hosts to download VirtualBox and its extension pack.
Step 3: After downloading it, click on the “New” icon in the top right-hand corner to create a new virtual machine.
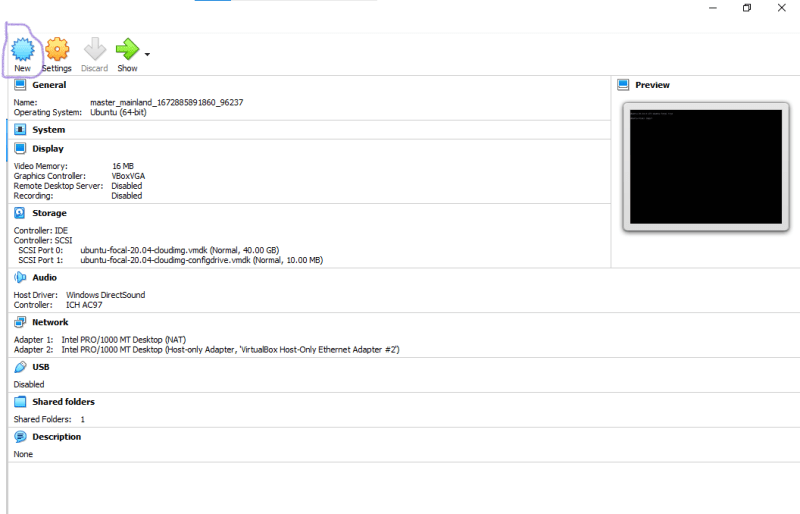
You would see a prompt like this.

Step 4: Name the new machine you want to create and choose the type and version that suits your taste.

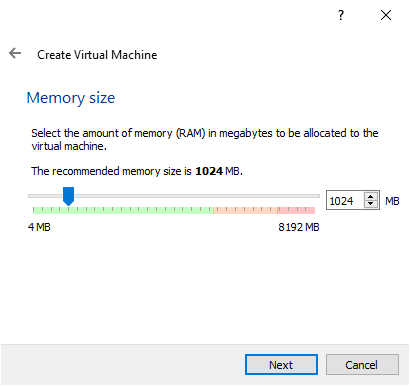
Step 5: Click next and assign the memory size you want to allocate to the virtual machine using the up and down arrow keys.
Step 6: Click Next, select “Create a virtual hard disk now”, and create.

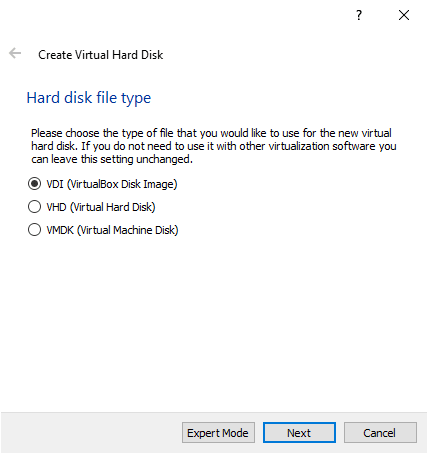
Step 7: Choose the hard disk file type (using the default setting is recommended except there are other preferences).
Step 8: Next is to allocate storage space for your hard disk. Choose if you want a flexible or fixed space.

Step 9: Choose the file location and size and create.

Step 10: Click Create, and you’ve successfully set up your virtual machine…
Installing Vagrant
To install Vagrant using a graphical user interface (GUI), you will need to download the Vagrant installer from the Vagrant website and then run it. Here are the steps:
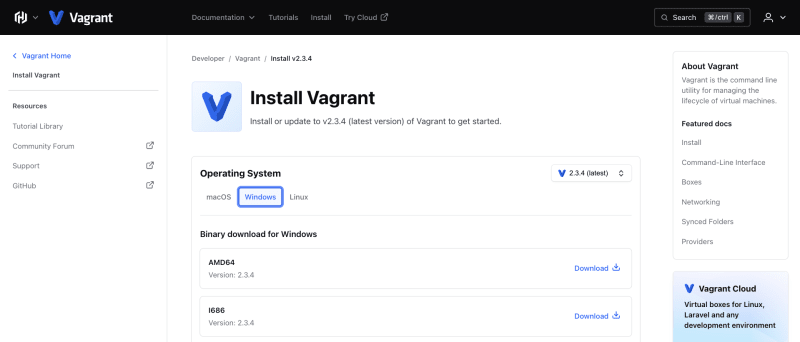
Step 1: Go to the Vagrant download page at https://www.vagrantup.com/downloads.html, and under the "Operating System" heading, click on the appropriate “Binary” for your computer. The installer will be downloaded to your computer.
Step 2: Locate the installer file on your computer and double-click it to start the installation process.

Step 3: Follow the prompts in the installer to complete the installation.
Step 2: Once the installation is complete, you can start using Vagrant by opening a terminal or command prompt and typing vagrant.
Setting up the machine
After downloading Vagrant, to confirm that it was successfully installed, open the terminal/cmd of your choice and head to the home directory using the $ cd ~ as in the image below.

Note: ~ is used to move into the home directory in the command line.
List out the files in that directory using the ls command to check if Vagrant was successfully installed.
$ ls

After confirming the installation, create a directory for the Ubuntu setup using the mkdir command below.
$ mkdir Ubuntu_20.04

Change into the directory that you created using the following command:
$ cd Ubuntu_20.04

Run vagrant init ubuntu/focal64 command. Running this command automatically places a Vagrantfile in the directory created above. A Vagrantfile is a file that instructs Vagrant to create new Vagrant machines or boxes. ubuntu/focal64 is an existing Vagrant box for the Linux Ubuntu distribution.
$ vagrant init ubuntu/focal64

Start the Virtual Machine using vagrant up and watch it spin up the Virtual machine.
$ vagrant up
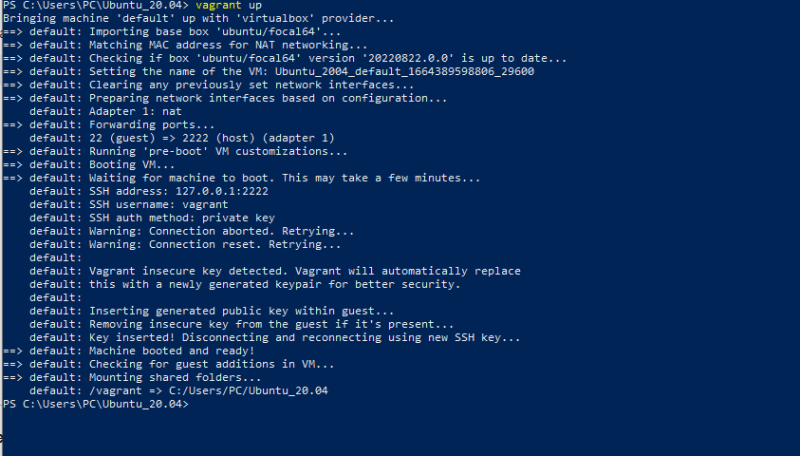
Ensure your VirtualBox looks like this:

Connect to the VM using vagrant ssh
$ vagrant ssh

Conclusion
This tutorial has shown you how to set up your Linux OS (Ubuntu) on Windows using Vagrant and VirtualBox. Vagrant is a great tool and a very easy way of using Ubuntu on Windows rather than having to dual boot. To learn more about Vagrant and VirtualBox, Check out these resources :

Top comments (0)