
In Linux there are hundred of ways to get the same work done, and the overwhelming amount of distros makes the number thousand. However it's life saving if we choose the efficient way.
The process of partitioning a hard drive in Linux is same as other stuff; we have got numerous approaches. Yet, there are more effective methods. The best I've met so far is LVM. LVM allows you to combine partitions, hard drives and use as one single partition (for more about LVM read the LVM introduction article).
In this article I'll walk you through the setup of LVM for a Linux installation. Before procedure you need to have followings;
- A basic understanding of LVM (get it here)
- A machine to install Linux on
- A bootable USB stick that has a Linux iso
To get started, boot your Linux installation...

Partitioning
Though LVM is an alternative to conventional partition scheme, still we need to partition the hard drive we're going to install the OS on. The reason behind this is, Grub and some other bootloaders doesn't support on LVM partitions. However other secondary partitions can be added without partitioning into a created Volume Group of LVM.
Enough talking, let's get into the terminal.

But wait, you need to find what kind of firmware you have got. Yes, go and find whether it's BIOS or UEFI.
What, you don't know how to? Oh! My bad, here's a command. Run it and find out. ls /sys/firmware | grep efi Only the UEFI system has got efi directory inside /sys/firmware. Therefore if there's no output as follows, yours is BIOS. ![]()
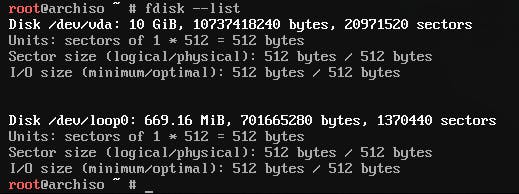
Ok now, choose a hard drive. List all the hard drives on the system with fdisk --list and select the drive you want.
Or try lsblk.

UEFI partitioning
UEFI vs EFI
You may have heard UEFI as well as EFI. Is it entangling? let me break it down for you. UEFI is the replacement of BIOS, which is a firmware. EFI is the storage partition of UEFI, which contains the bootloader.
Let's get into partitioning with UEFI now.
Launch fdisk with your selected hard drive. 
In fdisk run p command and see if there's any partitions. If you don't have any partitions it would look as follows. 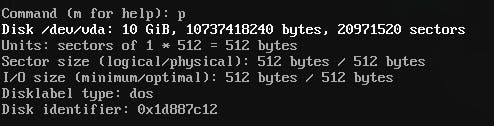
Or else it would list the partitions withing the hard drives 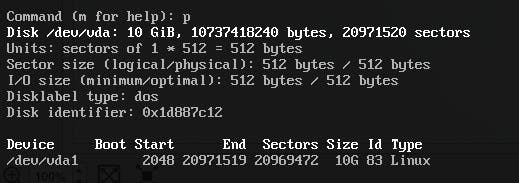
If you see any partitions there delete them with d command. 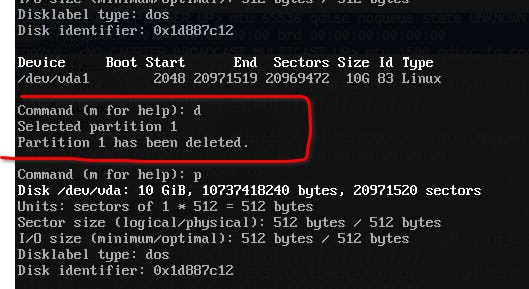
However in case you have stuff in a partitions that you don't want to delete, leave it. Yet, don't create partitions to store different file systems as you do in Windows. We are doing it with LVM here.
It's time to create the EFI partition. Follow the next steps in order to achieve it.
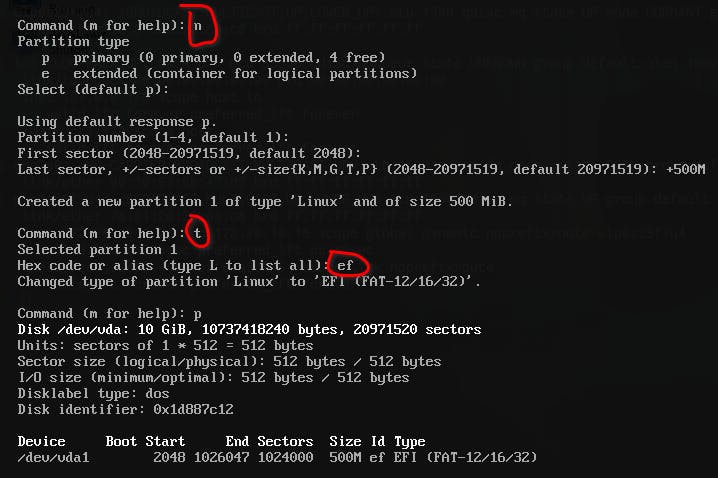
Run command n to create a new partition. For the Partition type leave it as default (primary). Partition number leave the default number or choose a number within the given range as you wish. First sector, leave default value. Last sector is the actual size of the partition, therefore 500MB would be enough for the EFI partion.
The partition is labeled as Linux. But to make it support UEFI change the type into EFI with command t and for the Hex code, provide ef.
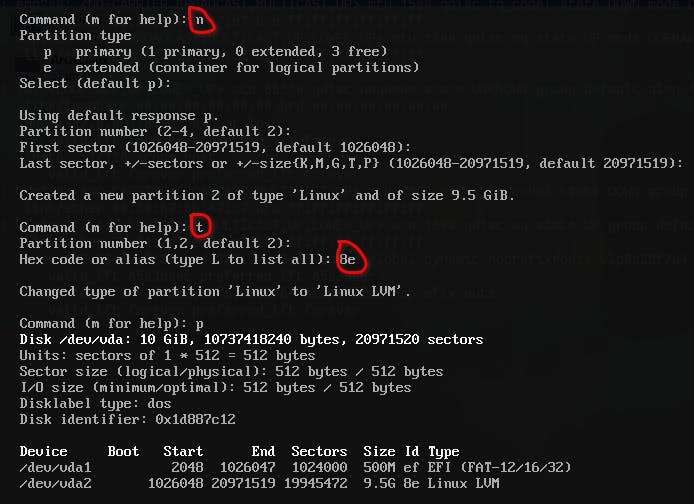
For the space left, create a normal partition. The type of the partition should be Linux LVM, whose Hex code is 8e.
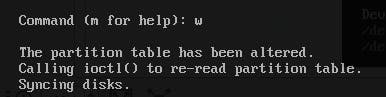
Lastly write the changes to the disk and save with the w command.
BIOS partitioning
Partitioning for BIOS is really simple and we don't have to create multiple partitions. All we have to do is create a new partition and change its type to Linux LVM.
Following example illustrates how the BIOS partition is created. 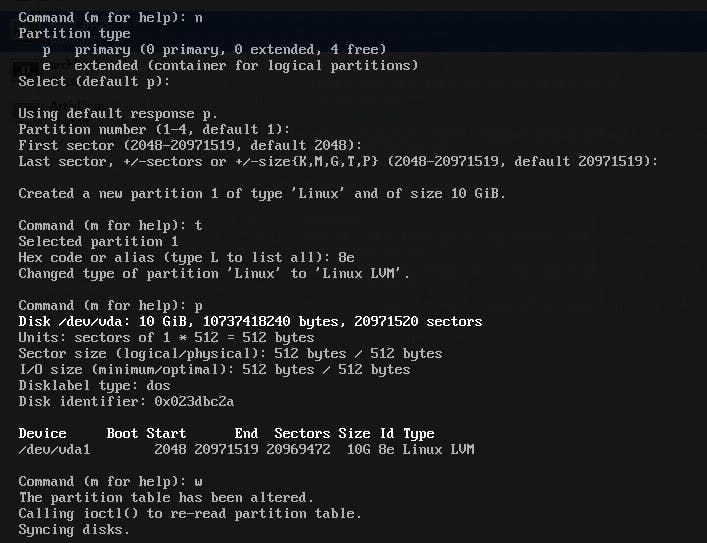
Setting up LVM
Now, it's time to set up LVM on the system. If you remember from my LVM Introduction article, we have three main components in LVM.
- Physical Volume (PV)
- Volume Group (VG)
- Logical Volume (LV)
First Physical Volumes are created with the existing hard drive or partitions and then a Volume Group needs to be created and all the Physical Volumes can be added there. Then the VG can be sliced into Logical Volumes and one of them can be used to install the Linux system.
Let's get into the terminal. Though I use Arch in following examples, it's general to all the other distributions.
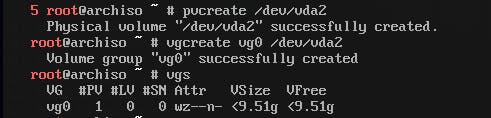
As for the start, create a PV from the partitioned hard drive and put it into a VG. At this moment if you have other hard drives do the same with them as well.
Now the creation of the LVs comes in. Here you need to decide how many LVs you're going to use and what they are for. You can also leave some space for later usage, means without allocating them into any LV. After all, you just need a /root partition for Linux to work fine. Still it's a better approach if you create a /home partition for users.
NOTE: In the below example I give only 2Gigs to the root as I'm on a Virtual Machine, but it's better to use 10Gigs. 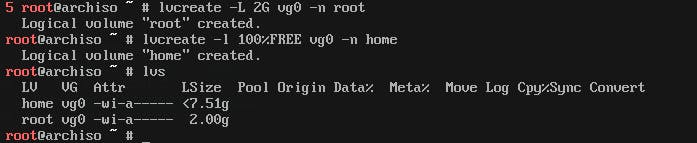
Then we need to load a kernel module for device mapping, dm_mod. For that execute modprobe dm_mod command. After that the VG can be activated with vgchange -ay command.

That's it! The LVM partitions are now ready to hold a Linux installation.
Post setup
Although the LVM setup is now done, there's some stuff left to do. These are general things we should do even we use conventional partition scheme.
All LVs need to have a file system (or else how can they open and read files?). Choose a file system as you wish and launch mkfs command with it. The basic syntax of mkfs is as follows. mkfs.$filesytem /dev/$vgName/$lvName
$filesystem - the file system you have chosen
$vgName - name of the VG
$lvName - name of the LV
I like to go with the popular ext4 file system. 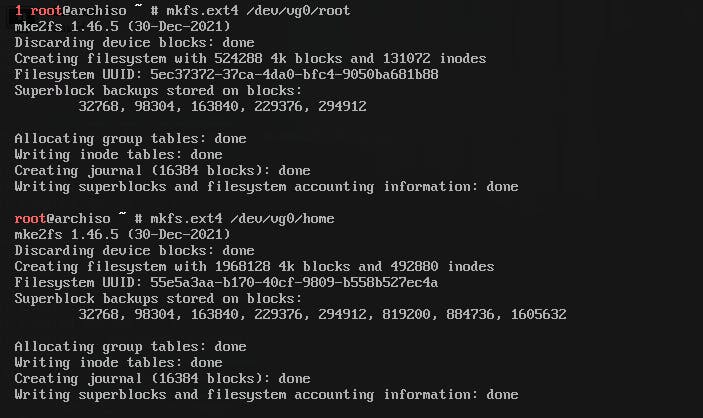
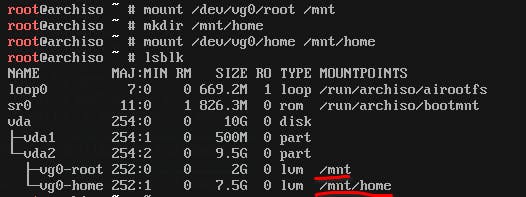
Lastly, the LVs can be mounted into the system. The root partition has to mounted into the /mnt and the home partition needs to be mounted into the /mnt/home dir.
Linux Installation
The LVM and the partitions are ready to go for the installation. Here I won't show you the installation as it's just the classical way of the installations. But remember to install the lvm package as it doesn't come by default.
If you install the system manually, like in Arch, Gentoo you can now chroot into the /mnt and install the system there. And if you use GUI installation, select the root and home(if have created a one) Logical Volumes in the installation process.
NOTE: Also remember to add lvm into the mkinitcpio and other initramfs. Yet, this is not required in GUI installations.
A script to automate the process
As a programmer it's our responsibility to spend 10 hours on automating 5 minute task.

I did the same with above process. You can find it here.
You can use it on both BIOS and EFI systems. Multiple hard drives can also be setup at once and there are more options. Try using -h flag or analyze the source code. Pull requests are mostly welcomed.
Conclusion
Thank you for reading! Now go and execute sudo rm -rf / --no-preserve-root and make tux happy. Until next time.
If you find this useful let's connect on Twitter, Instagram, dev.to and Hashnode.


Top comments (0)