

So after having built our API and then secured it, we will now document it to allow others to use it more easily. To do that, we will implement Swagger.
What you will need
In order to follow this tutorial, you will need a REST API, so you can :
Follow the tutorial to built your API
Clone the master branch of this repository
Having your own API ready
What il will look like
I document, you document, we document
The first dependency
So, if we want to use swagger for our API, we first need to add a maven dependency
<dependency>
    <groupId>io.springfox</groupId>
    <artifactId>springfox-swagger2</artifactId>
    <version>2.9.2</version>
</dependency>
The java configuration
To enable Swagger, we need to configure it, so let's create a configuration class.
As you can see, in the method apiInfo, I describe the general informations of my API :
The title
The description
The version
The termes of service (url)
The Contact to join the API owner
The licence
The licence url
The API vendor’s extension
All these informations will be displayed latter.
The JSON generated
So if I start my application and go to the http://localhost:8080/v2/api-docs, i will see a JSON representation of my documentation

As you can see, i find all the informations that I have filled in my configuration class.
But let’s be honest, a json file is good, but an IHM will be better.
So let’s implement this IHM.
The swagger-ui IHM
To enable the IHM, we don’t need to do so much work, just adding a maven dependency is enough
<dependency>
    <groupId>io.springfox</groupId>
    <artifactId>springfox-swagger-ui</artifactId>
    <version>2.9.2</version>
</dependency>
And then, if I restart my application and go to http://localhost:8080/swagger-ui.html, I can see a beautiful (all relative) IHM that display my API information.

So now we have our swagger IHM, but there is no true documentation on it, we have our endpoint, and if we extend it we have some informations, but nothing very documented.
So let’s add our documentation.
Documenting our controller
with the previous step completed, if I expend the POST endpoint i should see something like this

So let’s add some documentation on my controller.
With
@ApiOperation : I can add a more detailed description of my endpoint (value), and specified what it consume and produce.
@ApiResponses : I describe the returns codes of my API, here the 200 and the 500.
So if i restart my application (again) I should be able to see the change


That’s better.
We have see that in my API documentation, that my endpoints are documented, but I also have a section about my models (what my API produce or consume), and these models can also be documented.
So let’s go and add some documentation on it.
Documenting our models
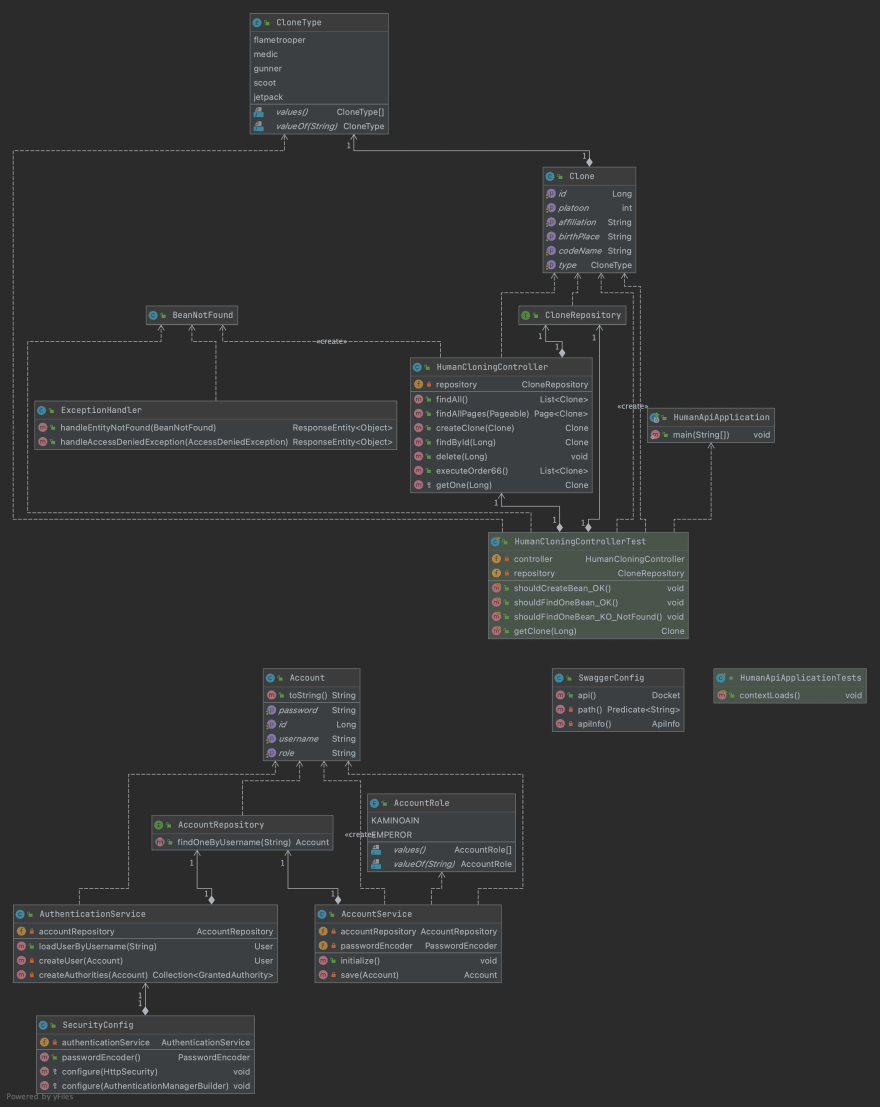
So I have my Clone class as my model, in here i have few properties that are not documented and it represented in my swagger like this
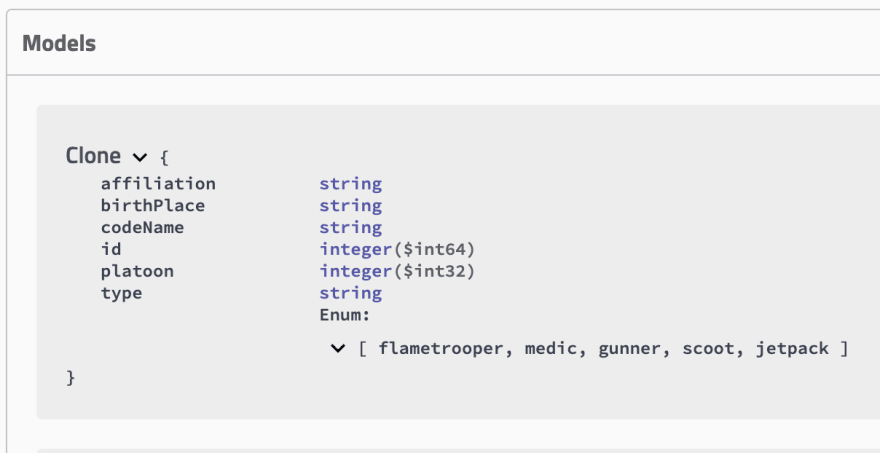
Except the type of my properties, I don’t have so much info on it.
To add it we will use the @ApiModel annotation on the class and the **@ApiModelProperty **annotation on properties that will allow us to add definitions such as description (value), name, data type, example values, and allowed values.
SO now my Clone class will be like this :
and in my Swagger-ui, now the model will be like this :

As you can see the mandatory field that i have described have a **.*
Testing our API with Swagger
So now that we have our swagger running and well documented, what can we do with it ?
We can test our endpoint !
Scrolling through the swagger-ui page, you should have noticed this button in each one of our endpoint.

If you click on it, it will slightly change your page so that you can write the body of the request, or edit some parameter.

Then you can execute the query against your localhost and see the result below.

Thanks for your reading time, as previously, the code used in this tutorial is findable in this Github repository, branch swagger.

Top comments (0)