This post was originally posted on JonCloudGeek.
Table of Contents
- Scenario
- Get started
- Create a compute instance running a Postgres container
- Add a Firewall rule to connect to this instance
- Migrate data to new DB
- Summary
- Disclaimer
In this blog post, I will explore running a Postgres instance in a container within Compute Engine for a fraction of what it costs to run in Cloud SQL.
Scenario
Cloud SQL is kind of expensive:
-
f1-microgives you a weak instance with only 0.25 vCPU burstable to 1 vCPU, from $9.37. -
g1-smallis still 0.5 vCPU burstable to 1 vCPU, but the price jumps to from $27.25. - Let's not even talk about the non-shared vCPU standard instances.
For toy project or production projects that just don't need that power, Cloud SQL is overkill, at least the price is overkill.
This blog post is for smaller projects that need Postgres but without Cloud SQL, and without the maintenance hassle of running commands to manually install Postgres.
Get started
- Sign up for Google Cloud. Free trial gives you $300 credits lasting one year.
- Create a project to house your related resources.
- Navigate to Compute Engine.
Create a compute instance running a Postgres container
-
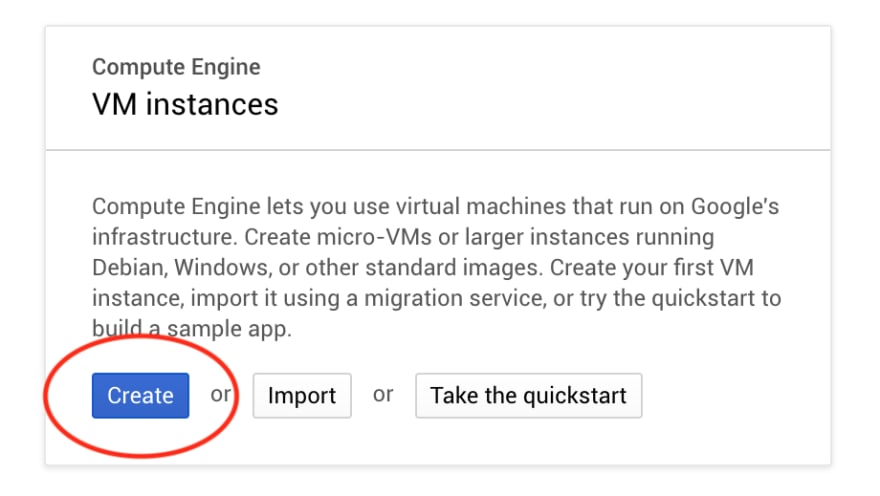
In the Compute Engine instances page in the Cloud Console, click on Create.
-
Select the E2 series and the
e2-micromachine type. E2 series is a cost-optimized series of compute engine instances. Read more about it in the launch blog post.e2-microis likef1-micro, but with 2 shared vCPU, which is good enough for almost any small project, but not compromising like the weakf1-micro(which hangs / throttles when you try to do too much CPU work).The
e2-microstarts from $6.11/month. -
Check Deploy a container image to this VM instance. This will cause Compute Engine to only run the given image (next step) in the compute instance. Each compute instance can only run a single container using this method, and since we have sized our instance to only have just enough resources, this is totally fine.

Check this to deploy a container image to our Compute Engine instance -
Choose a Postgres image from the Marketplace.
-
Search for Postgres in Marketplace:
-
Select a Postgres version:
-
Click on Show Pull Command to retrieve the image URL:
If you click on Get Started with Postgresql 11 it will bring you to a Github page with more (important) information.
Notably you want to take note of the list of Environment Variables understood by the container image.
-
Copy the image URL:
-
-
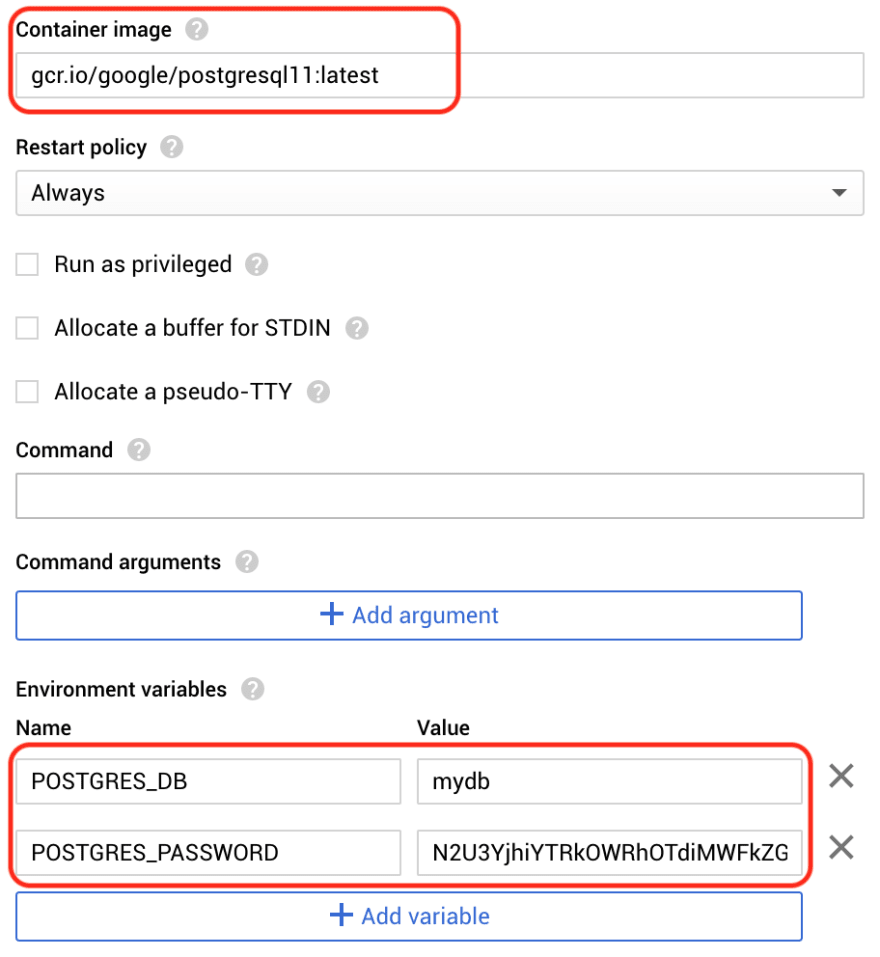
Paste the image URL into previous Compute Engine step. Set the minimum necessary environment variables. The default user is postgres. POSTGRES_DB is arguably unnecessary, you can already create it manually after instance creation.
-
[VERY IMPORTANT] Mount a directory and point it at where the container stores data. IF YOU DO NOT DO THIS, WHEN YOUR INSTANCE REBOOTS OR STOPS FOR WHATEVER REASON, ALL DATA DISAPPEARS.

Mount a volume at the Postgres data directory It is somewhat container intuitive, usually in the command line we state the host path first, and then the mount path. Here Mount path (the container directory) comes first, and Host path (the OS directory) comes second.
Click Done.
-
Some optional settings to configure:
Click Create.
Add a Firewall rule to connect to this instance
By default, post 5432 is blocked in a Google Cloud project. To allow connections from your local machine, do the following:
-
Go to Firewall rules.

Search for firewall and click on Firewall rules (VPC network) Select Create Firewall Rule.
Name, allow-postgres (or anything you like)
In Target tags, add
allow-postgres.In Source IP ranges, add
0.0.0.0/0. Or Google "my ip" and paste in the result (safer but cumbersome, IP changes frequently).In Specific protocols and ports, add
5432in tcp.Click Create.
Go back to the DB instance, click Edit.
-
Add the
allow-postgresnetwork tag: Click Save. Your instance is now accessible from your local machine.
Migrate data to new DB
-
Dump your current DB data:
pg_dump -d mydb -h db.example.com -U myuser --format=plain --no-owner --no-acl \ | sed -E 's/(DROP|CREATE|COMMENT ON) EXTENSION/-- \1 EXTENSION/g' > mydb-dump.sql -
Get the external IP of our new DB:
-
Use the external IP to
psqlto the instance. When prompted, paste the DB password fromPOSTGRES_PASSWORDearlier. The following command restores the dump back into the new DB instance:
psql -h [EXTERNAL_IP] -U postgres mydb < mydb-dump.sql -
Your DB is now ready. When creating the DB, note the internal hostname for this instance:

Note the instance internal hostname You can use this internal hostname to talk to this DB from within your VPC (another Compute Engine instance, Cloud Run, GKE, etc.). If that fails, then you can fallback to the Internal IP (see screenshot in Step 2).
[HIGHLY RECOMMENDED] Stop (shut down) your DB instance and start it again. Connect to your instance via
psql(note that the External IP will likely change). Check that all your data is intact.Remove
allow-postgresfrom your instance Network tags (Edit, remove, Save). Your instance is no longer publicly accessible. By default, all internal network ports are open in Firewall rules so your DB instance remains accessible from within your VPC.
Summary
In this blog post, we have successfully created a Postgres instance from a container image in Compute Engine. We configured a firewall rule to connect to that instance from our local machine using a network tag, and we removed that network tag to lock up access to that instance. We also used the instance External IP to connect to it and restore dumped SQL data from our old instance (with the firewall rule in place).
If you are confident about the needs and performance of your application, you can choose to downgrade the instance to f1-micro to save another $2/month. Eventually GCP will come along and tell you that your instance is over-utilized (you can ignore or reject the warning). Note that all the risk is yours if your DB instance hangs because it is CPU-starved. There is an increased risk to cheap in the cloud.
Alternatively, there is a Postgres Google Click to Deploy option in the Marketplace. This will run Postgres in Debian OS, not a container. And you also cannot run it in an E2 instance (only N1 is supported). But it is probably more production ready, I presume.
Also highly recommended is that you take scheduled snapshots of the boot disk of the DB instance. This is important for data recovery and backups. Usually Cloud SQL takes care of this for you, but we need to handle it ourselves since we are DIY-ing here.
Disclaimer
The information provided in this blog post is provided as is, without warranty of any kind, express or implied. By following the steps outlined in this blog post I do not guarantee that your database will be free from any sort of failures or data losses.
My GCP Books
If you found this blog post helpful, kindly check out my books on GCP topics!


Top comments (1)
Should i have a separate instance for my db or can i just use one instance with my app and db?