
In this blog, we learn to link an OpenShift K8S Context to a local ENT CLI profile.
Sometimes we need to work with different environments for a given project or to switch between a few ones. It could also help a team to separate the responsibilities on different steps of a process such as integration, QE testing, and pre-production. It can also be a game-changer to be able to switch between different versions of a given application. As in such scenarios, separate environments become a requirement. Later, we can link those environments to several ENT profiles and use them accordingly.
To link an OpenShift K8S Context to a local ENT CLI profile, you’ll need the following installed on your computer:
OpenShift CLI (OC) is easy to install as it’s available over Github. For Mac M1 users, in case there’s an issue installing through the zip file. Please install it using homebrew.
(If we have the x86 version of brew installed then we just need to type the command: brew install openshift-clielse, we would need to prefix it with arch -x86_64. To know more, check this Github gist.)
arch -x86_64 brew install openshift-cli
The ENT CLI is an easy installation too. For starters, please navigate to our docs page and install it with the mentioned steps.
To check, if OC was installed correctly, on our terminal, we can type:
oc version

And to check, if ENT CLI is installed, we can type:
ent help

Once we’re set up, we navigate to the OpenShift Web Console for our cluster. It’ll be something like this: \
https://<base_url>:<port>/console/project/<project_name>/overview
We log in here, with our username and password. Once it’s done, we’ll be navigated to the dashboard. On the top right corner, we click on our username, and click on “Copy Login Command”.

Next, we open our terminal and paste the command that we just copied. At this point, we have configured our .kube profile with the Kube context. To check that, we run the below command on our terminal: \
Open .kube/config
This will open up a configuration file, that’ll contain Cluster, Context, and User information, with their server name, namespace, and other credentials. In this, we’ll find the login command URL that we copied earlier from the Open Shift Web Console.
apiVersion: v1
clusters:
- context:
    cluster: mycluster:8443
    namespace: mynamespace
    user: myuser
  name: mynamespace/mycluster:8443/myuser
current-context: mynamespace/mycluster:8443/myuser
kind: Config
preferences: {}
We can also try an alternative way, by typing in the below command on our terminal:
ent list-kubectx
And our output would be like
mynamespace/mycluster:8443/myuser%
Pro Tip:
To have a more detailed overview of this command, we can try adding parameters by the end of the command, for example:
ent list-kubectx sales-demo
Through this, only the lines containing the parameter “sales-demo” (only if it exists) would get displayed. It is like a sub-string match!
Now, to link this configuration to an ENT Profile, we’ll need to follow the below steps:
- Through the output of the
ent list-kubectxcommand, we fill up the placeholders on the below command. (On our terminal)
**ent pro new [profileName] [EntandoAppName] [namespace]
For example ent pro new rd-sohini quickstart release-e6-3-2
Here, we are creating a new profile, for the environment we just configured. The profileName could be something like “dev” / ”rd” / ”prod” etc. The entando app name would be quickstart if we’ve installed it using the ENT CLI. If not, then we can check the app name by running the below command or ask your administrator:
kubectl get -n entando EntandoApp
we’ll find the [namespace] on our .kube file.
- From the config file, we find the entity: **
[context-name], copy its value, and paste it in the below command:
ent pro link [contextName]
Through this command, we instruct ent how to connect to the Kube containing the EntandoApp.
- And then, we can print the list of profiles we have. And here, we can find our newly created profile listed.
ent pro list - Now, we can also activate the profile that ent should use across the shells.
ent pro use [profileName]
ent pro use rd-sohini
➤ [I] | 2022-01-11 09-46-23 | Current profile info:
- PROFILE: rd-sohini
- APPNAME: quickstart
- APPVER:
- NAMESPACE: mynamespace
- K8S CONTEXT: mycontext
For the final step, when we have linked our profile to the K8s context, we check if our profile is working right. To do that, we type the below command on our terminal:
ent pod list
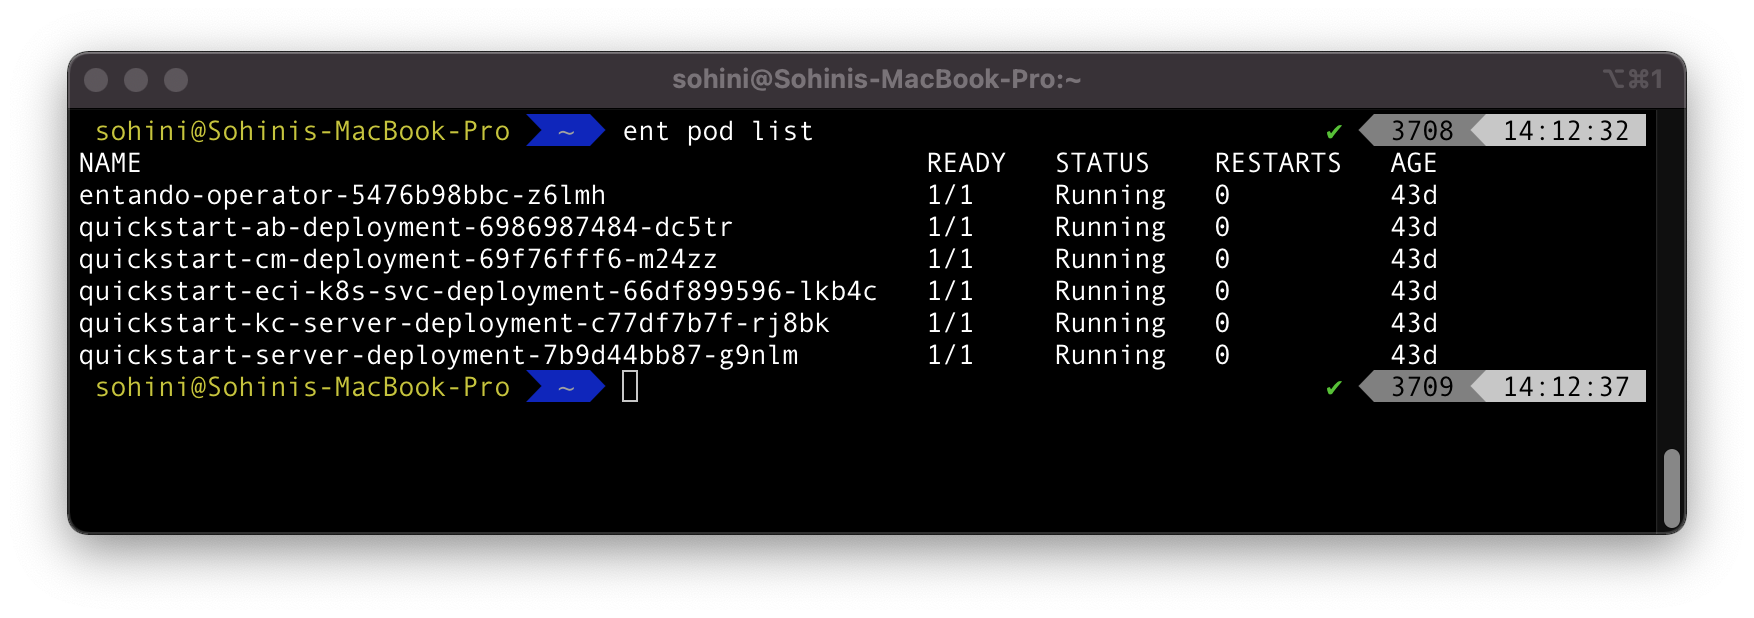
This lists all the pods, displaying their status, the number of restarts, and their age. That’s all.
If you’re interested in learning more about composable applications, you can check out this [blog](https://entando.com/page/en/why_the_future_of_application_development_is_composable?contentId=BLG5158&modelId=64).

Top comments (0)